a14g-final-submission-t03-outdoor-innovators

a14g-final-submission
* Team Number: 03
* Team Name: Outdoor Innovators
* Team Members: Jinnan Weng, Jinyu Tan
* Github Repository URL: https://github.com/ese5160/a14g-final-submission-t03-outdoor-innovators
* Description of test hardware: (development boards, sensors, actuators, laptop + OS, etc) Customed PCBA, sensors,  actuators
1. Video Presentation
https://drive.google.com/file/d/1mBNG53yQCwf-wDcMPQ2UYusR2cHMgMRF/view?usp=sharing
2. Project Summary
- Device Description:
The Outdoor Assistant is an innovative device tailored for enhancing safety and convenience during camping trips. It addresses the need for real-time environmental monitoring and alerting in outdoor settings. The device uses Internet connectivity primarily to enhance its functionality by sending real-time alerts and updates about weather conditions, wildlife movements, and other environmental factors directly to campers’ mobile devices. This connectivity ensures that all data collected by the on-site sensors are promptly processed and utilized to keep the campers informed and safe.
- Inspiration:
The inspiration for the Outdoor Assistant came from the challenges and risks associated with outdoor camping, such as sudden weather changes and potential wildlife encounters. Our aim was to create a smart, reliable companion that would provide peace of mind to campers through continuous monitoring and automated alerts, thereby making camping safer and more enjoyable.
- Device Functionality:
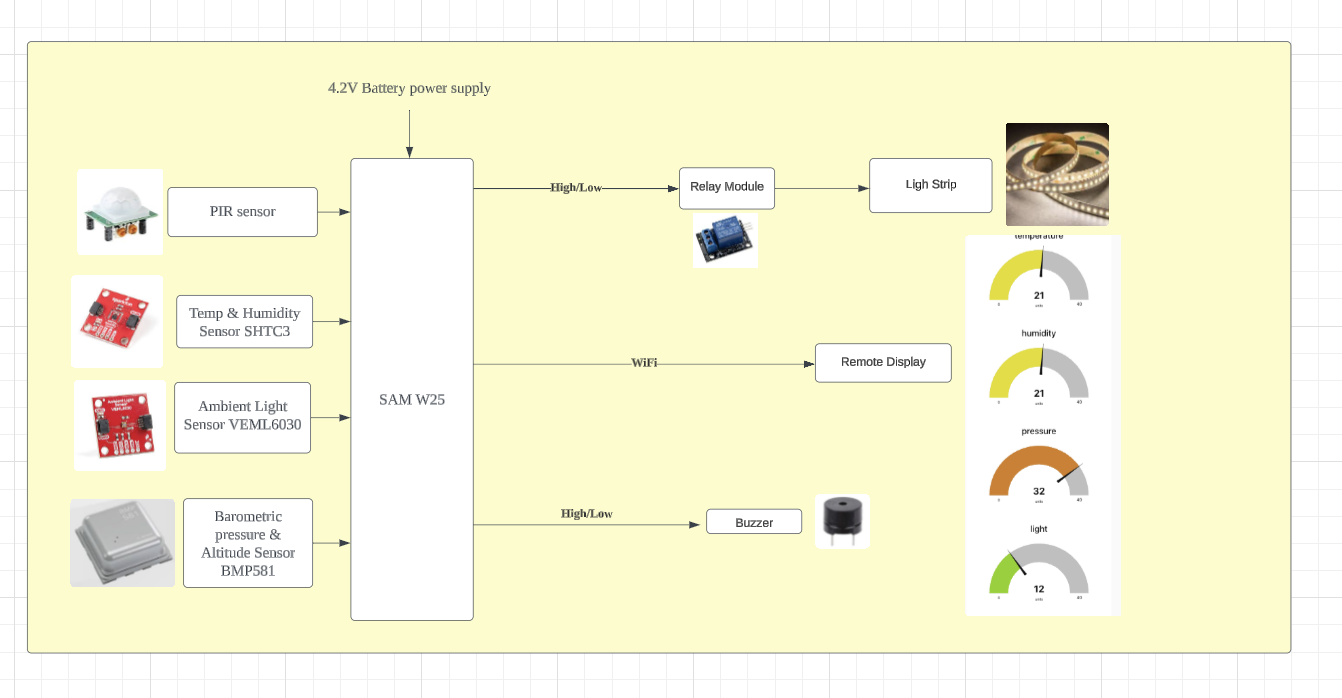
The Outdoor Assistant is equipped with a series of sensors and actuators interconnected through a robust system architecture. Key components include:
SHTC3 sensor for temperature and humidity monitoring, providing SMS alerts if thresholds are exceeded.
BMP581 sensor for altitude and air pressure data, important for route planning and safety.
PIR sensor for motion detection to alert against wildlife.
VEML6030 ambient light sensor to automatically manage lighting based on ambient conditions.
Light Strip for providing essential lighting, automatically adjusting to surrounding conditions.
Buzzer to emit warning beeps when wildlife is detected, enhancing camper safety.
These devices are coordinated through a FreeRTOS vTask system and visualized via a Node-RED interface for robust remote monitoring and control. Additionally, a WiFi module plays a crucial role by enabling the device to connect to the Internet. This connectivity allows for the uploading of environmental data such as temperature, humidity, and light levels to online platforms, ensuring that all information is easily accessible and that users can receive updates anywhere with Internet access.
- Challenges
Significant challenges were faced in hardware integration and firmware stability, particularly with the battery management system and button component manufacturer errors and SPI communication faults. These were mitigated by temporary hardware modifications and rigorous debugging sessions to stabilize the communication protocols. The biggest challenge is the above mentioned that one of the sub-modules of our power management system, the Lipo-charger, was not working because the manufacturer had soldered one of our chips to the wrong pin. Nick suggested replacing this sub-module with a three-pin switch. The switch allows the user to manually select USB or battery power, solving the problem in an ingenious way!
- Prototype learnings
The prototyping phase taught us valuable lessons in system integration and the importance of rigorous testing, especially under varied environmental conditions. If we were to build this device again, we would place an increased emphasis on enhancing power management and further refining the user interface for even more intuitive interaction. The lessons learned above emphasized the importance of comprehensive testing, meticulous component selection, and maintaining detailed documentation to enhance troubleshooting and future development efforts. In conclusion, this prototype not only taught us the intricacies of embedded system design but also highlighted the necessity of flexibility and thorough testing in overcoming unexpected challenges.
- Next Steps
To finalize the Outdoor Assistant, we need to resolve the remaining hardware issues with the SPI communication, expand the device’s sensor array for even more detailed environmental data. We also remanufacture PCBs to ensure the integrity of the button and battery management system while ensuring that the manufacturer does not have a problem.
- Takeaways from ESE5160
The course ESE5160 provided a comprehensive understanding of embedded system design, from conceptualization to execution. Through lectures and assignments, we gained insights into real-time operating systems, hardware-software integration, and the practical challenges of bringing an IoT device from the drawing board to real-world application. This project was a hands-on opportunity to apply these lessons and refine our approach to embedded system design.
- Project Links
Link to your Node-RED instance:http://20.42.90.94:1880/
Link to your Node-Red ui: http://20.42.90.94:1880/ui/
Link to your A12G code repository:https://github.com/ese5160/a12g-firmware-drivers-t03-outdoor-innovators/tree/main
Final PCBA link: https://upenn-eselabs.365.altium.com/designs/33677AEA-E514-458A-9677-44B08257B49A
3. Hardware & Software Requirements
Hardware requirements
-
HRS 01 - Microcontroller Core
-
The project shall be centered around the SAM W25 microcontroller, which provides Wi-Fi connectivity and robust data processing capabilities for handling sensor inputs and controlling output devices. Connection: SPI/I2C/UART, Voltage: 3.3V
-
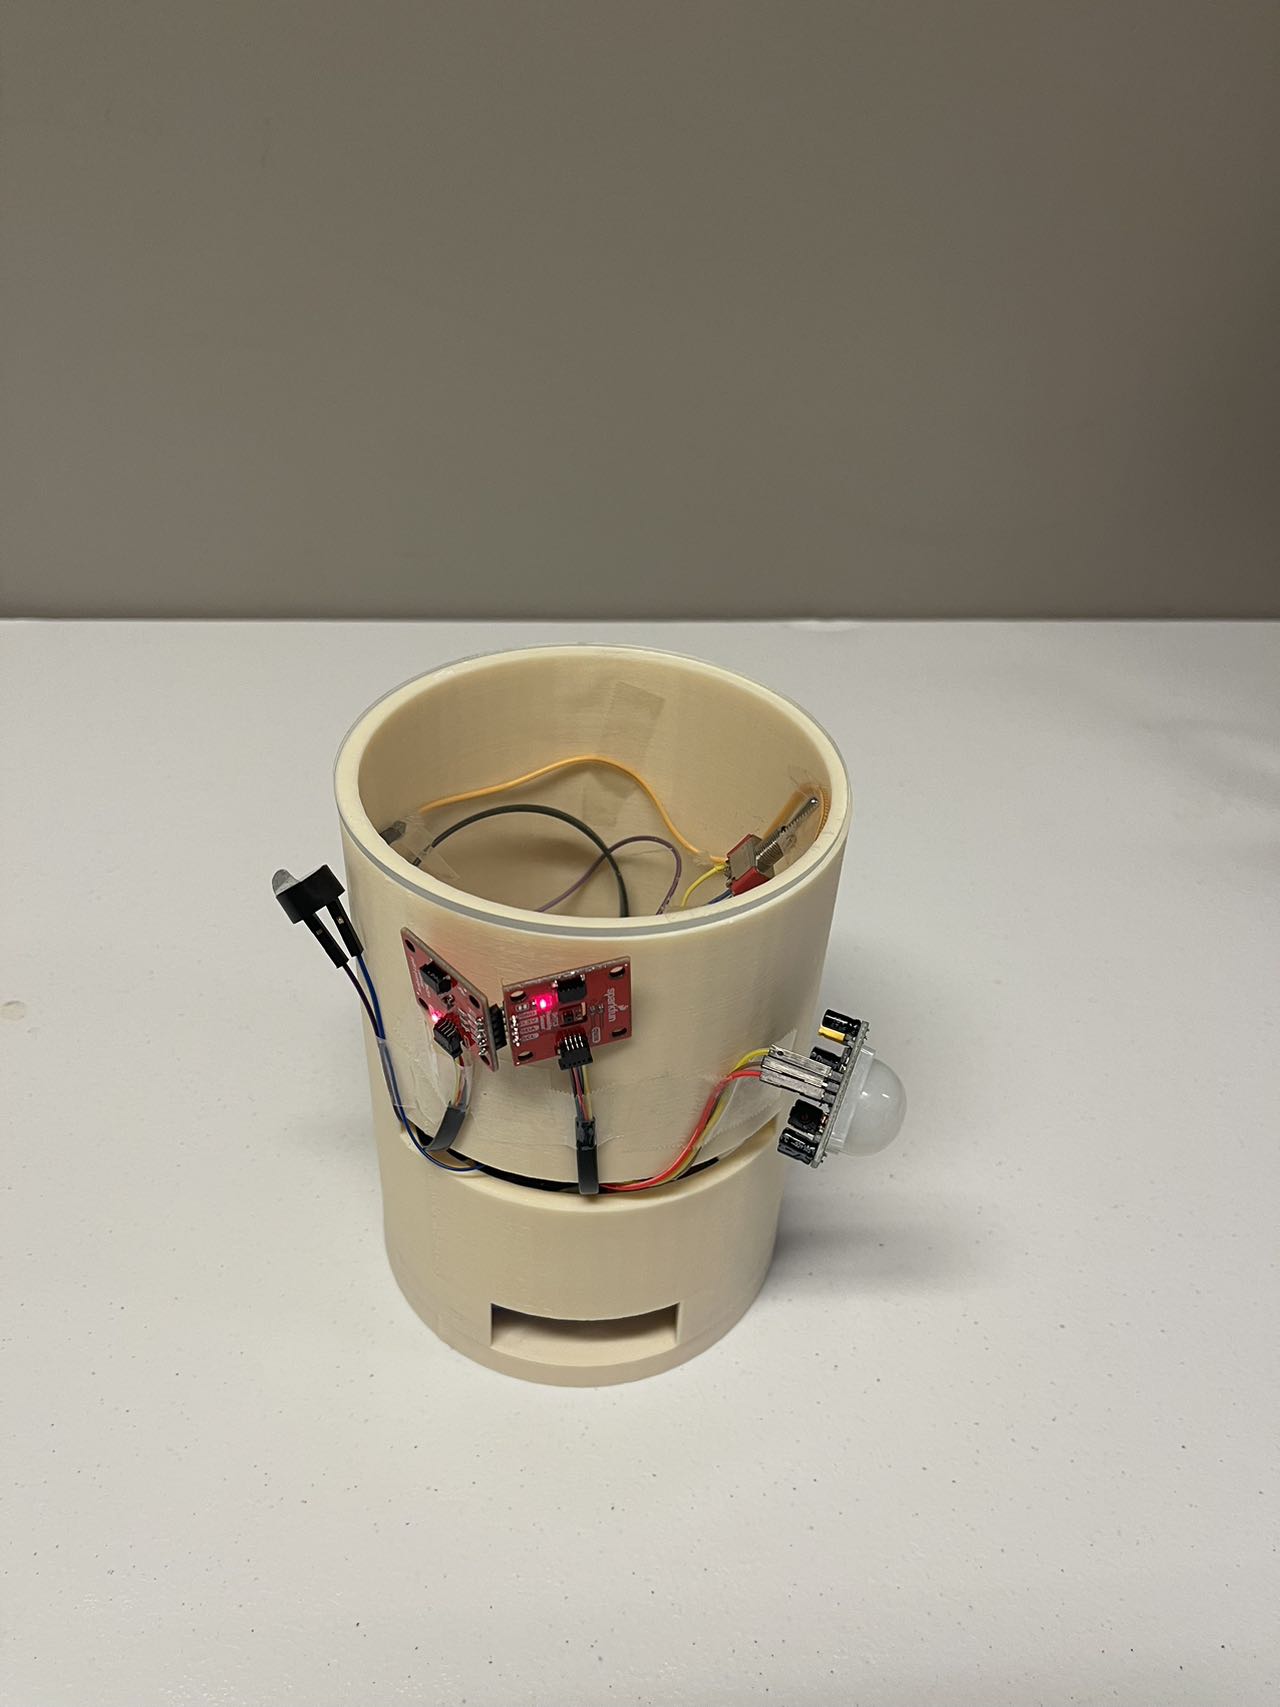
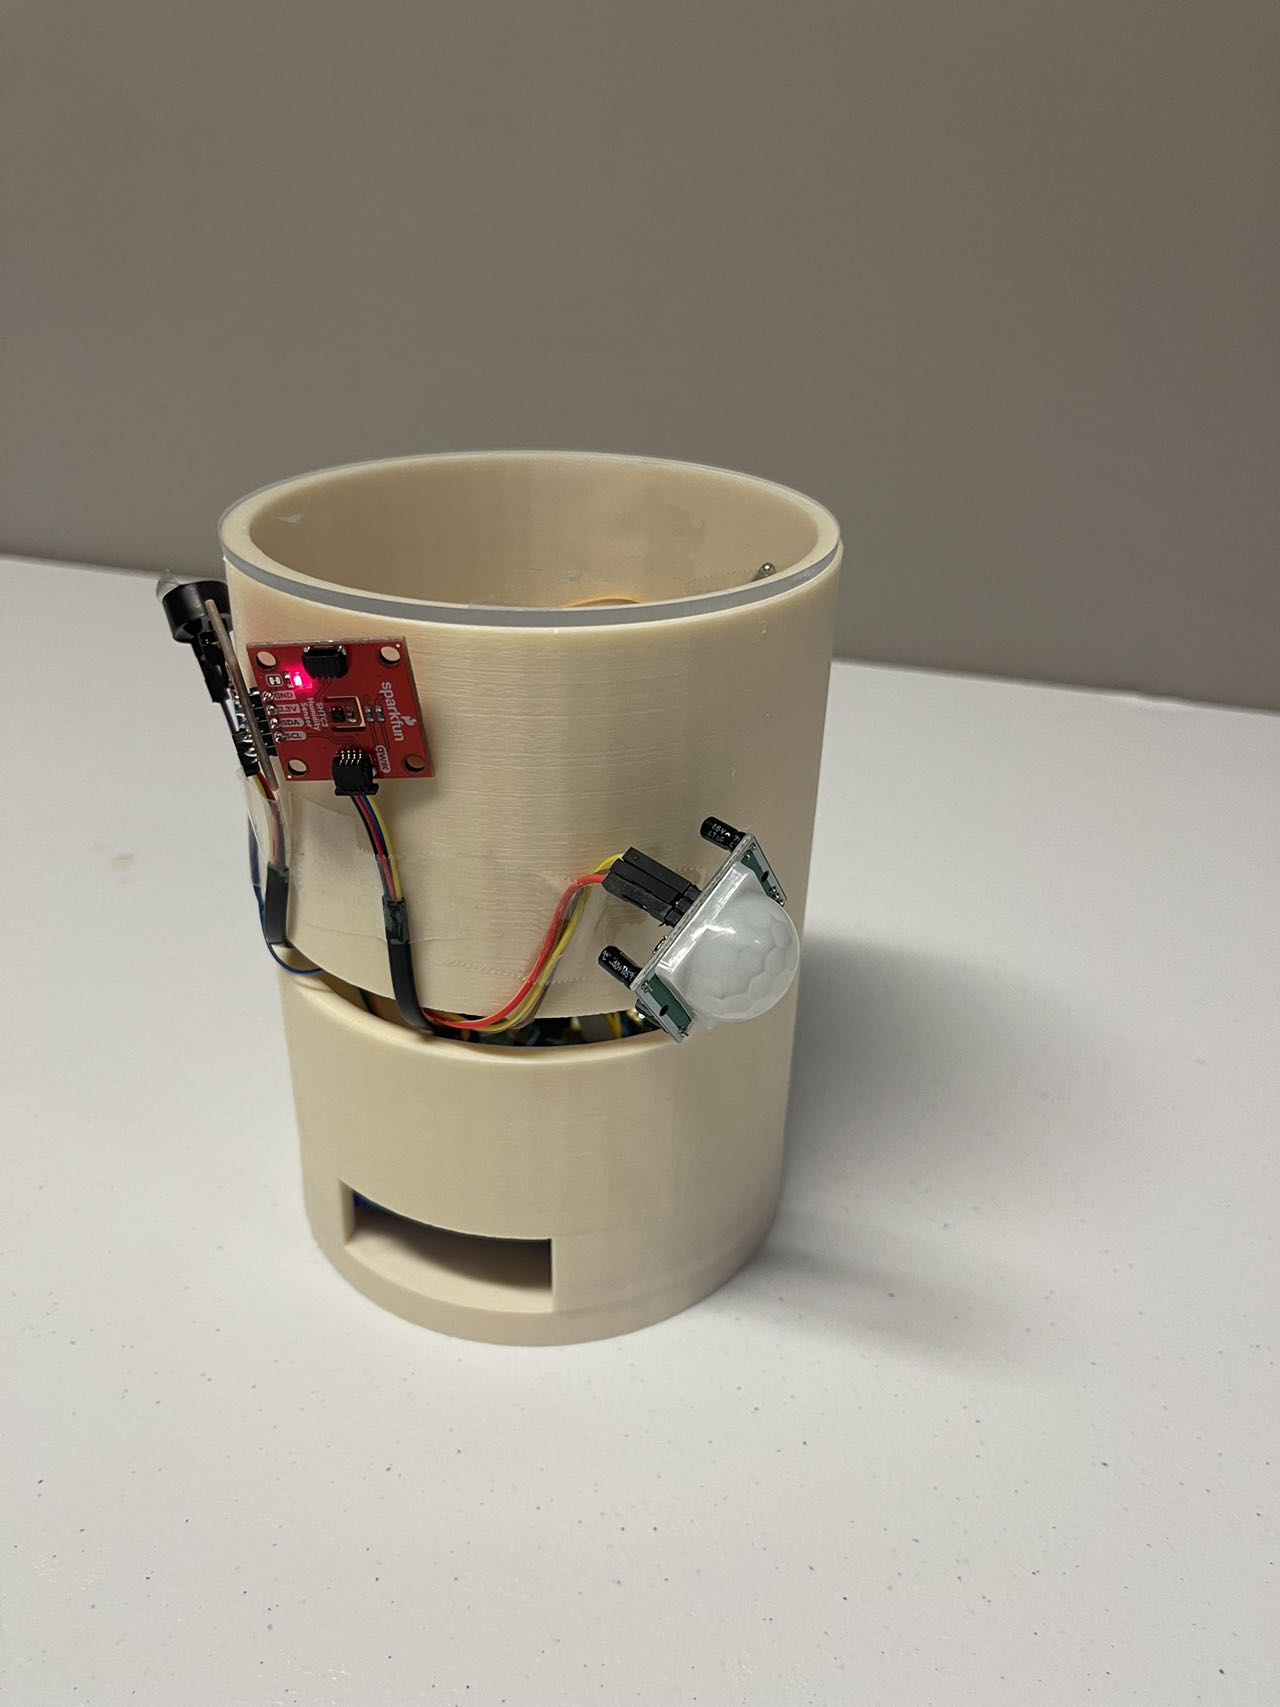
Verification: As is shown in project photos, our customed PCBA use SAM W25 as our MCU. This requirement is met.
-
-
HRS 02 - Proximity Detection
-
PIR motion sensor RE200B shall be used for detecting the proximity of individuals, triggering the buzzer.
-
Verification:This function has been demonstrated in the Video Presentation part. At 1:13 to 1:16 of the video, I demonstrate that the buzzer will make a sound when a hand is passed over the PIR sensor. It demonstartes that the above requirement is met.
-
-
HRS 03 - Ambient Light Adjustment
-
The Ambient Light Sensor VEML6030 shall adjust the light intensity based on environmental light conditions to provide optimal visibility. Connection for RE200B: Digital I/O, Voltage: 3-6V; Connection for VEML6030: I2C, Voltage: 3.3V
-
Verification:This function has been demonstrated in the Video Presentation part. At 1:20 to 1:35 of the video, I demonstrate that the light strip will be turned on when the finger covers the ambient light sensor VEML6030(Simulating dark environments). It demonstartes that the above requirement is met.
-
-
HRS 04 - Environmental Monitoring
-
The SHTC3 sensor shall measure the temperature and humidity of the campsite. Accurate and real-time data from this sensor is critical for campers to prepare for changes in the environment and to ensure comfort. Connection: I2C, Voltage: 1.8-3.3V
-
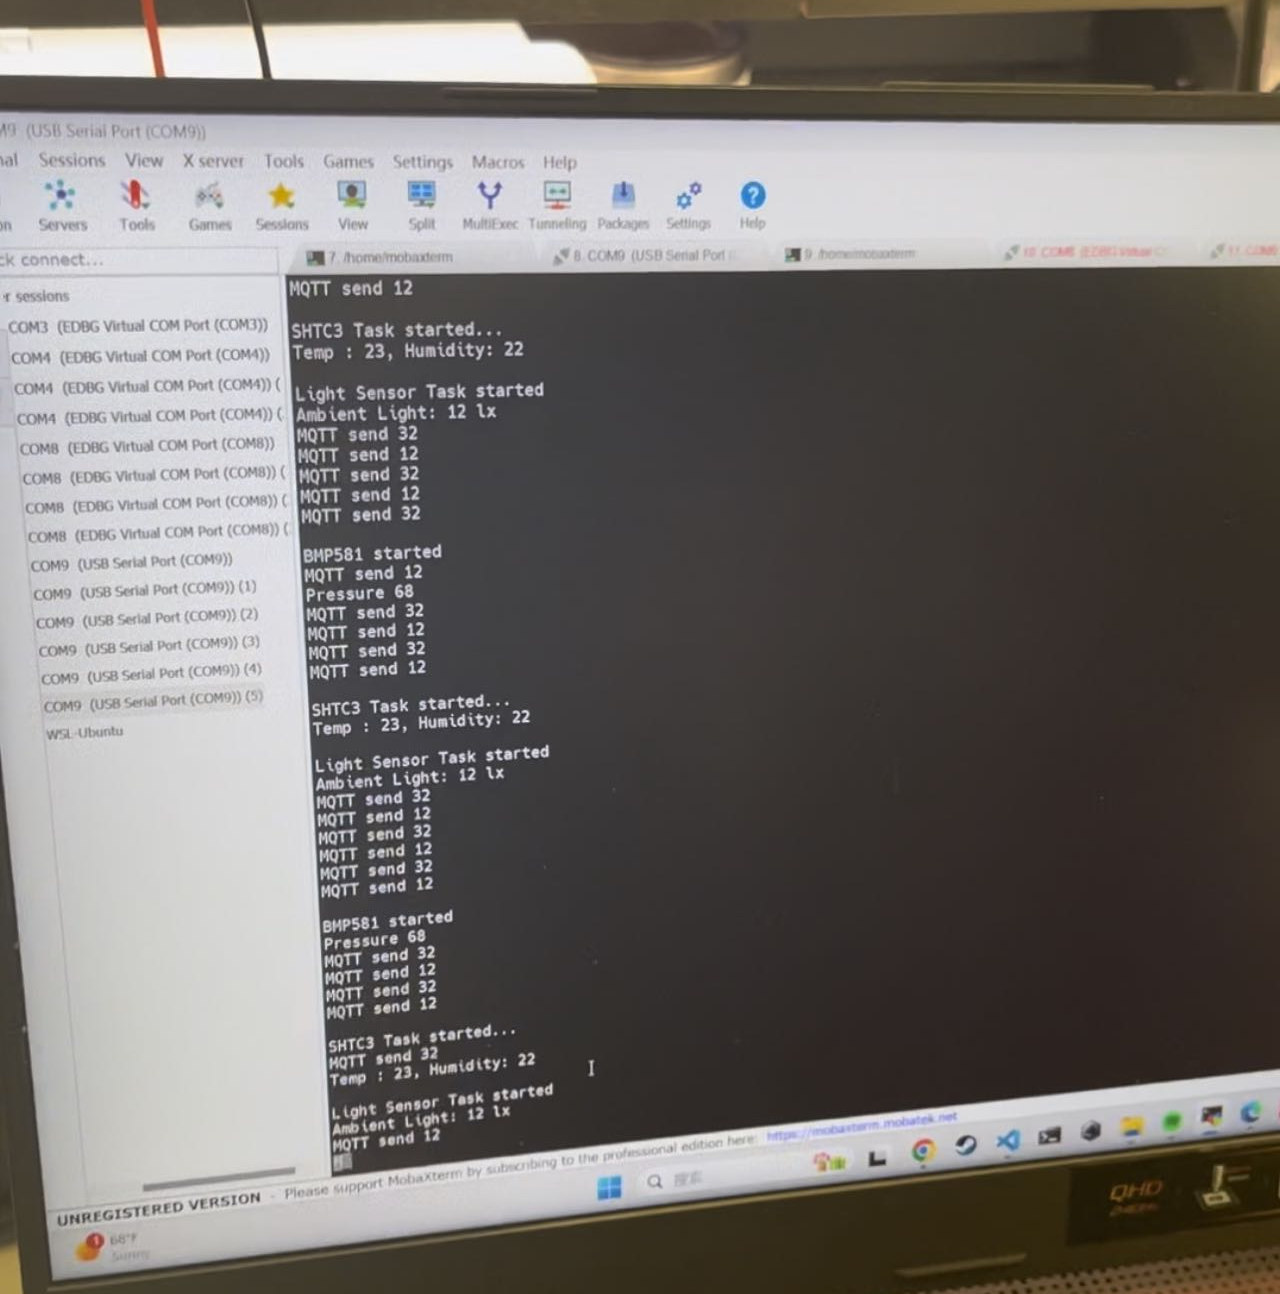
Verification:This function has been demonstrated in Node-RED dashboard(Shown below). In Node-RED dashboard, the temperature and humidty value was shown correctly. The CLI output can also demonstrates the detected temperature and humidity value.
-
-
HRS 05 - Barometric Pressure and Altitude Measurement
-
The BMP581 sensor shall be included to offer precise barometric pressure readings and altitude measurements, essential for hikers and mountaineers in assessing their environment. Connection: I2C, Voltage: 1.8-3.6V
-
Verification:This function has been demonstrated in Node-RED dashboard(Shown below). In Node-RED dashboard, the ambient light value was shown correctly. The CLI output can also demonstrates the detected illumination value.
-
-
HRS 06 - Internet Connectivity
-
Leveraging the Wi-Fi capability of the SAM W25, the device shall connect to the internet and update the acquired data to remote display. Integrated Wi-Fi in SAM W25, Voltage: 3.3V
-
Verification: Video Link: https://drive.google.com/file/d/1t3kiqObLjqx87QlHcKUHqHlMelwJ2aMp/view?usp=sharing This function has been demonstrated in the above video. In the video, when you put your hand on the temperature sensor, since the temperature of your hand is higher than the room temperature, the temperature detected by the temperature sensor rises, which corresponds to an increase in temperature in the CLI output and remote display, which proves that the device is connected to the internet and correctly updates the sensor data.
-
Software Requirements
-
SRS 01 – Proximity-Activated Lighting
- The software shall manage an IR sensor to detect the presence of individuals and activate the lighting system.
- The software shall modulate the light intensity based on ambient light sensor readings.
- Implementation : Utilize a PIR sensor for presence detection and emit an audible beep when proximity is detected. This function is achieved by modulating the input voltage level of the PIR sensor.
-
SRS 02 – Environmental Monitoring
- The software shall continuously measure and display real-time temperature and humidity levels, updating every 5 seconds +/- 1 second.
- The software shall issue alerts if temperature or humidity changes by more than 10% within a 10-minute window.
- Implementation : Implement environmental monitoring and display the data on Node-RED. Note: Due to challenges with FreeRTOS in achieving precise time intervals, a delay method is used to approximate updates every second.
-
SRS 03 – Altitude Measurement
- The software shall provide real-time altitude readings, updating the display every 10 seconds +/- 2 seconds using an altitude sensor.
- Implementation : Use the BMP sensor 581 for altitude data, which is relayed to Node-RED.
-
SRS 04 – Voice Detection and Alarm System
- The software shall analyze audio inputs for unusual sounds or potential animal noises and trigger an alarm within 1 second of detection.
- Implementation : Alerts are sent via text message upon detection of specific audio triggers. Utilizing Node-RED’s topic subscription and JavaScript, alarms are activated when the alert topic detects an event.
-
SRS 05 – Internet Connectivity and Data Fetching
- The software shall connect to the internet to fetch local weather conditions every 30 minutes +/- 5 minutes.
- The software shall display both current and upcoming weather conditions on an OLED screen.
- Implementation : Initially planned, this feature was omitted from the BOM and PCB design. Weather data can be accessed via the Node-RED web page.
-
SRS 06 – Data Logging and Storage
- The software shall log all captured data including temperature, humidity, altitude, and detected sounds.
- The software shall securely transmit and store data logs to AWS at predefined intervals of 1 hour +/- 5 minutes.
- The software shall ensure data integrity and confidentiality during transmission and storage using encryption standards.
- The software shall provide user access to download data in formats like CSV or JSON from AWS.
- Implementation : Data is logged under the appropriate Node-RED topic and can be visualized on the UI display over time.
4. Project Photos & Screenshots
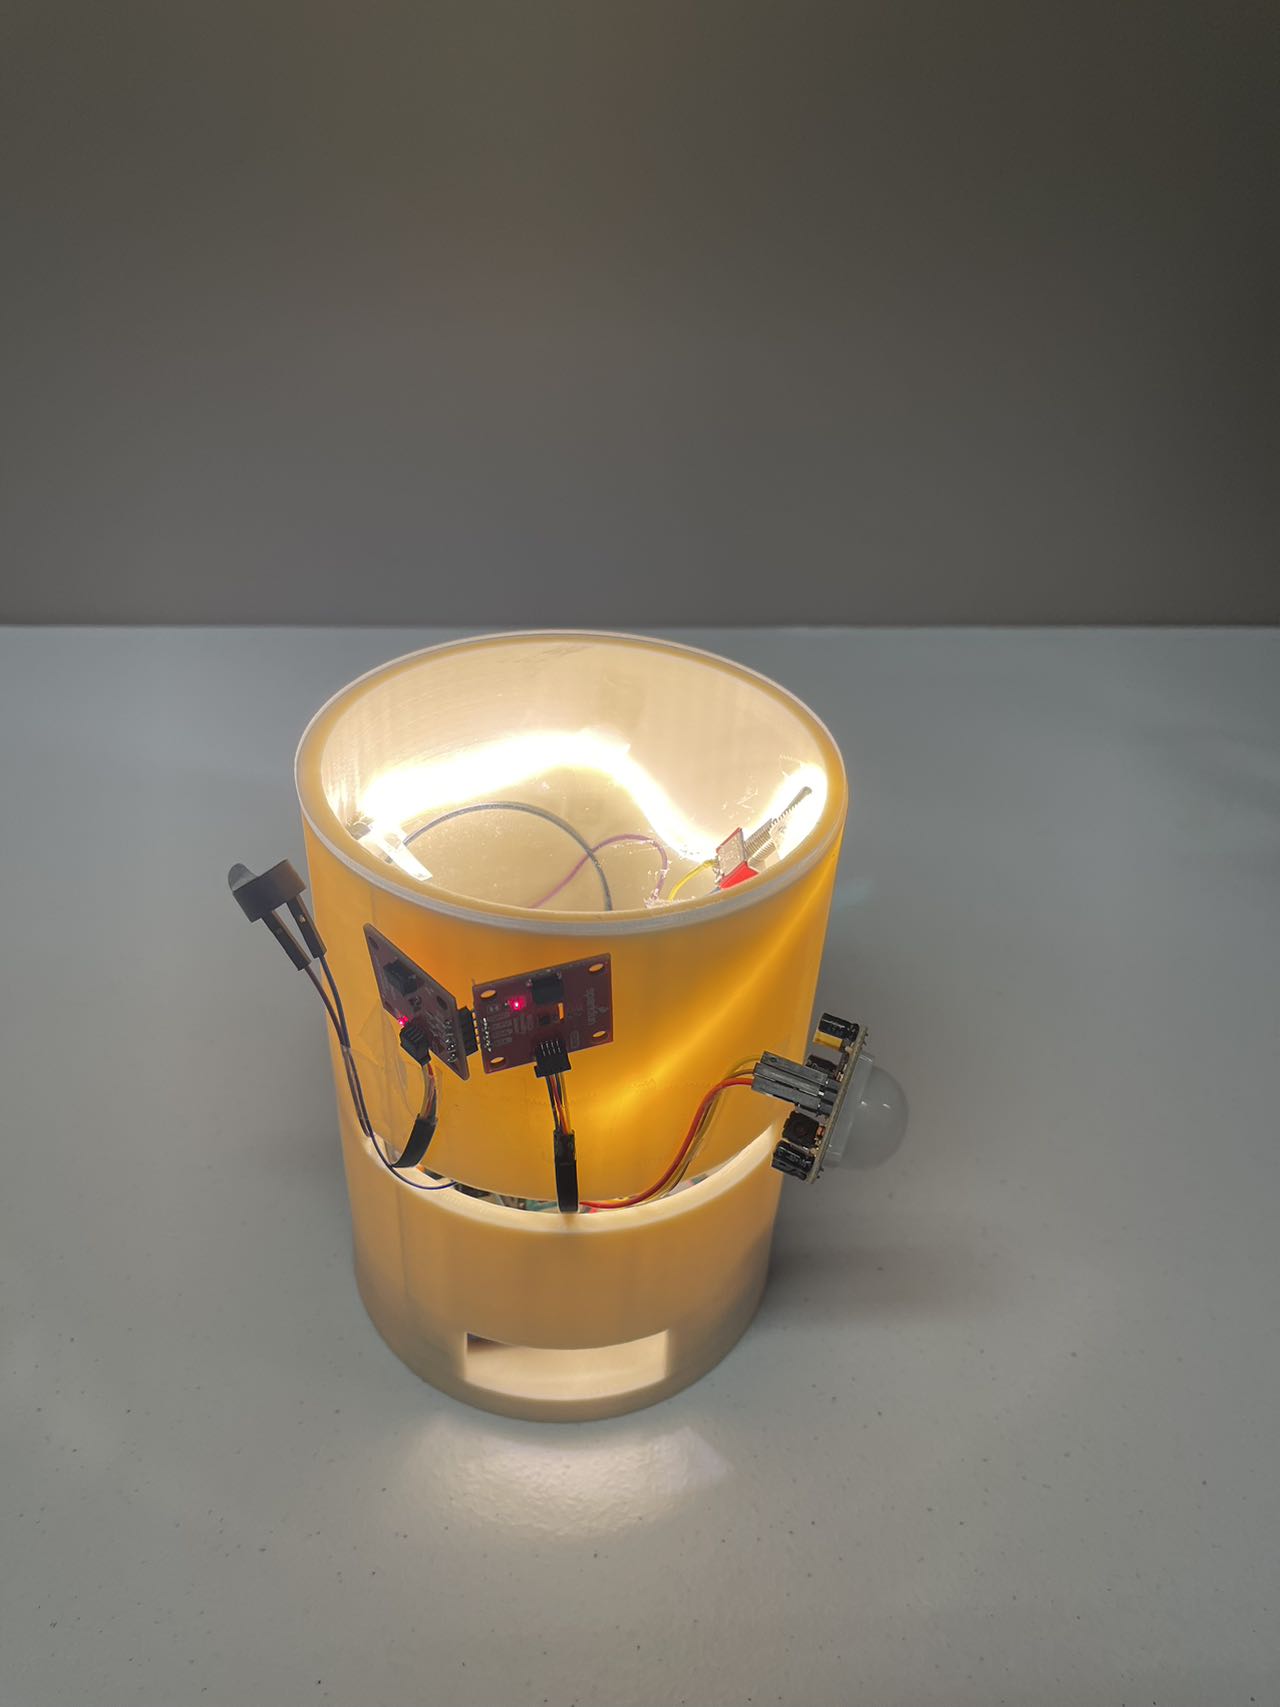
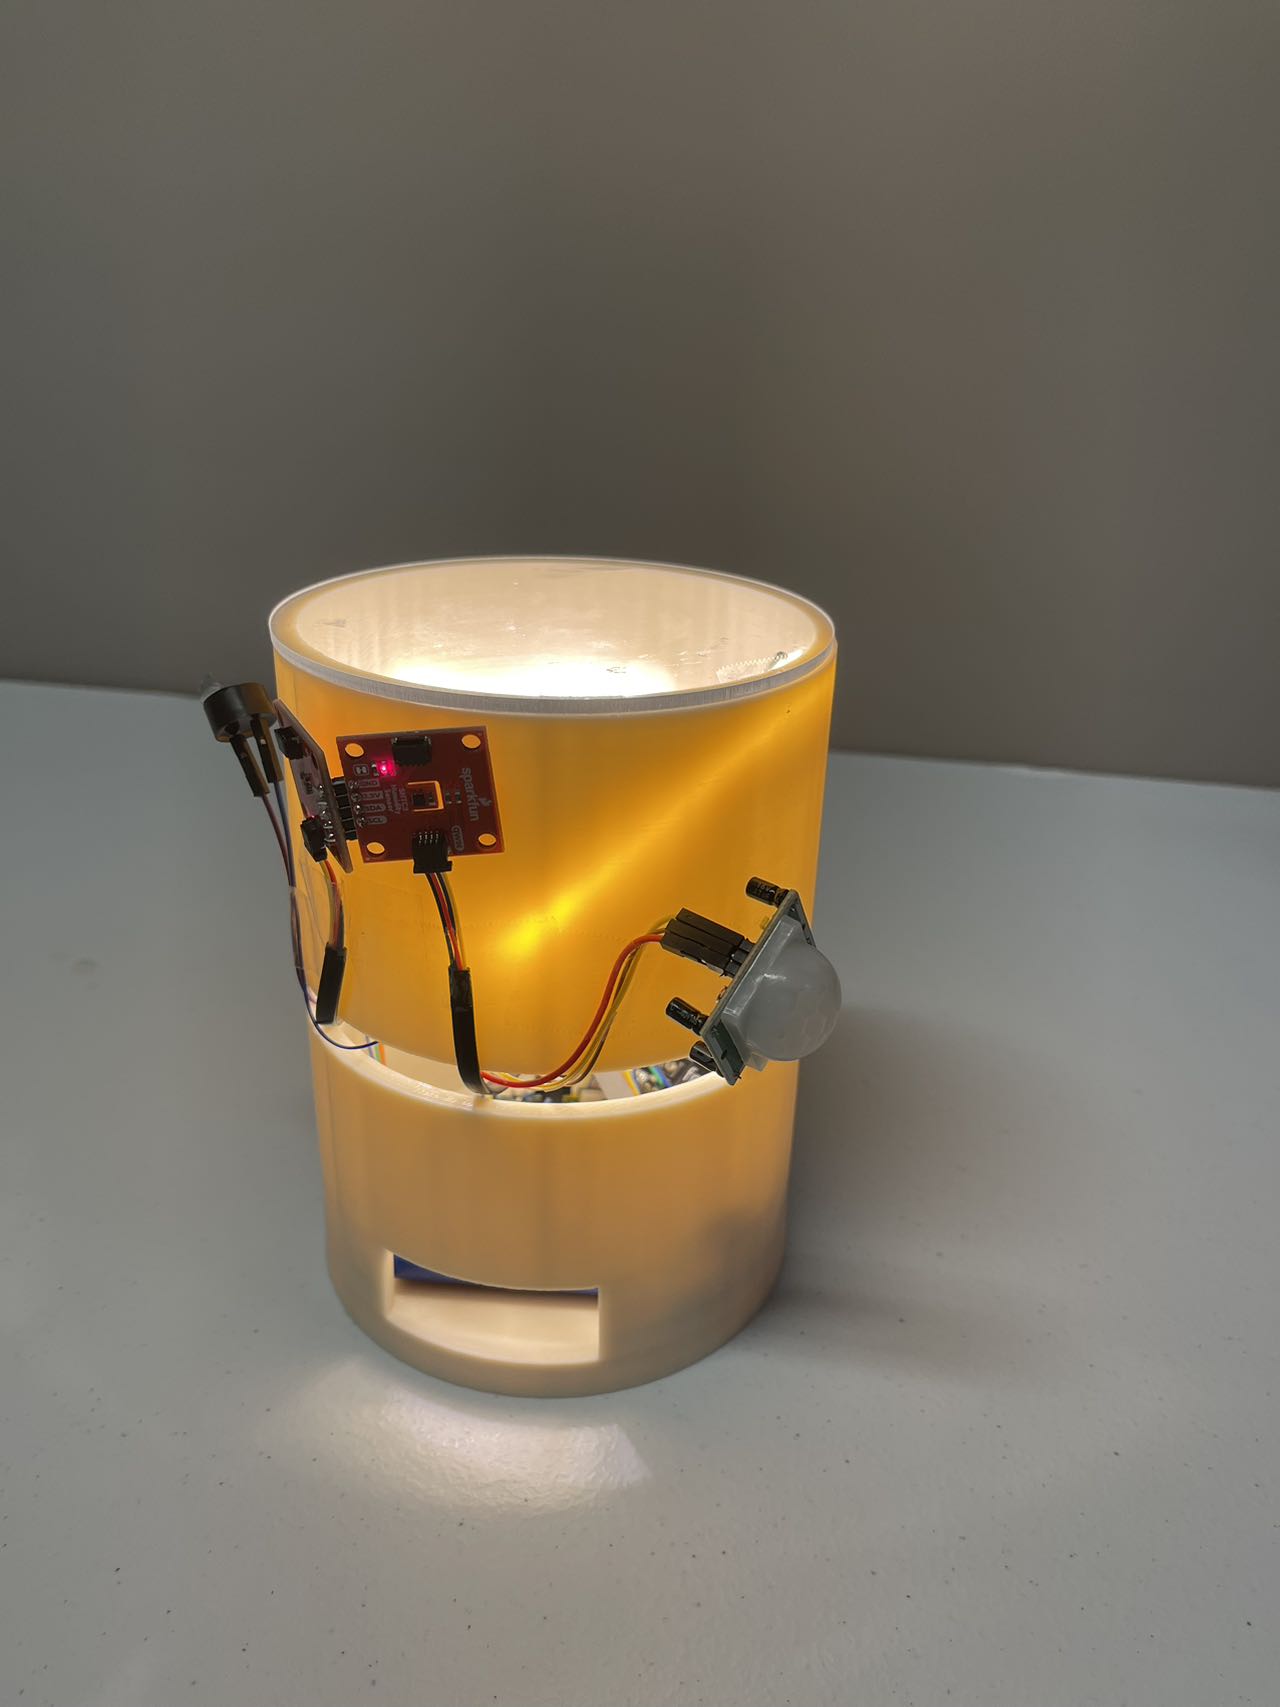
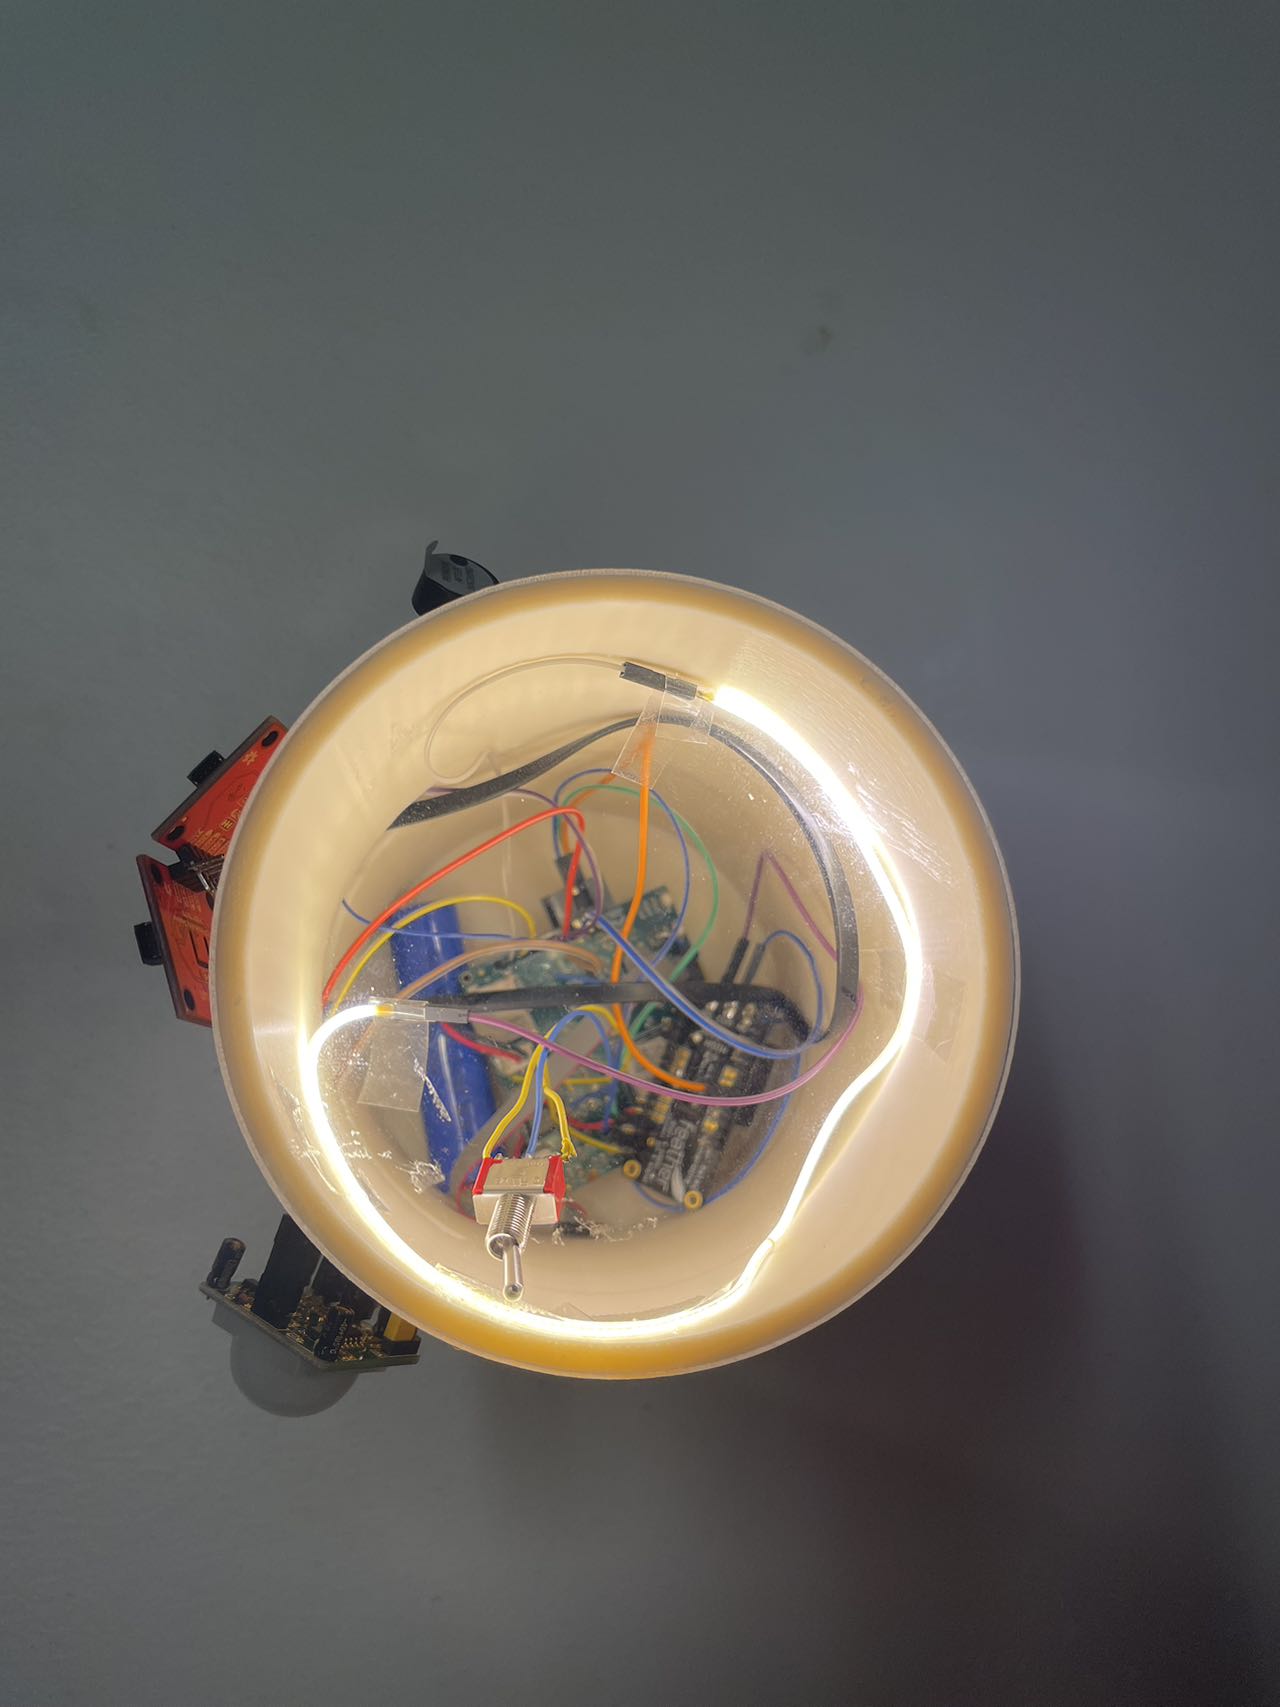
Final Project:
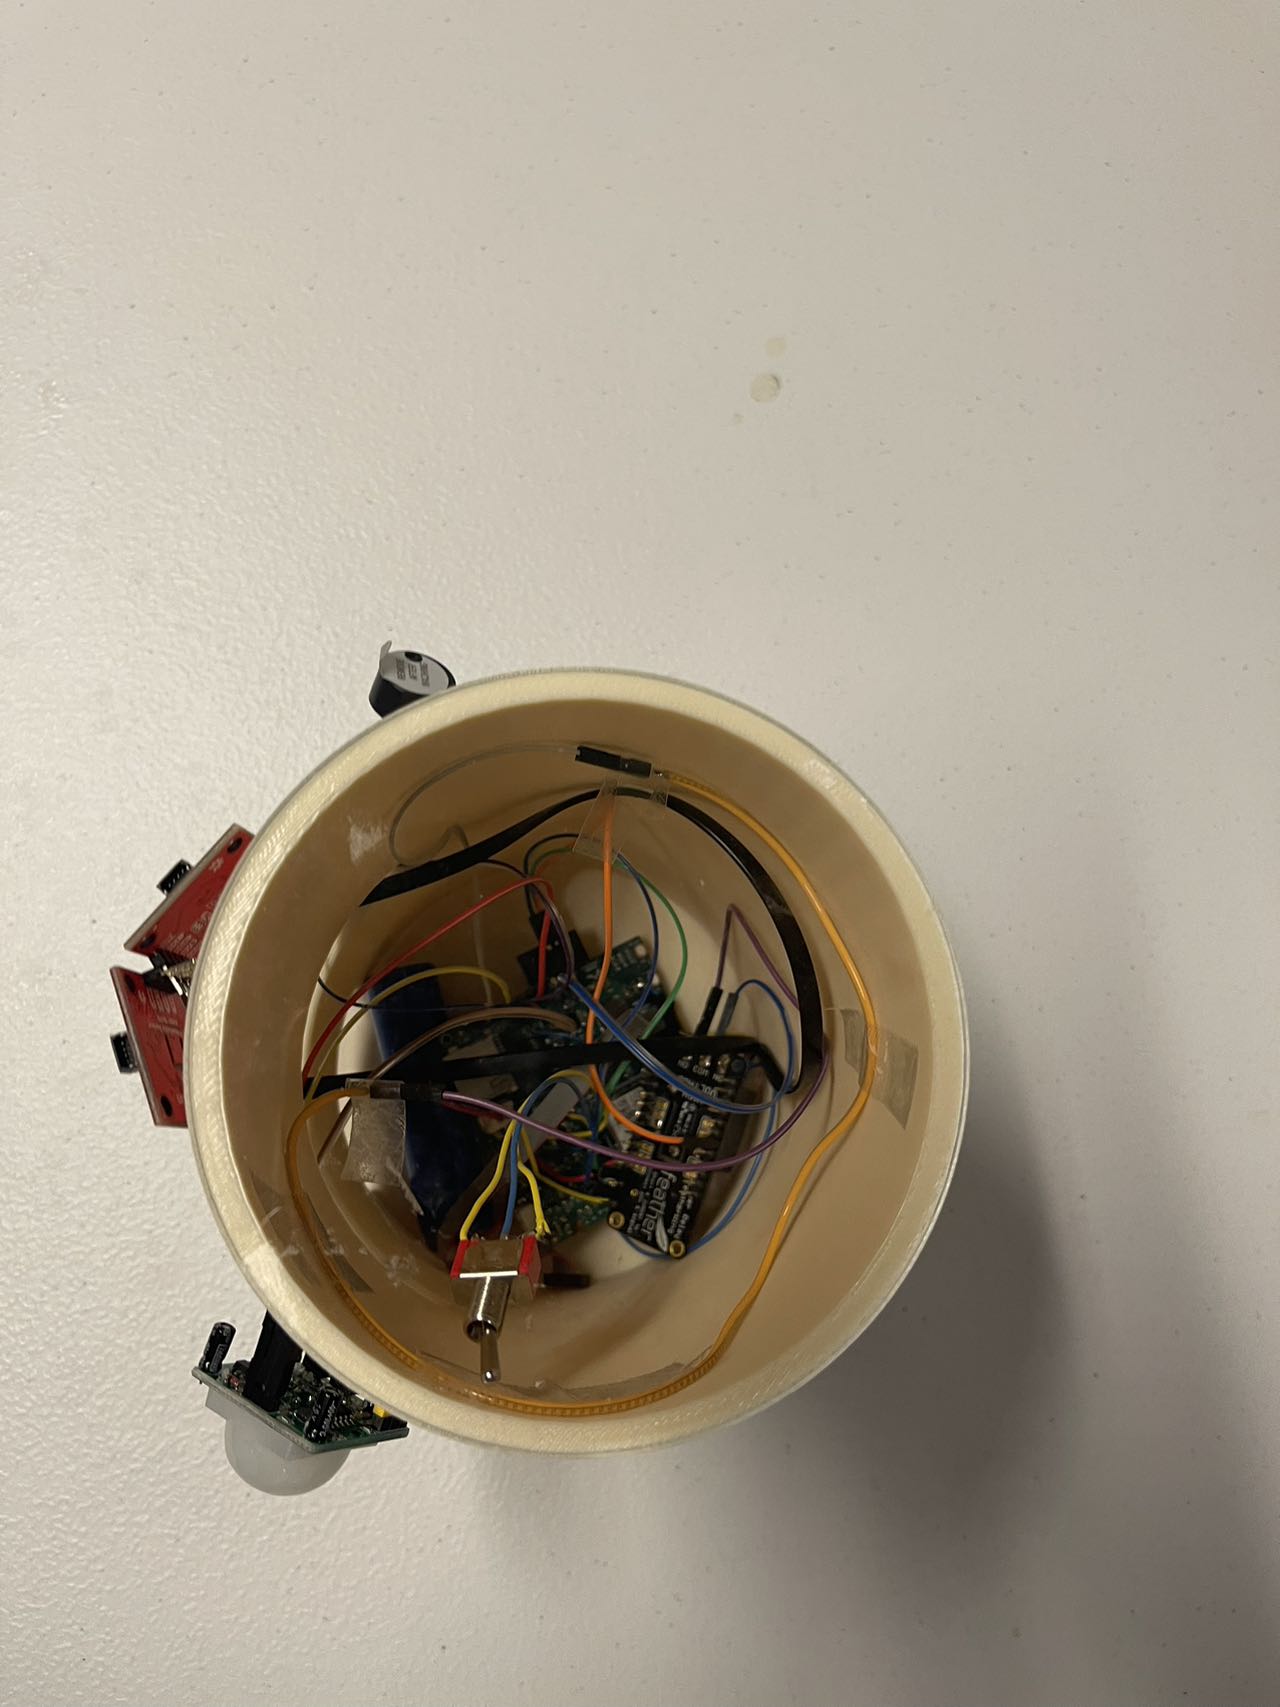
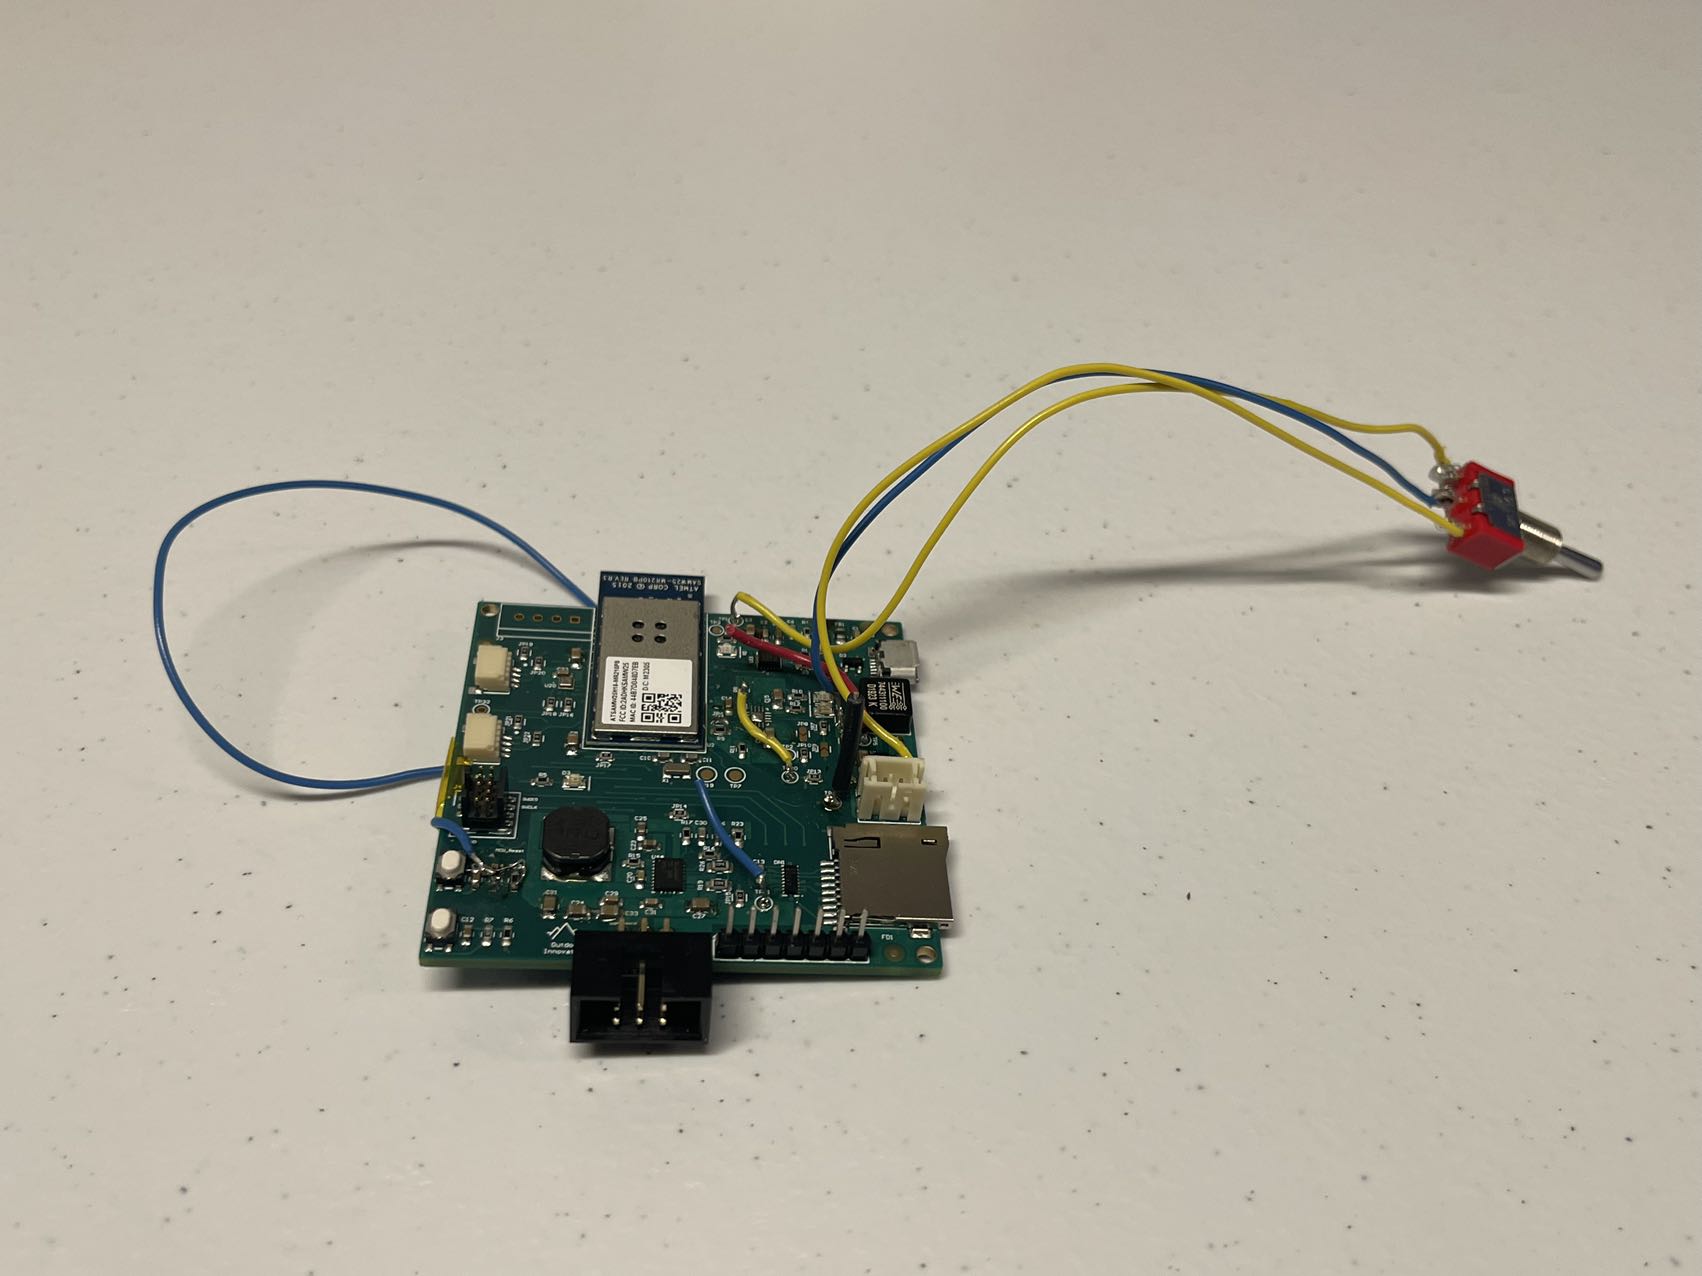
 The standalone PCBA, top:
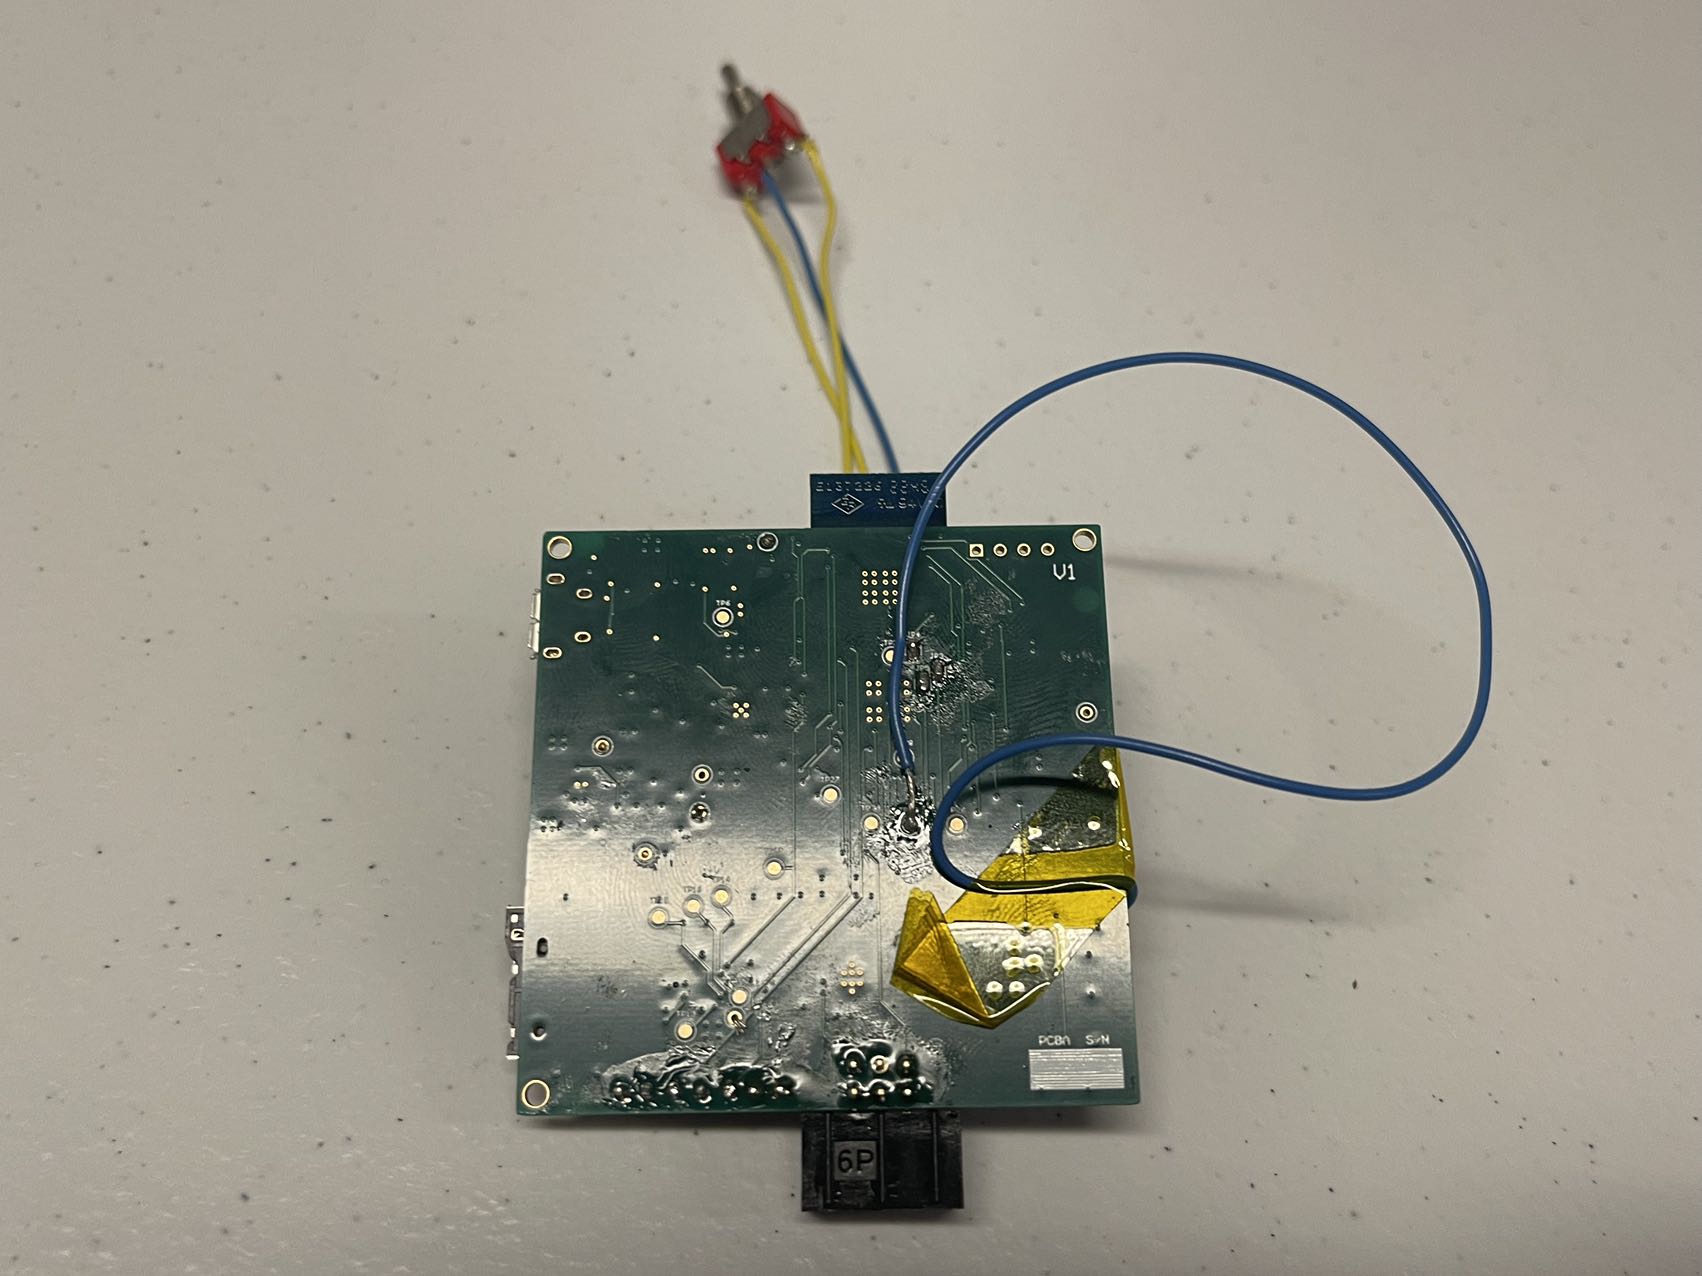
The standalone PCBA, bottom:
Thermal camera images:

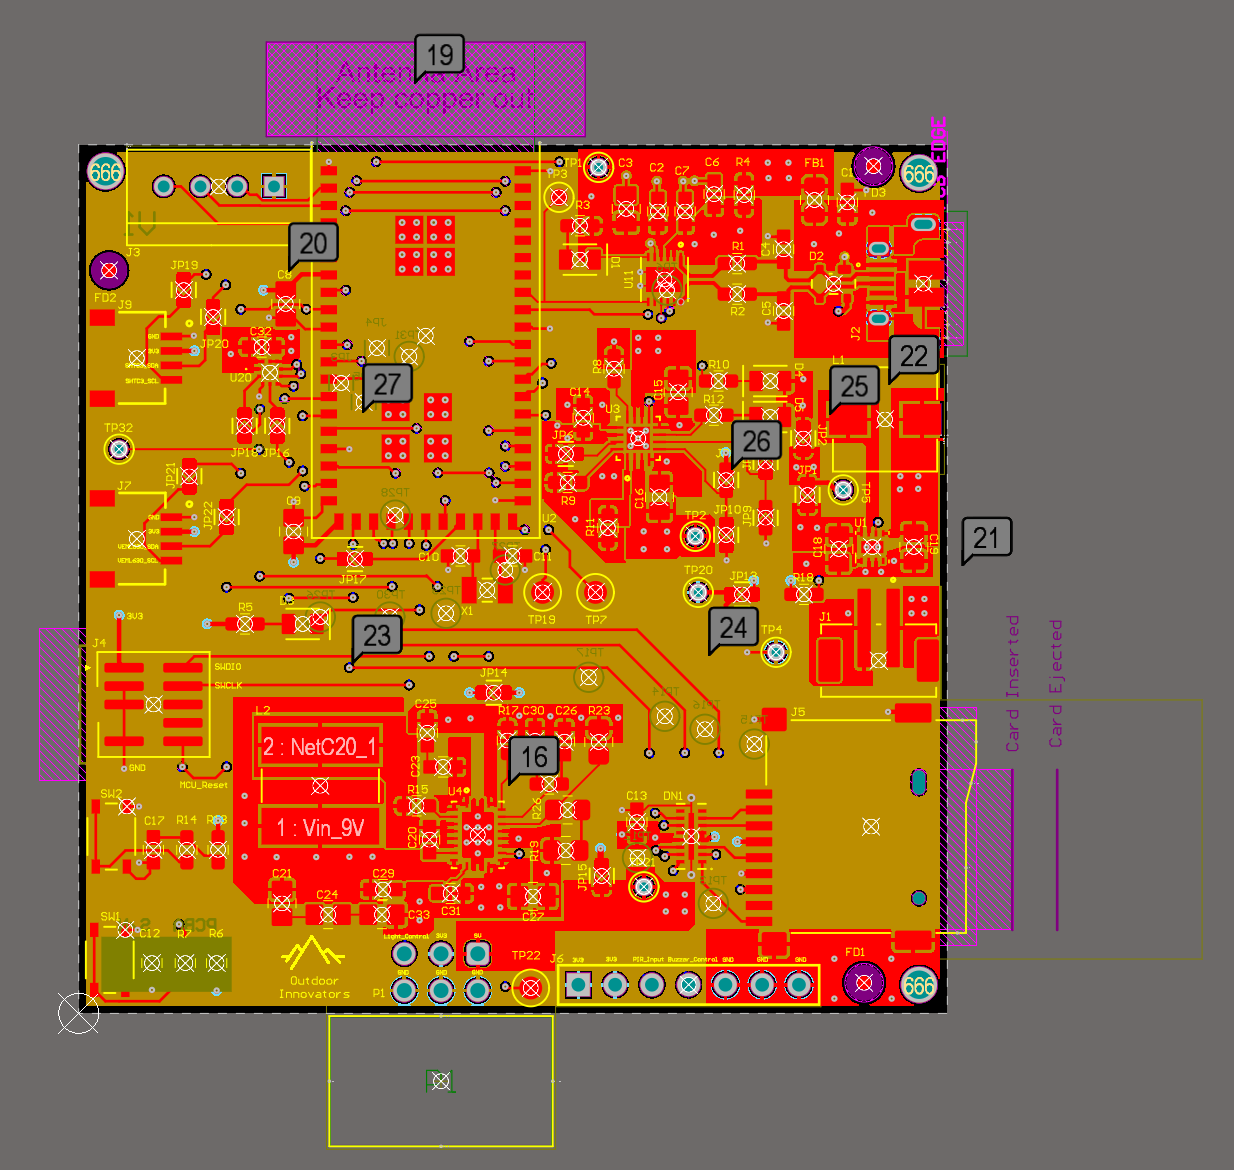
The Altium Board design in 2D view:
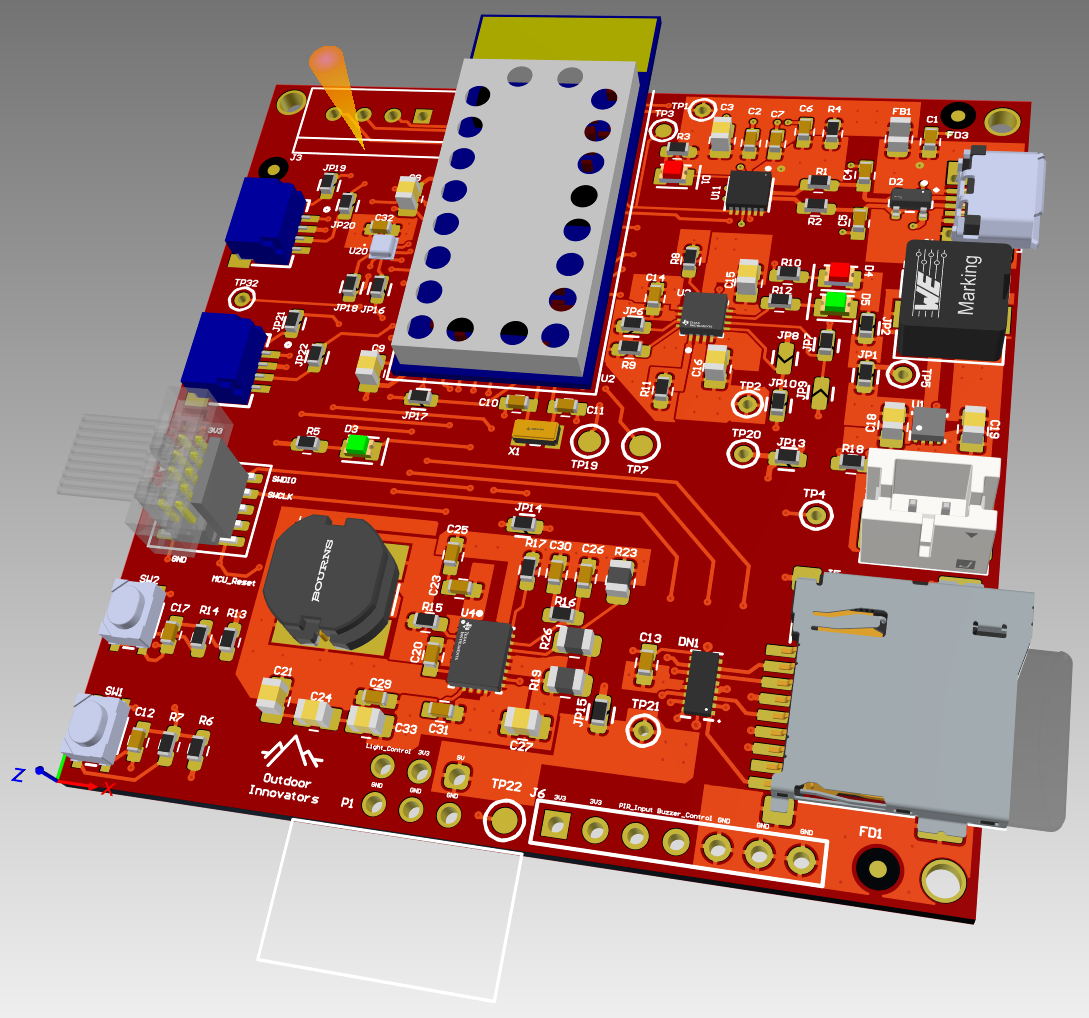
The Altium Board design in 3D view:
Node-RED dashboard:

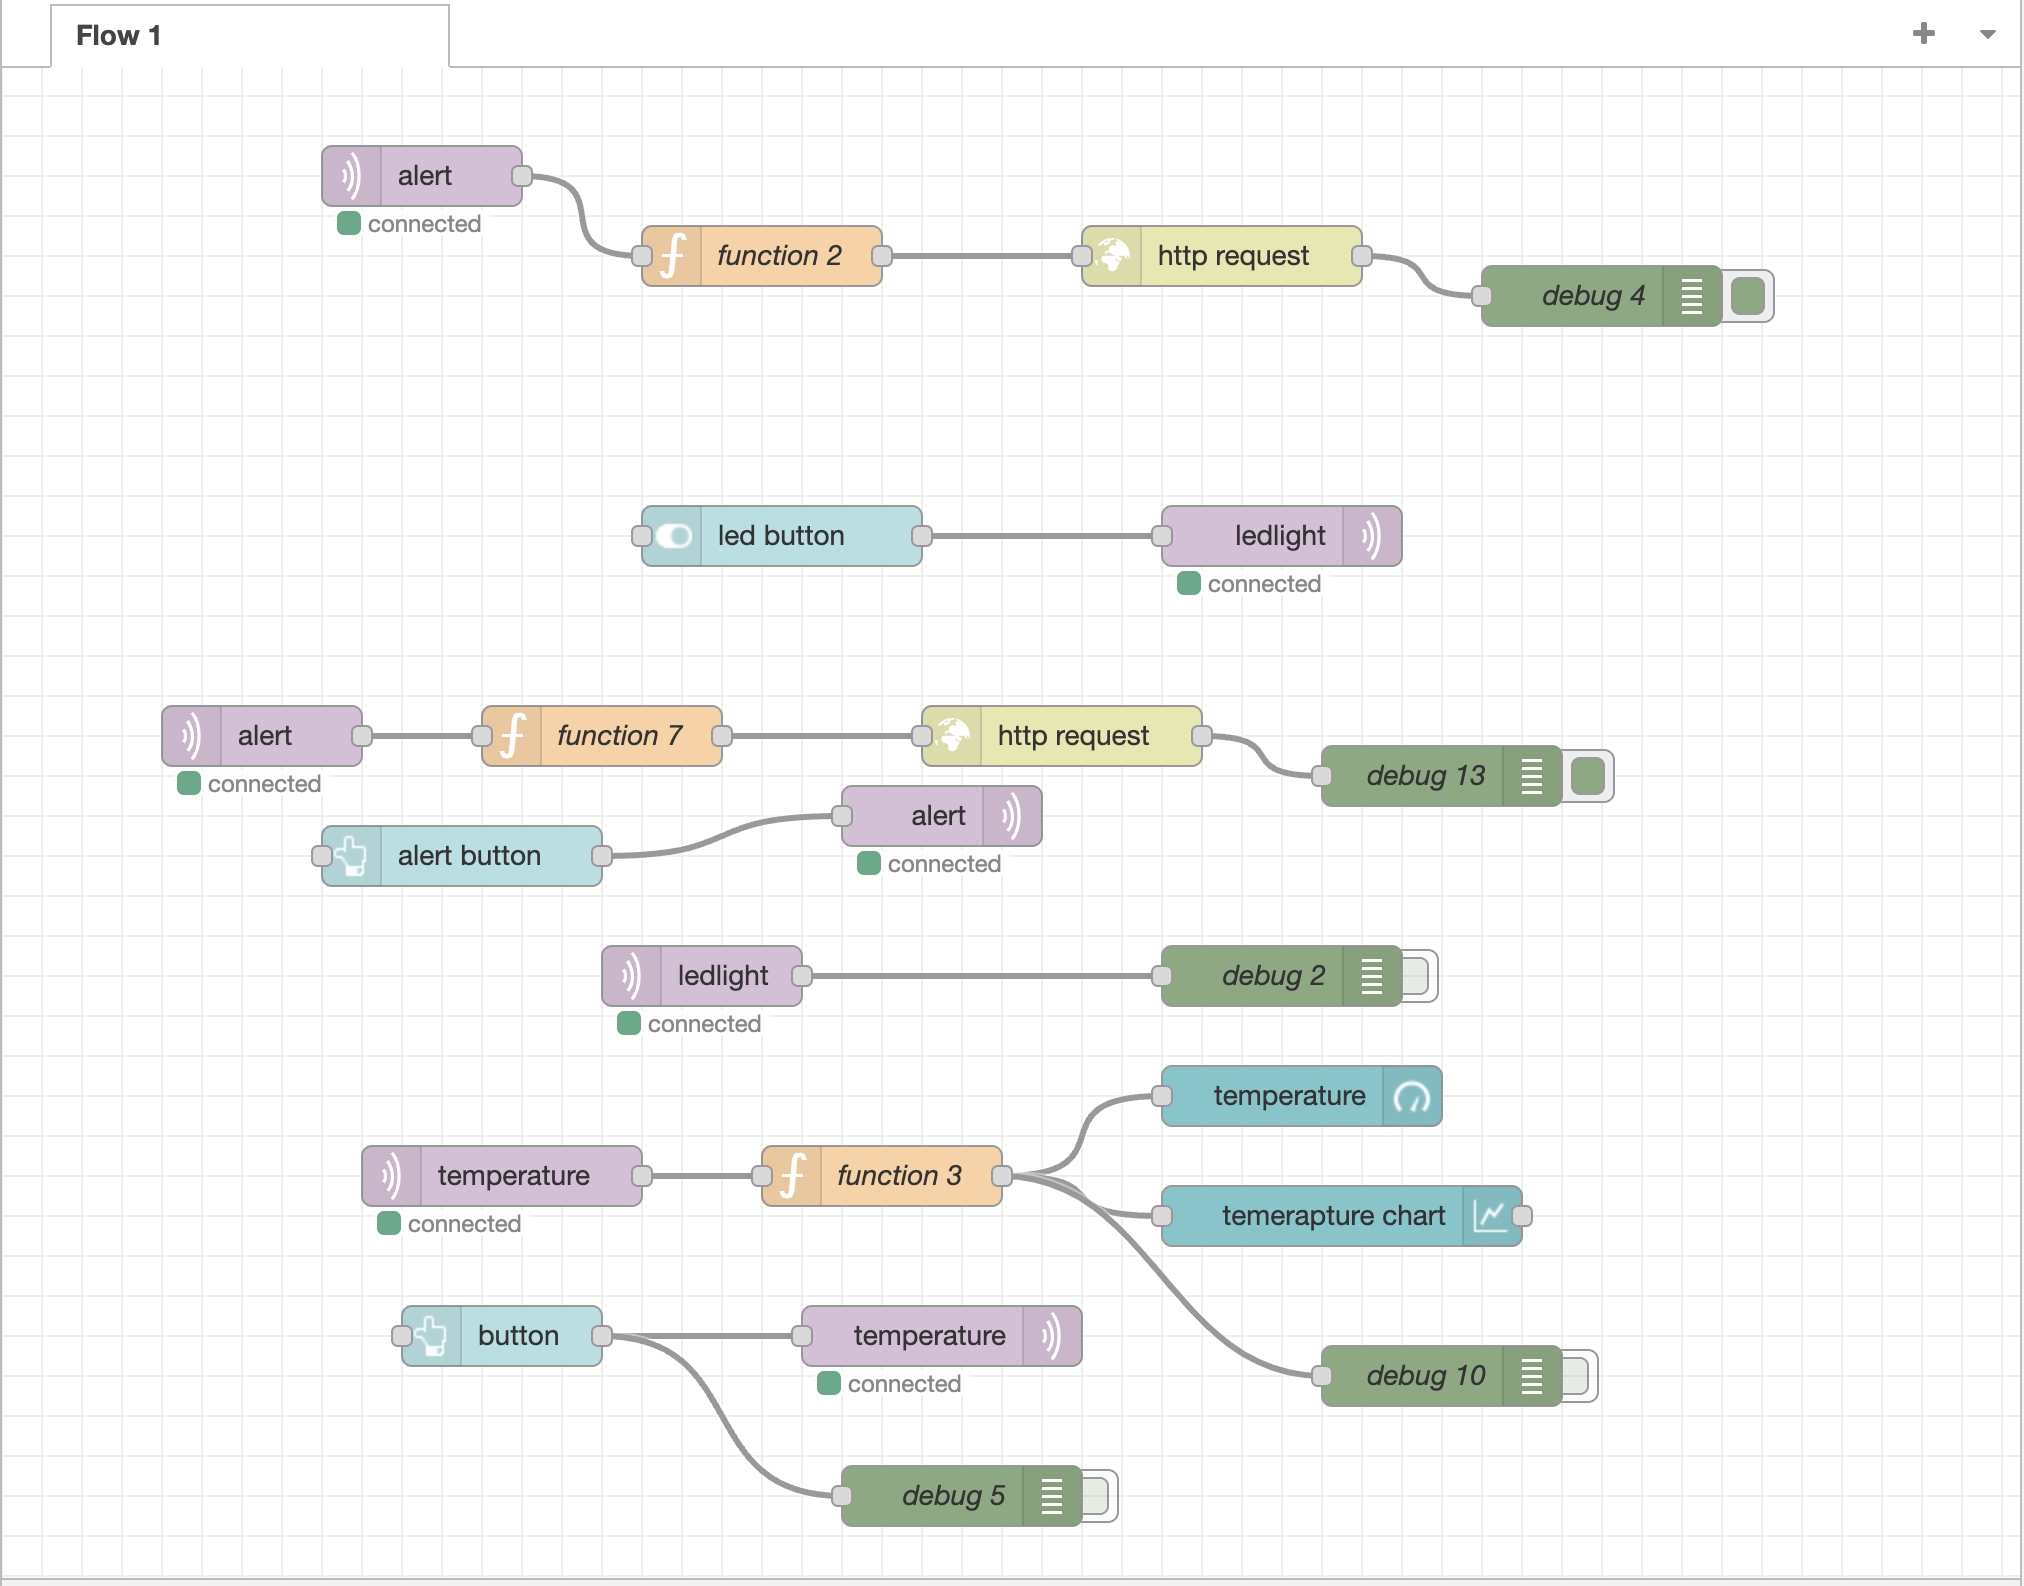
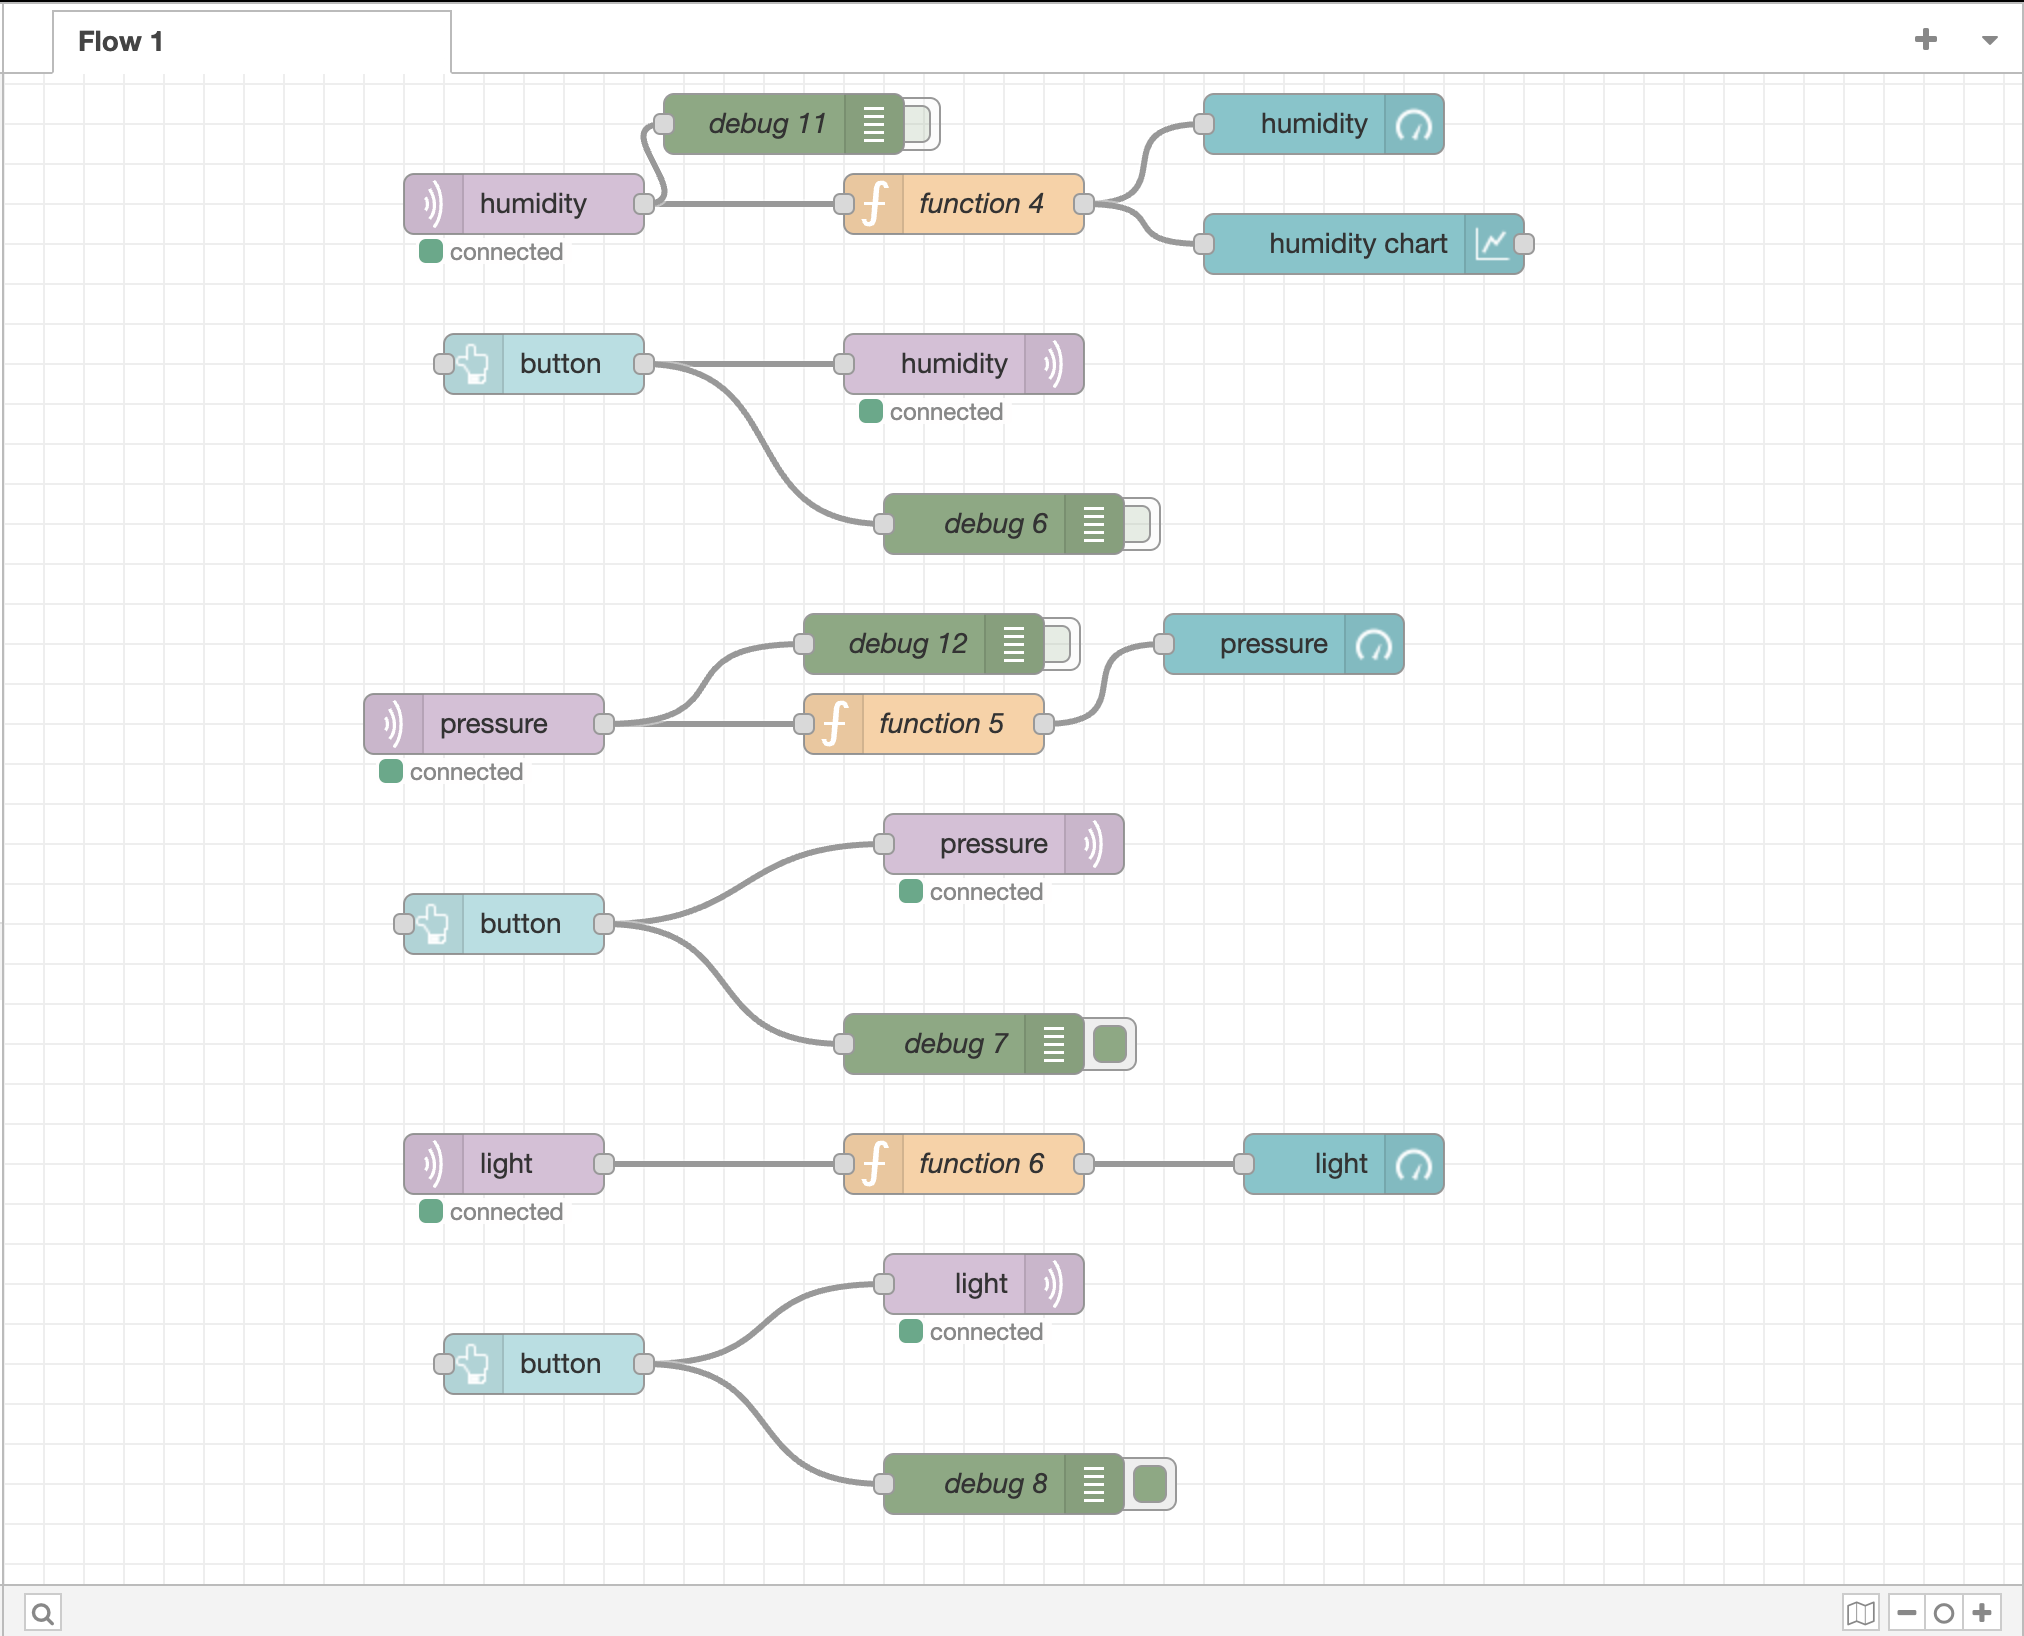
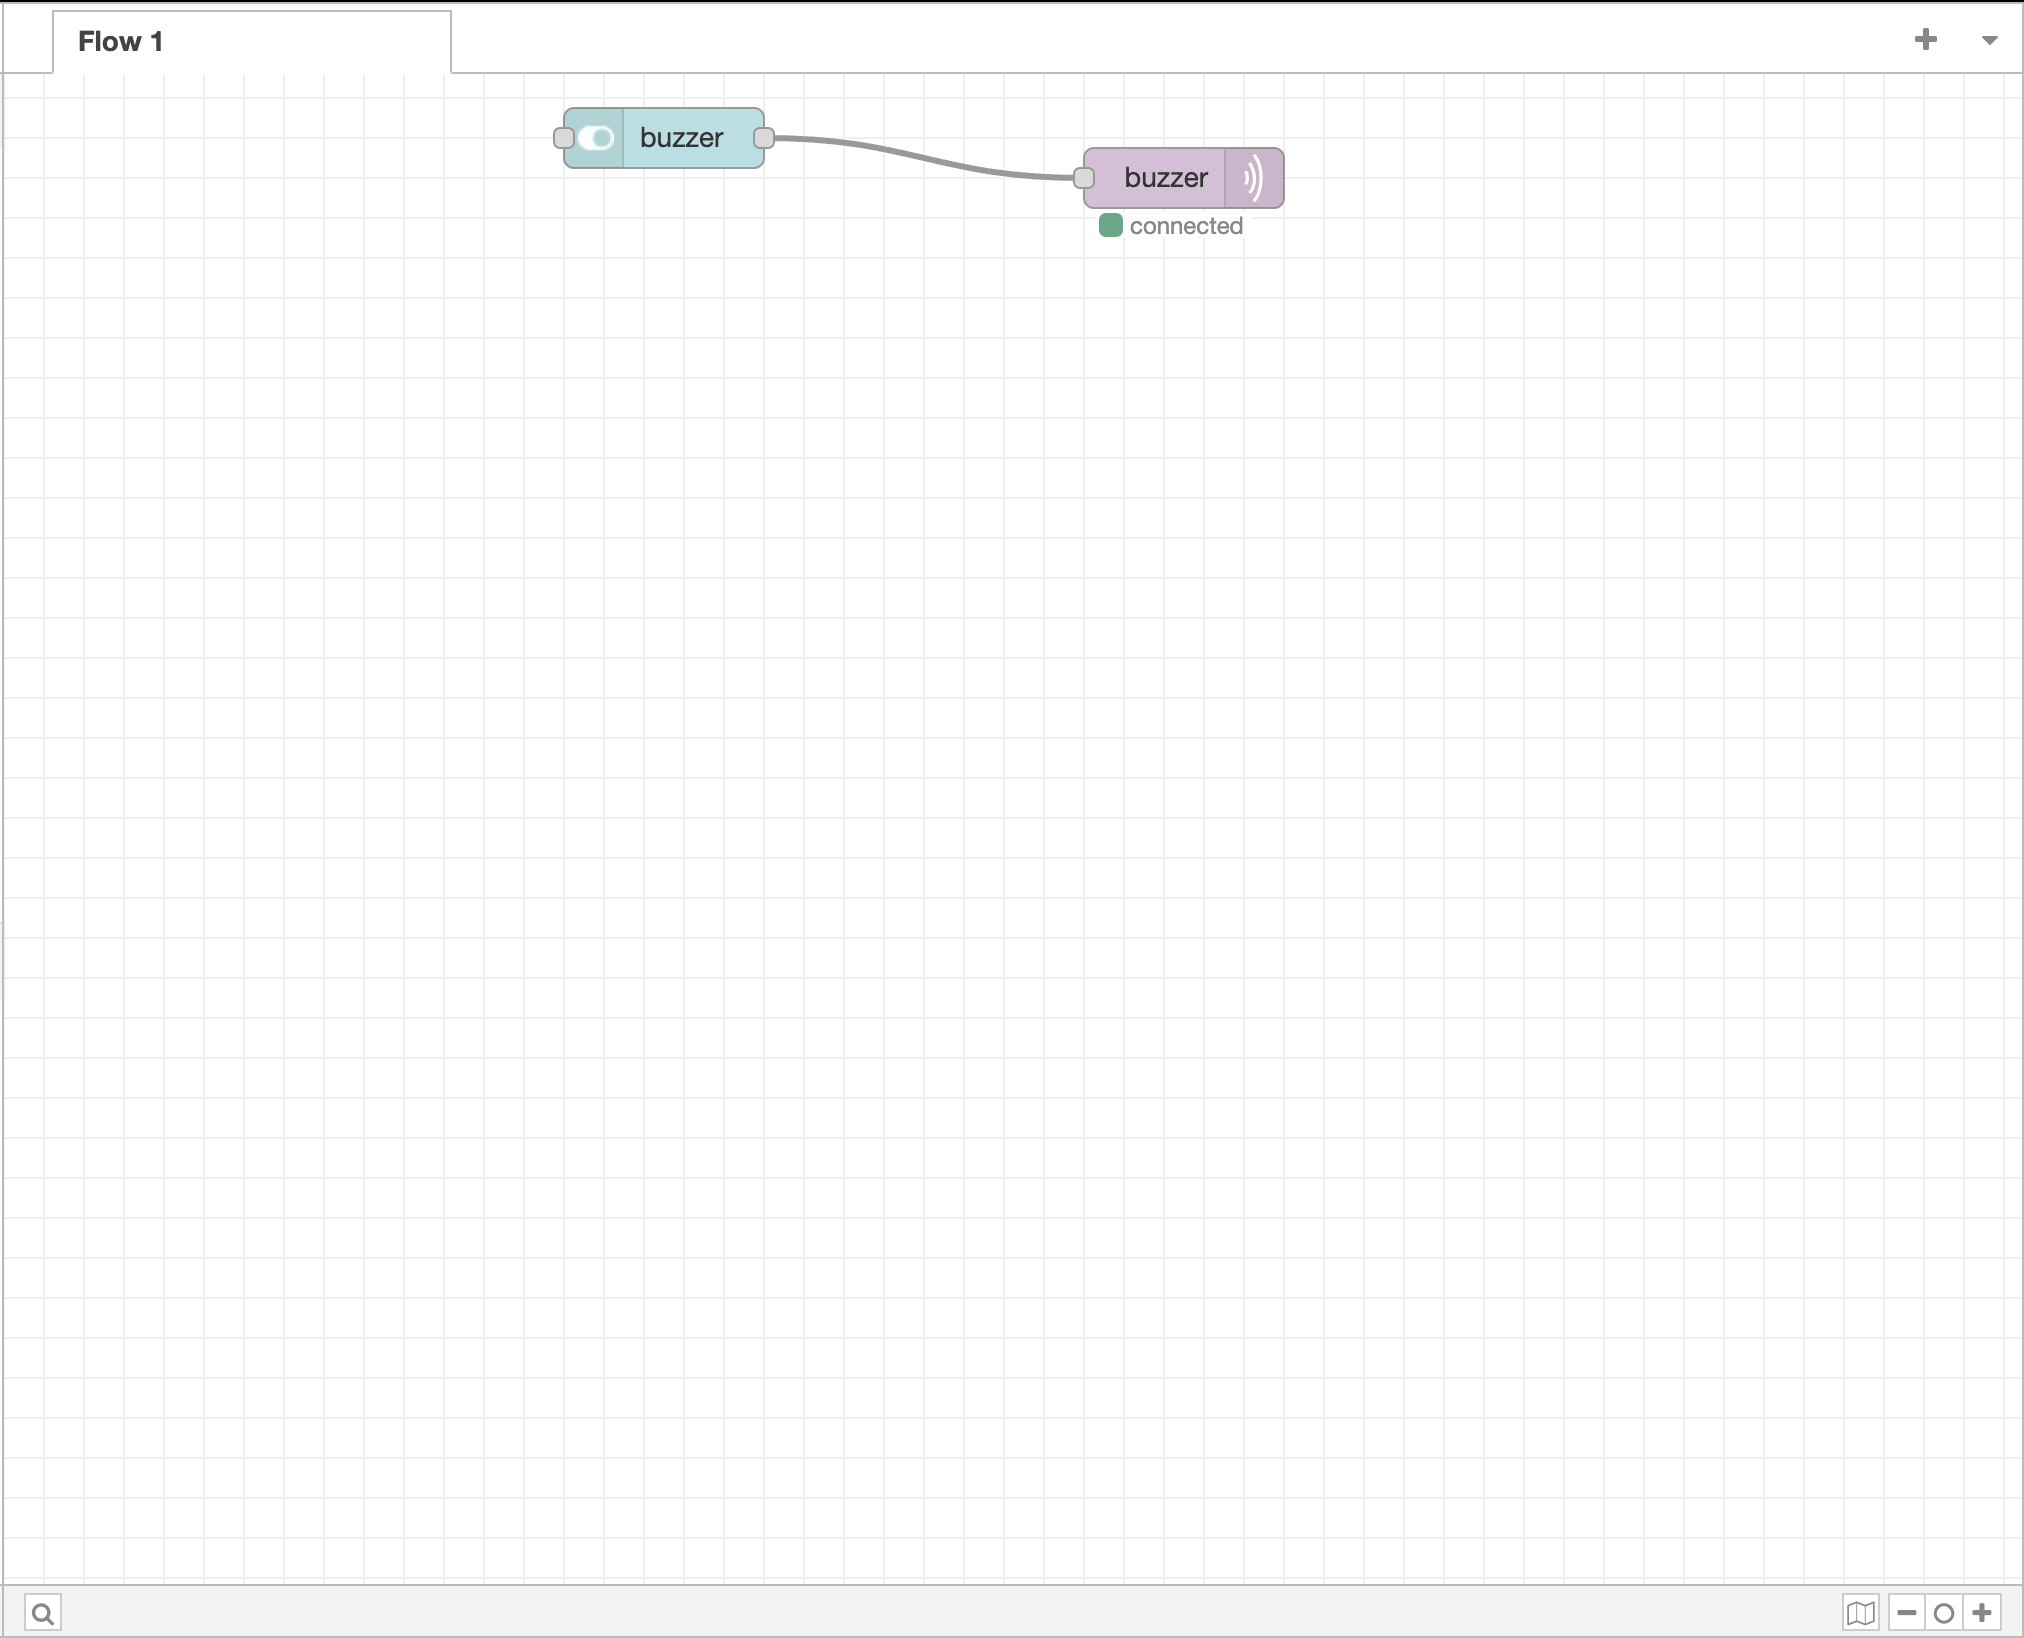
Node-RED backend:
Block diagram of your system: