a14g-final-submission-s25-t01-double-aa-batteries

a14g-final-submission
* Team Number: 1
* Team Name: Double AA Batteries
* Team Members: Arushi Mittal and Ashley Tang
* Github Repository URL: https://github.com/ese5160/a14g-final-submission-s25-t01-double-aa-batteries.git
* Description of test hardware: (development boards, sensors, actuators, laptop + OS, etc)
1. Video Presentation
2. Project Summary
Device Description
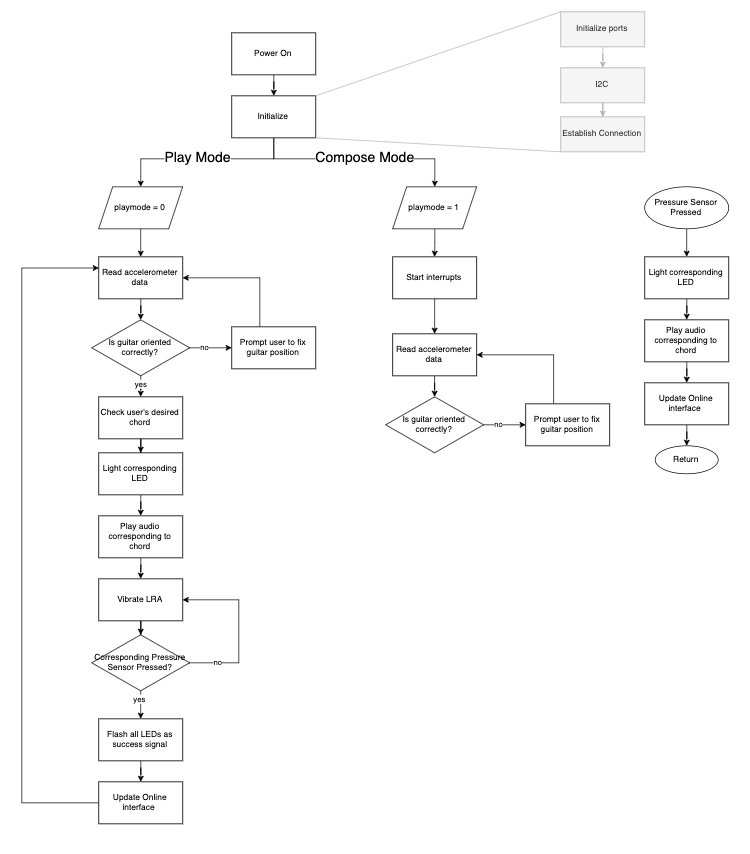
The Guitar Buddy is an assistive guitar trainer helping people with accessibility needs learn how to play the guitar through visual and tactile prompting. The Guitar Buddy has large buttons that the user can press as opposed to having to pressing multiple strings to play chords, as well as with an assitive guitar pick holder with haptic feedback of when to strum the strings and uses IoT as the user interface, allowing the user to select modes and view feedback, creating a more friendly user experience.
Device Functionality
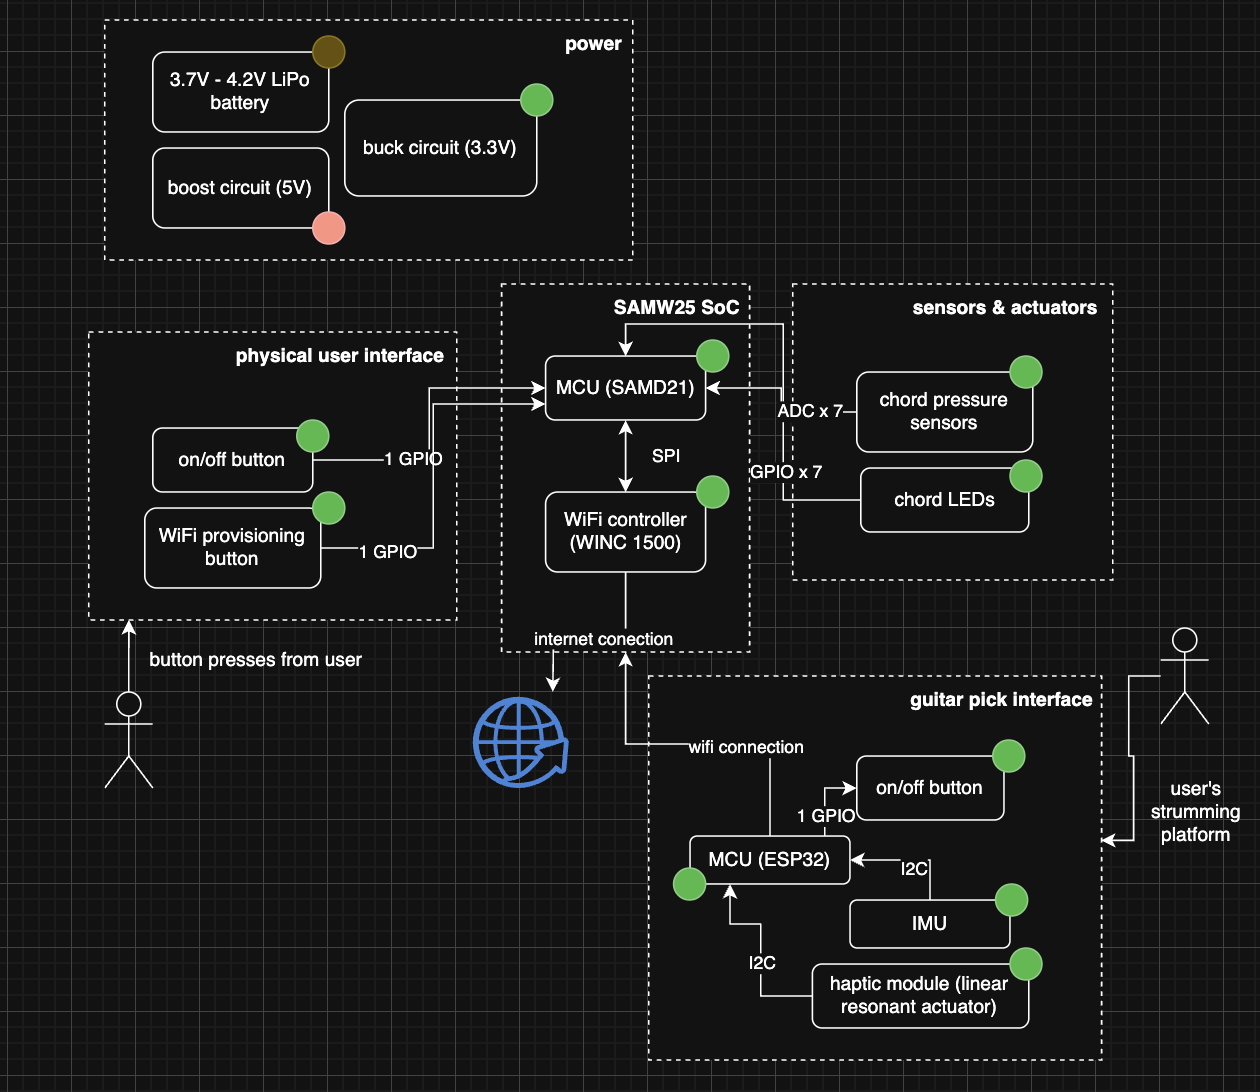
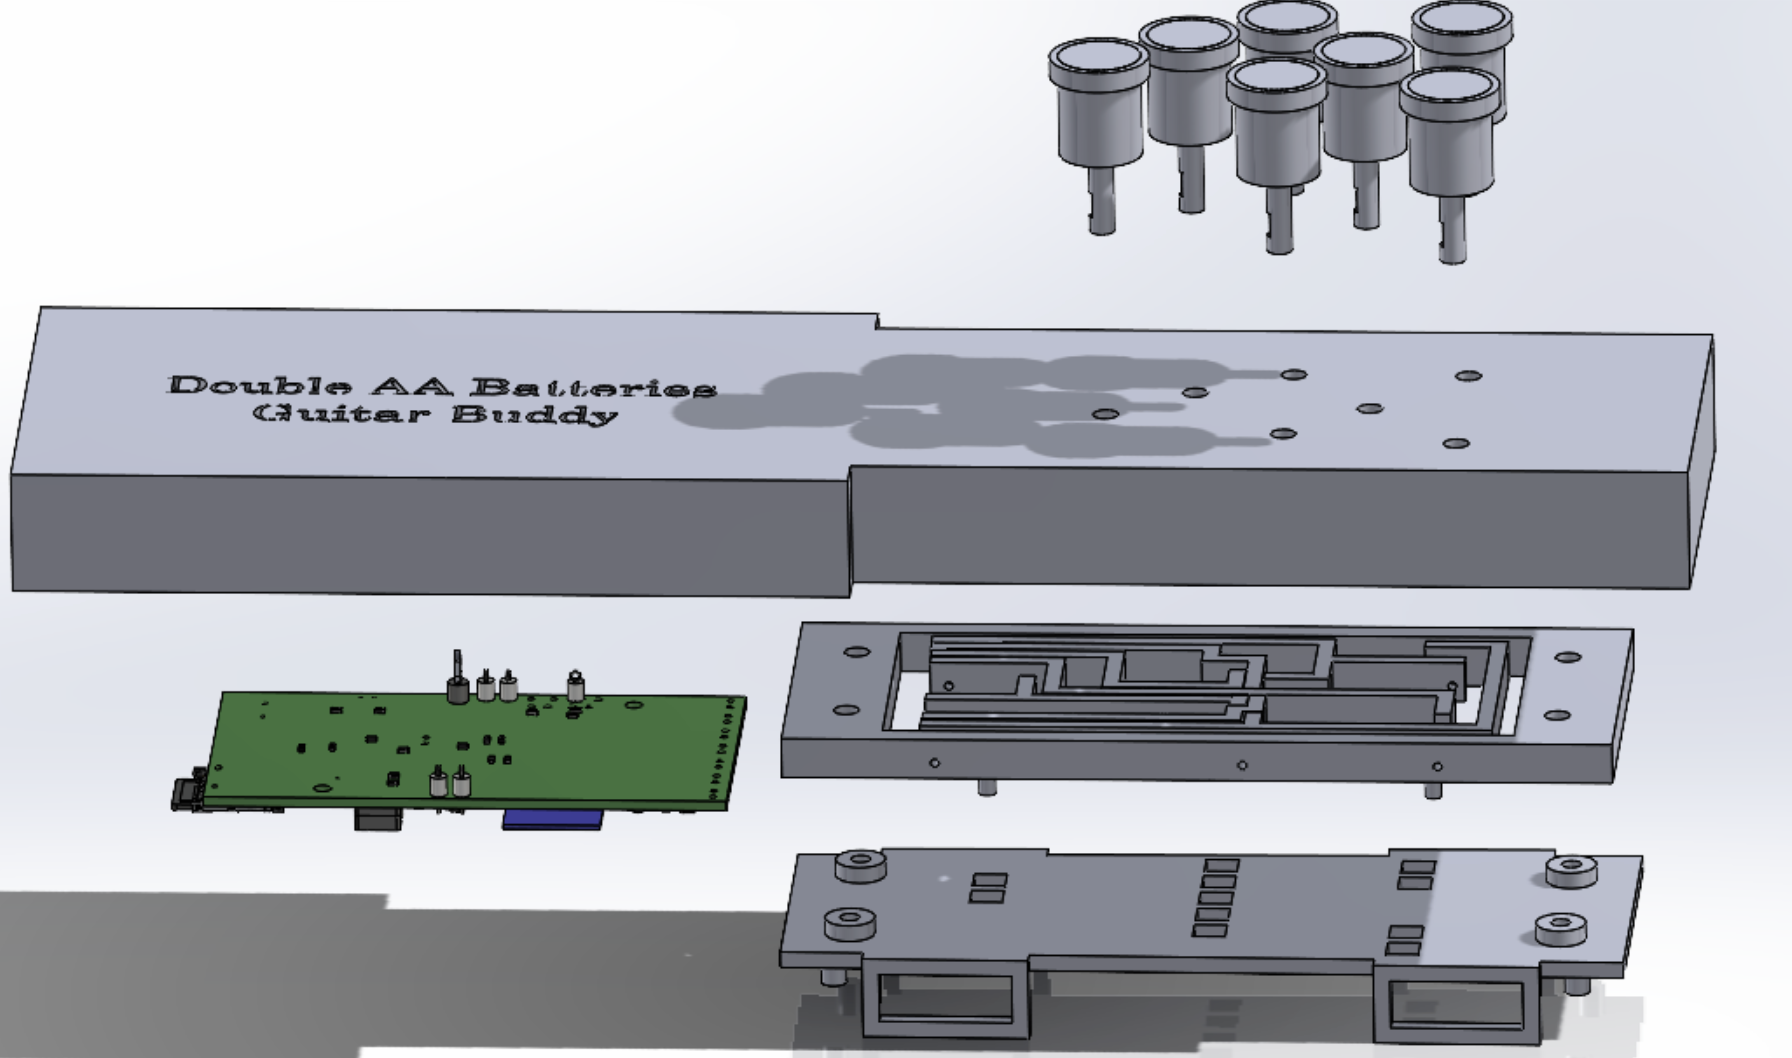
The device has four major components – an LRA (linear resonant actuator), accelerometer, pressure sensors, and LEDs. The LRA is used in the assistive guitar handle and prompts the user to strum the guitar strings whenever it buzzes. The accelerometer is used to provide positioning feedback on how the guitar is being held. Finally, the LEDs visually prompt the user to play a specific chord, and the pressure sensors detect if/when the chord is pressed.
Challenges
Although we created a mechanical user interface that would be easy to use, it was harder to implement than we thought. We also sent our prints and due to the end of semester rush, we did not recieve them until the night before demo day. Although our mechanical components were unable to work with the device as expected, we were still able to create a functional prototype that demonstrates proof of concept.
Prototype Learnings
From making the prototype, we learned a lot about PCBA board bring up, specifically in creating the bootloader. We were also very fortunate that we did not face many manufacturing challenges, but this experience taught us the importance of strong PCB design. We gained more experience working with JLink programming and working with a variety of communication protocols, including I2C and SPI. Finally, we learned a lot about cloud communication through our development with Node-Red.
Next Steps & Takeaways
In the future we would love to create a more robust mechanical interface so that pressing the buttons would allow the user to play chords. Electrically, we would also like to include a speaker on our device so that we could also audibly prompt the user what chord to play. The speaker could also play the sounds of the chords, transforming the device into a portable electric guitar, allowing multiple modes of play.
Project Links
3. Hardware & Software Requirements
Hardware Requirements (HRS)
- HRS 01: The device shall be based on the SAMD21 microcontroller for the main system and the ESP32 microcontroller for the guitar pick interface.
- HRS 02: The system shall use a LiPo battery (3.7–4.2V) for power, with a boost circuit (5V) and buck circuit (3.3V) for appropriate voltage regulation.
- HRS 03: Pressure sensors shall detect button presses (simulating playing chords) and transmit data to the MCU using ADC (Analog-to-Digital Conversion) pins.
- HRS 04: The device shall include a Wi-Fi controller (WINC 1500) for IoT connectivity.
- HRS 05: LEDs shall be included to prompt the user, indicating the chord to be played.
- HRS 06: The system shall include a haptic module (linear resonant actuator) integrated into the guitar pick to prompt strumming actions wirelessly.
- HRS 07: The system shall incorporate on/off buttons for user control over power and WiFi connectivity.
- HRS 08: The guitar attachment shall house all essential sensors and actuators, detachable from the guitar for portability.
- HRS 09: The device shall have a speaker for audible prompting functionality, enabling voice-based instructions during training modules.
- HRS 10: The on-board accelerometer shall sense and transmit the guitar’s orientation, to provide feedback to the user for correcting the orientation of the guitar.
- HRS 11: The PCB shall include proper shielding to minimize interference between wireless communication and other components.
Software Requirements Specification (SRS)
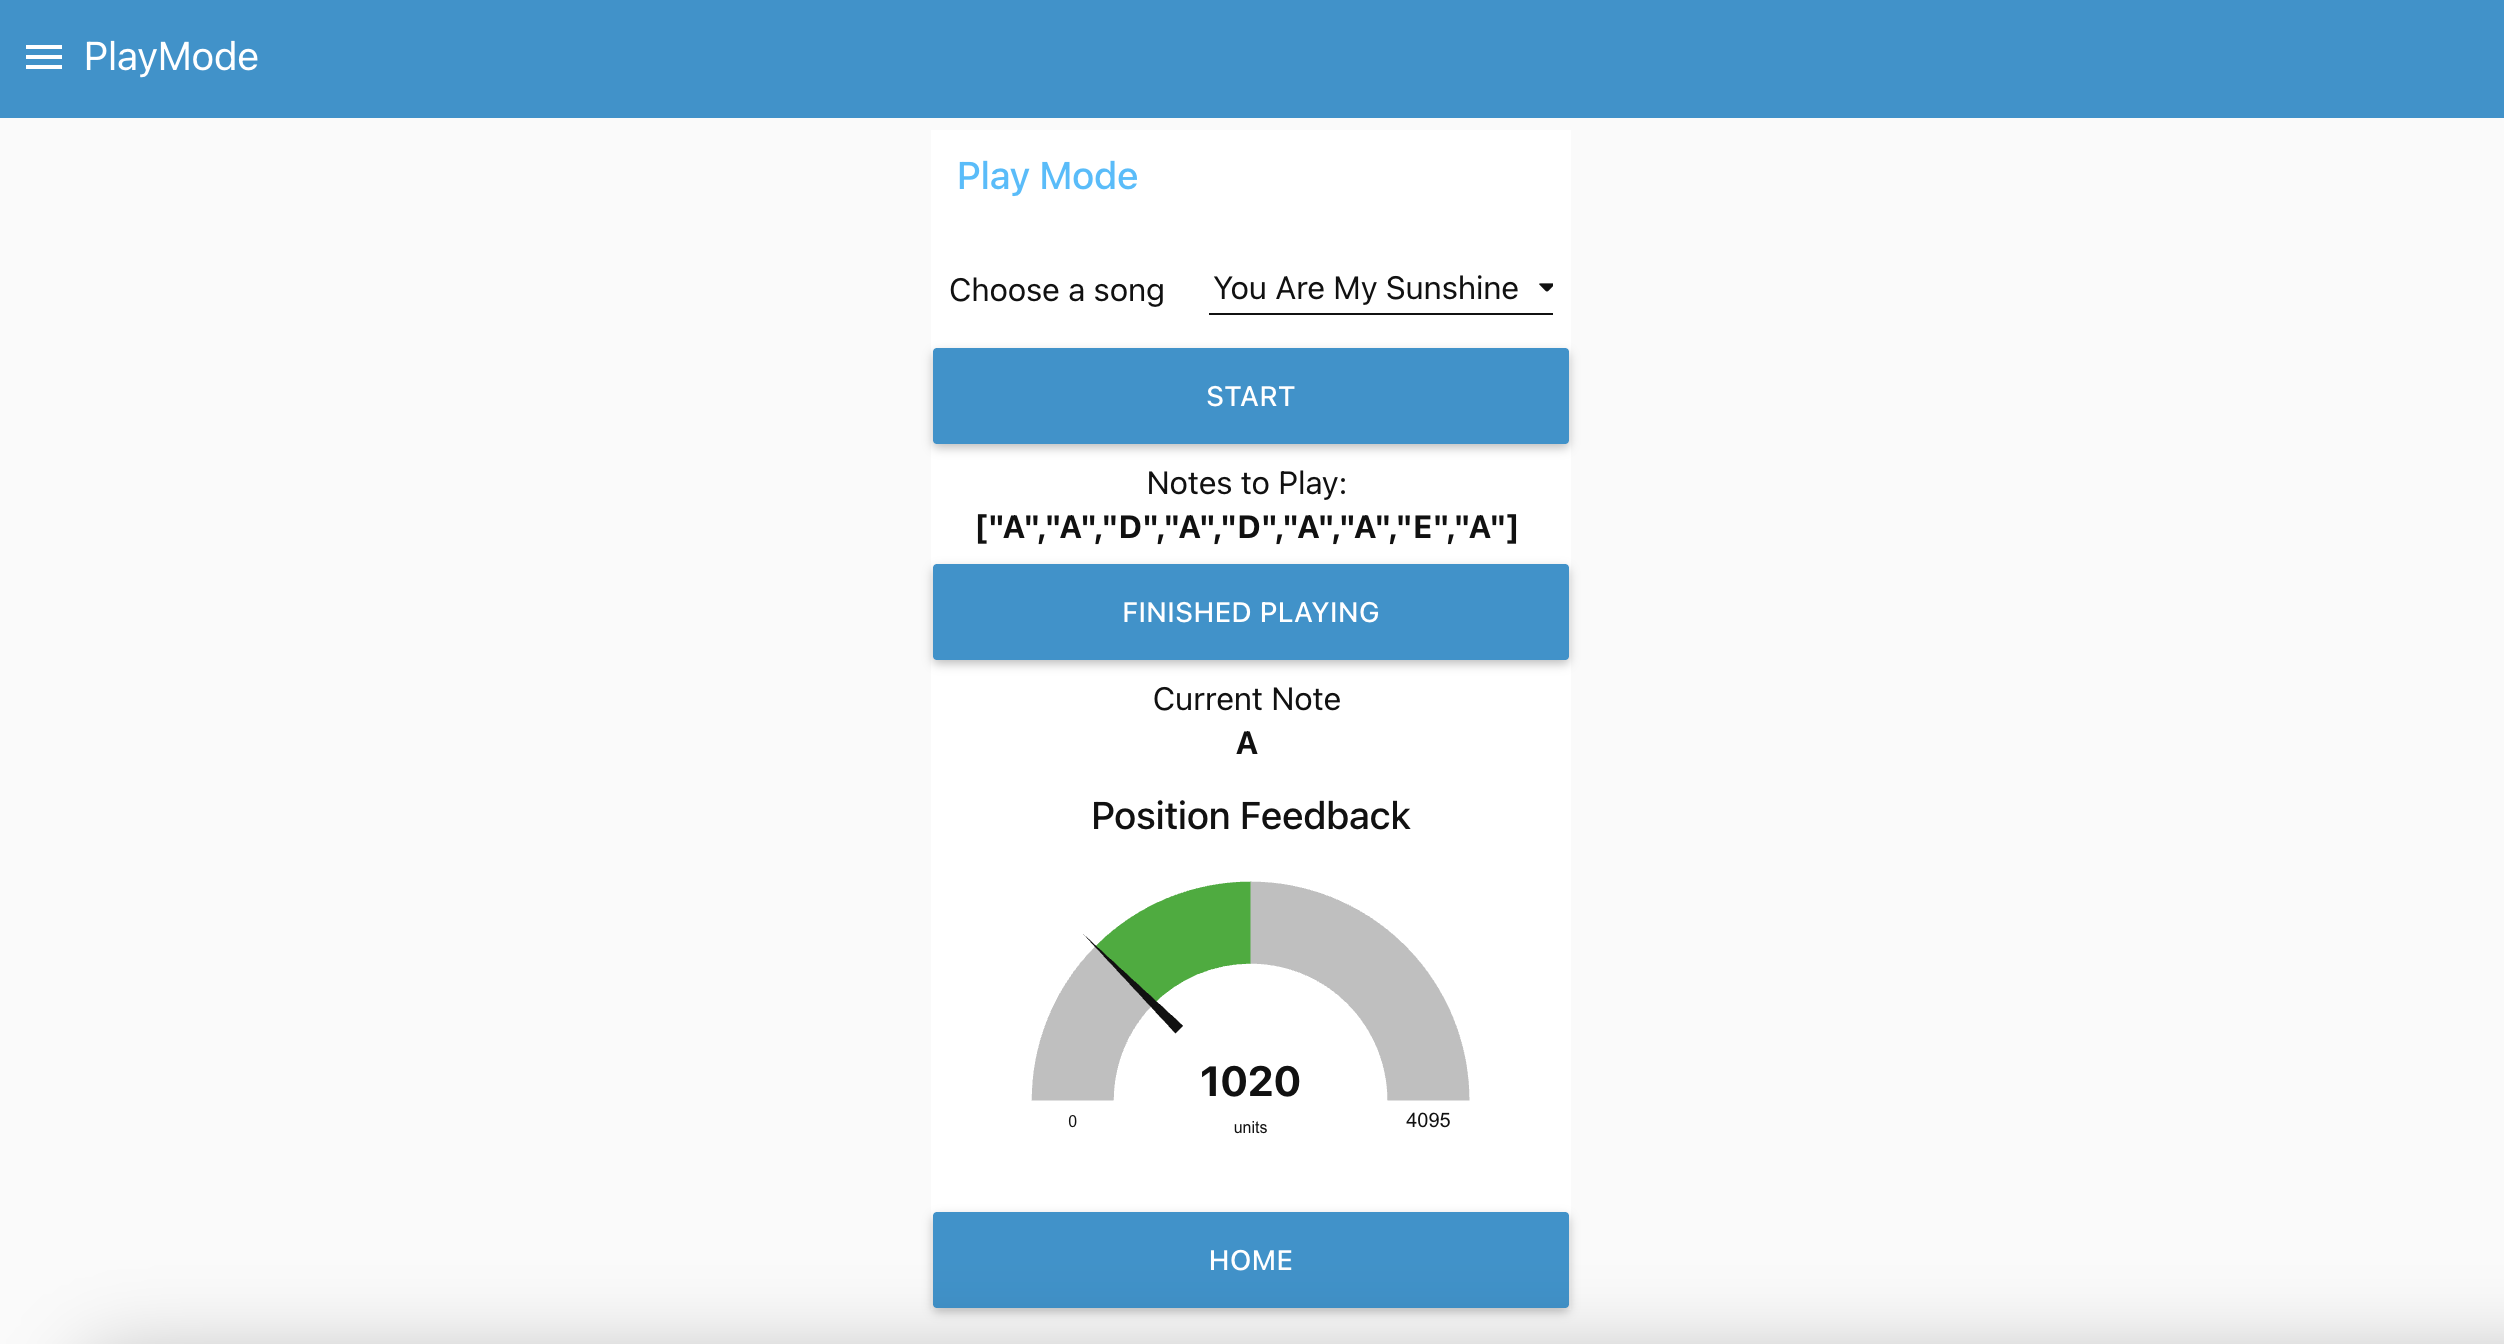
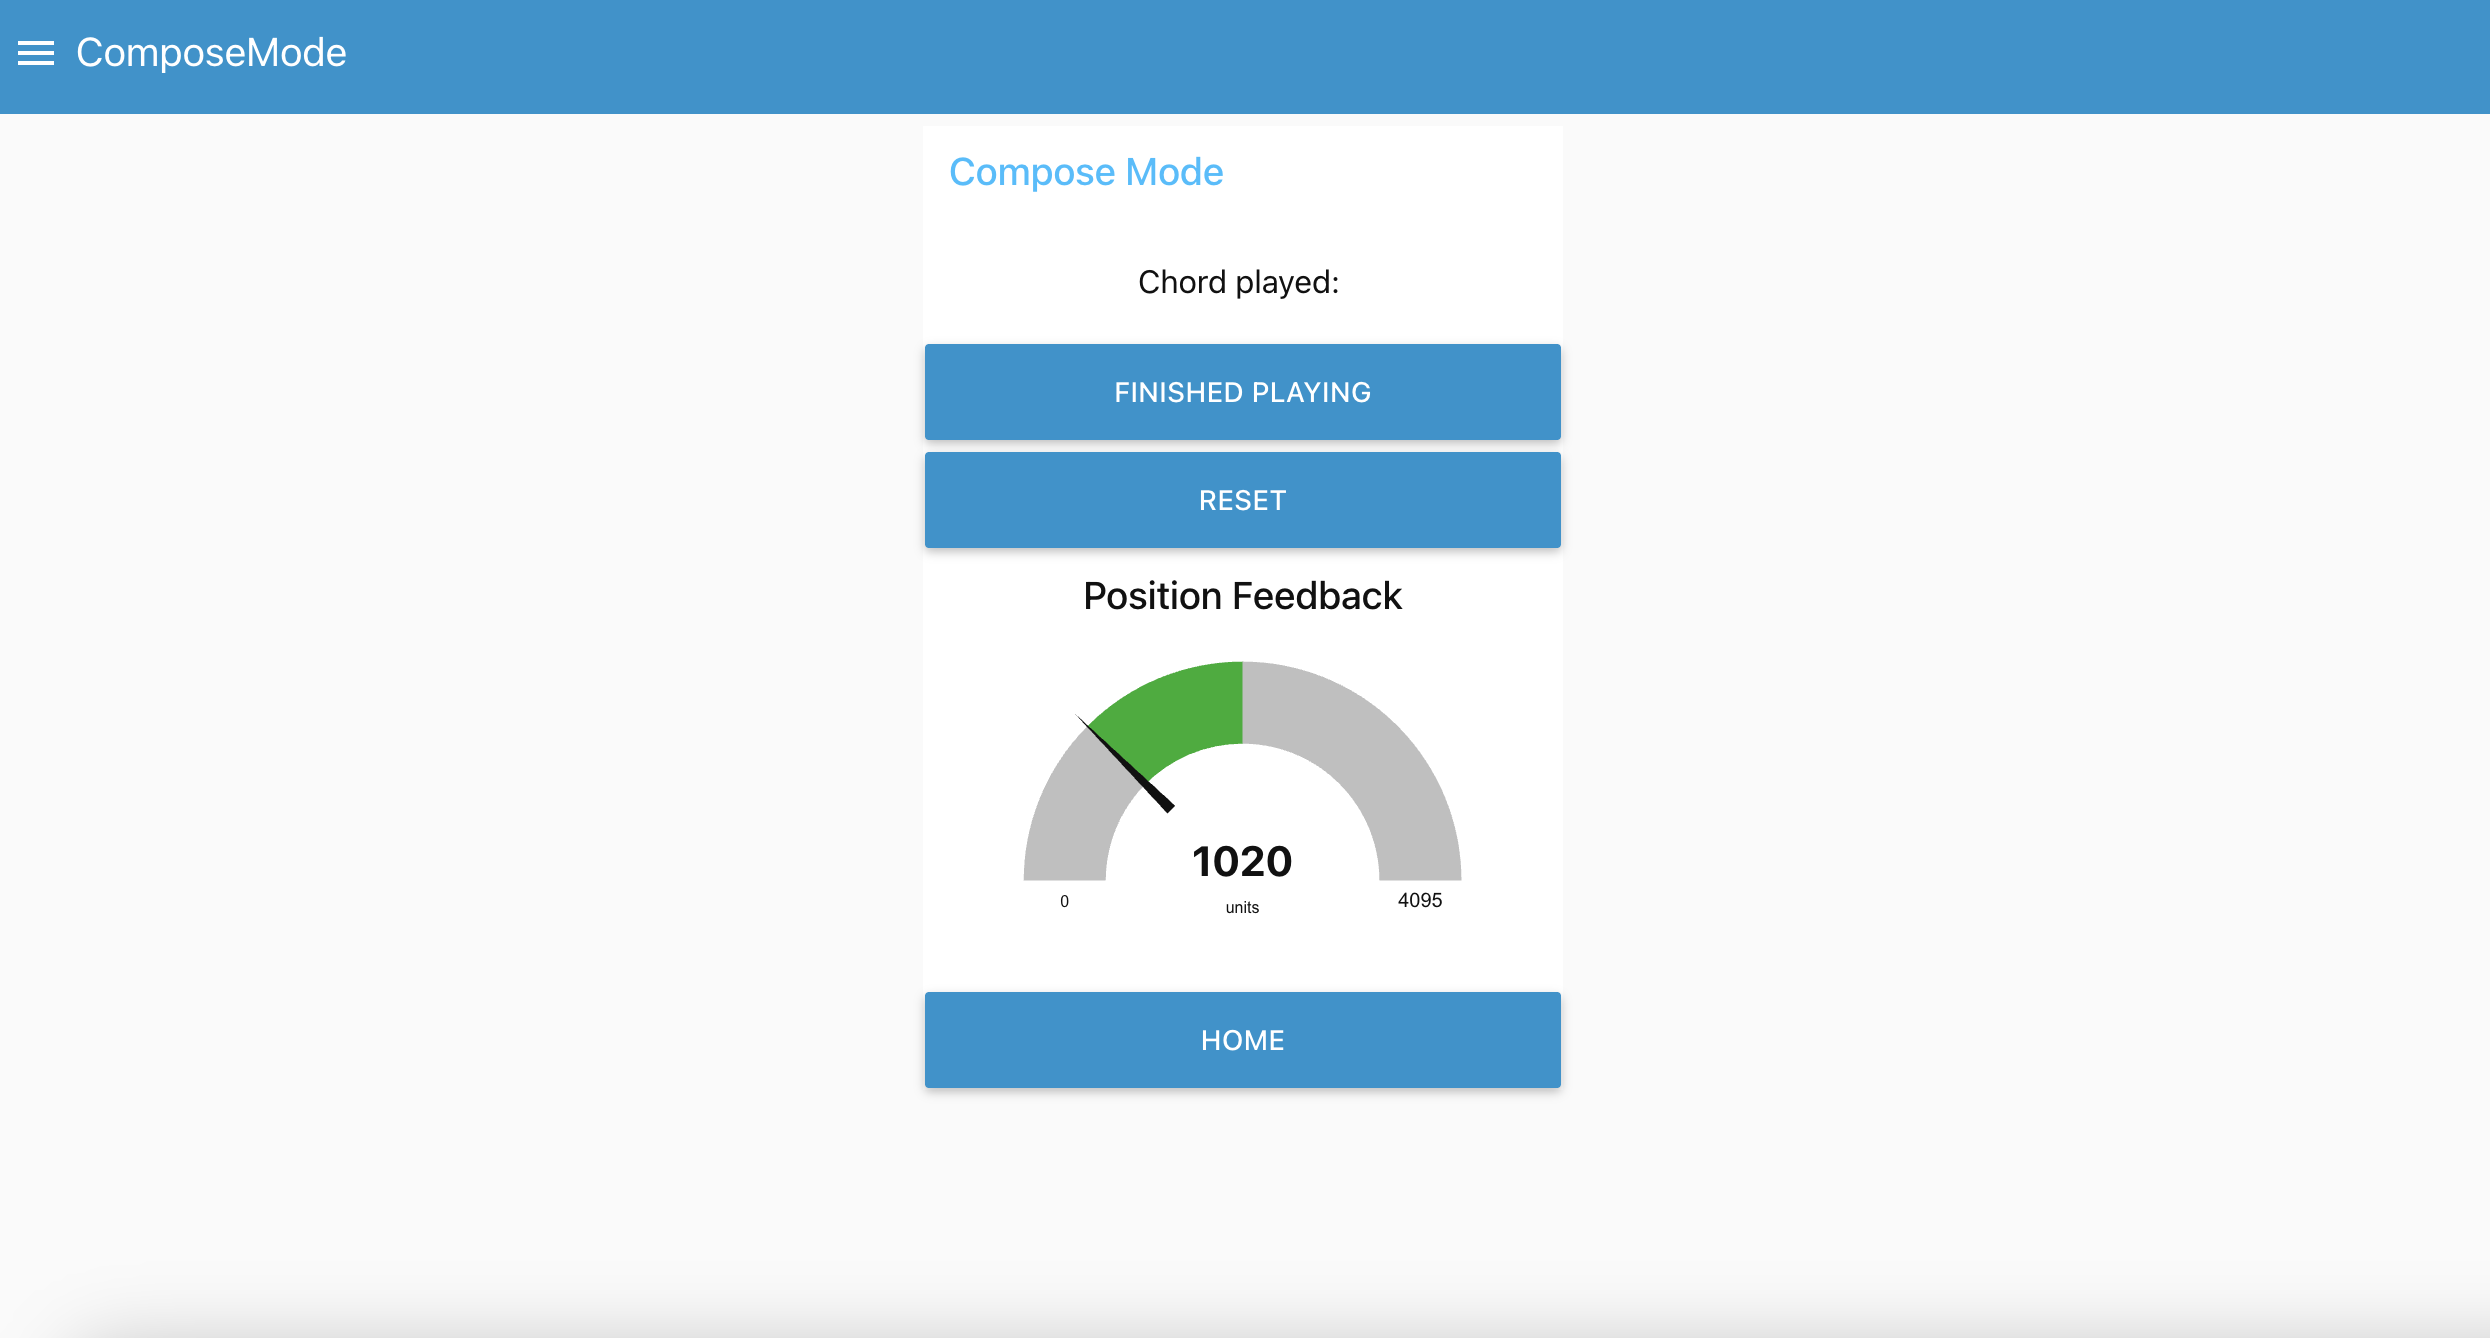
The device allows the user to choose between two modes. The first mode is loading specific songs from the online dashboard and prompting the user to play the chord and strum. The second mode is a “free compose” mode where the user can play chords and strum the guitar, and the online dashboard records the chord and strumming pattern, effectively allowing the user to compose their own music.
- SRS 01 – When the user is using “playing mode”, the device can light up an LED under a button, based on the user’s selected chord, prompting them to play the chord
- SRS 02 – When the user is using “playing mode”, the device sends a signal to the adaptive guitar pick to prompt the user to strum the guitar
- SRS 03 – When the user is using “playing mode”, the device is able to prompt the user to play chords and strum the guitar based on the chords and strumming patterns of a song
- SRS 04 – The user can load songs to play on the device and the device prompts the user to play the chords and strum patterns
- SRS 05 – When the user switches the mode of the device, the online dashboard will reflect which mode the user is using
- SRS 06 – When the user is using “composing mode”, the dashboard will record which cord is being played and the strumming pattern of the user.
- SRS 07 – The device users the accelerometer data to provide feedback to adjust guitar orientation.
- SRS 08 – The device prompts the user using vocal cues from the speaker.
4. Project Photos & Screenshots
Final Project:
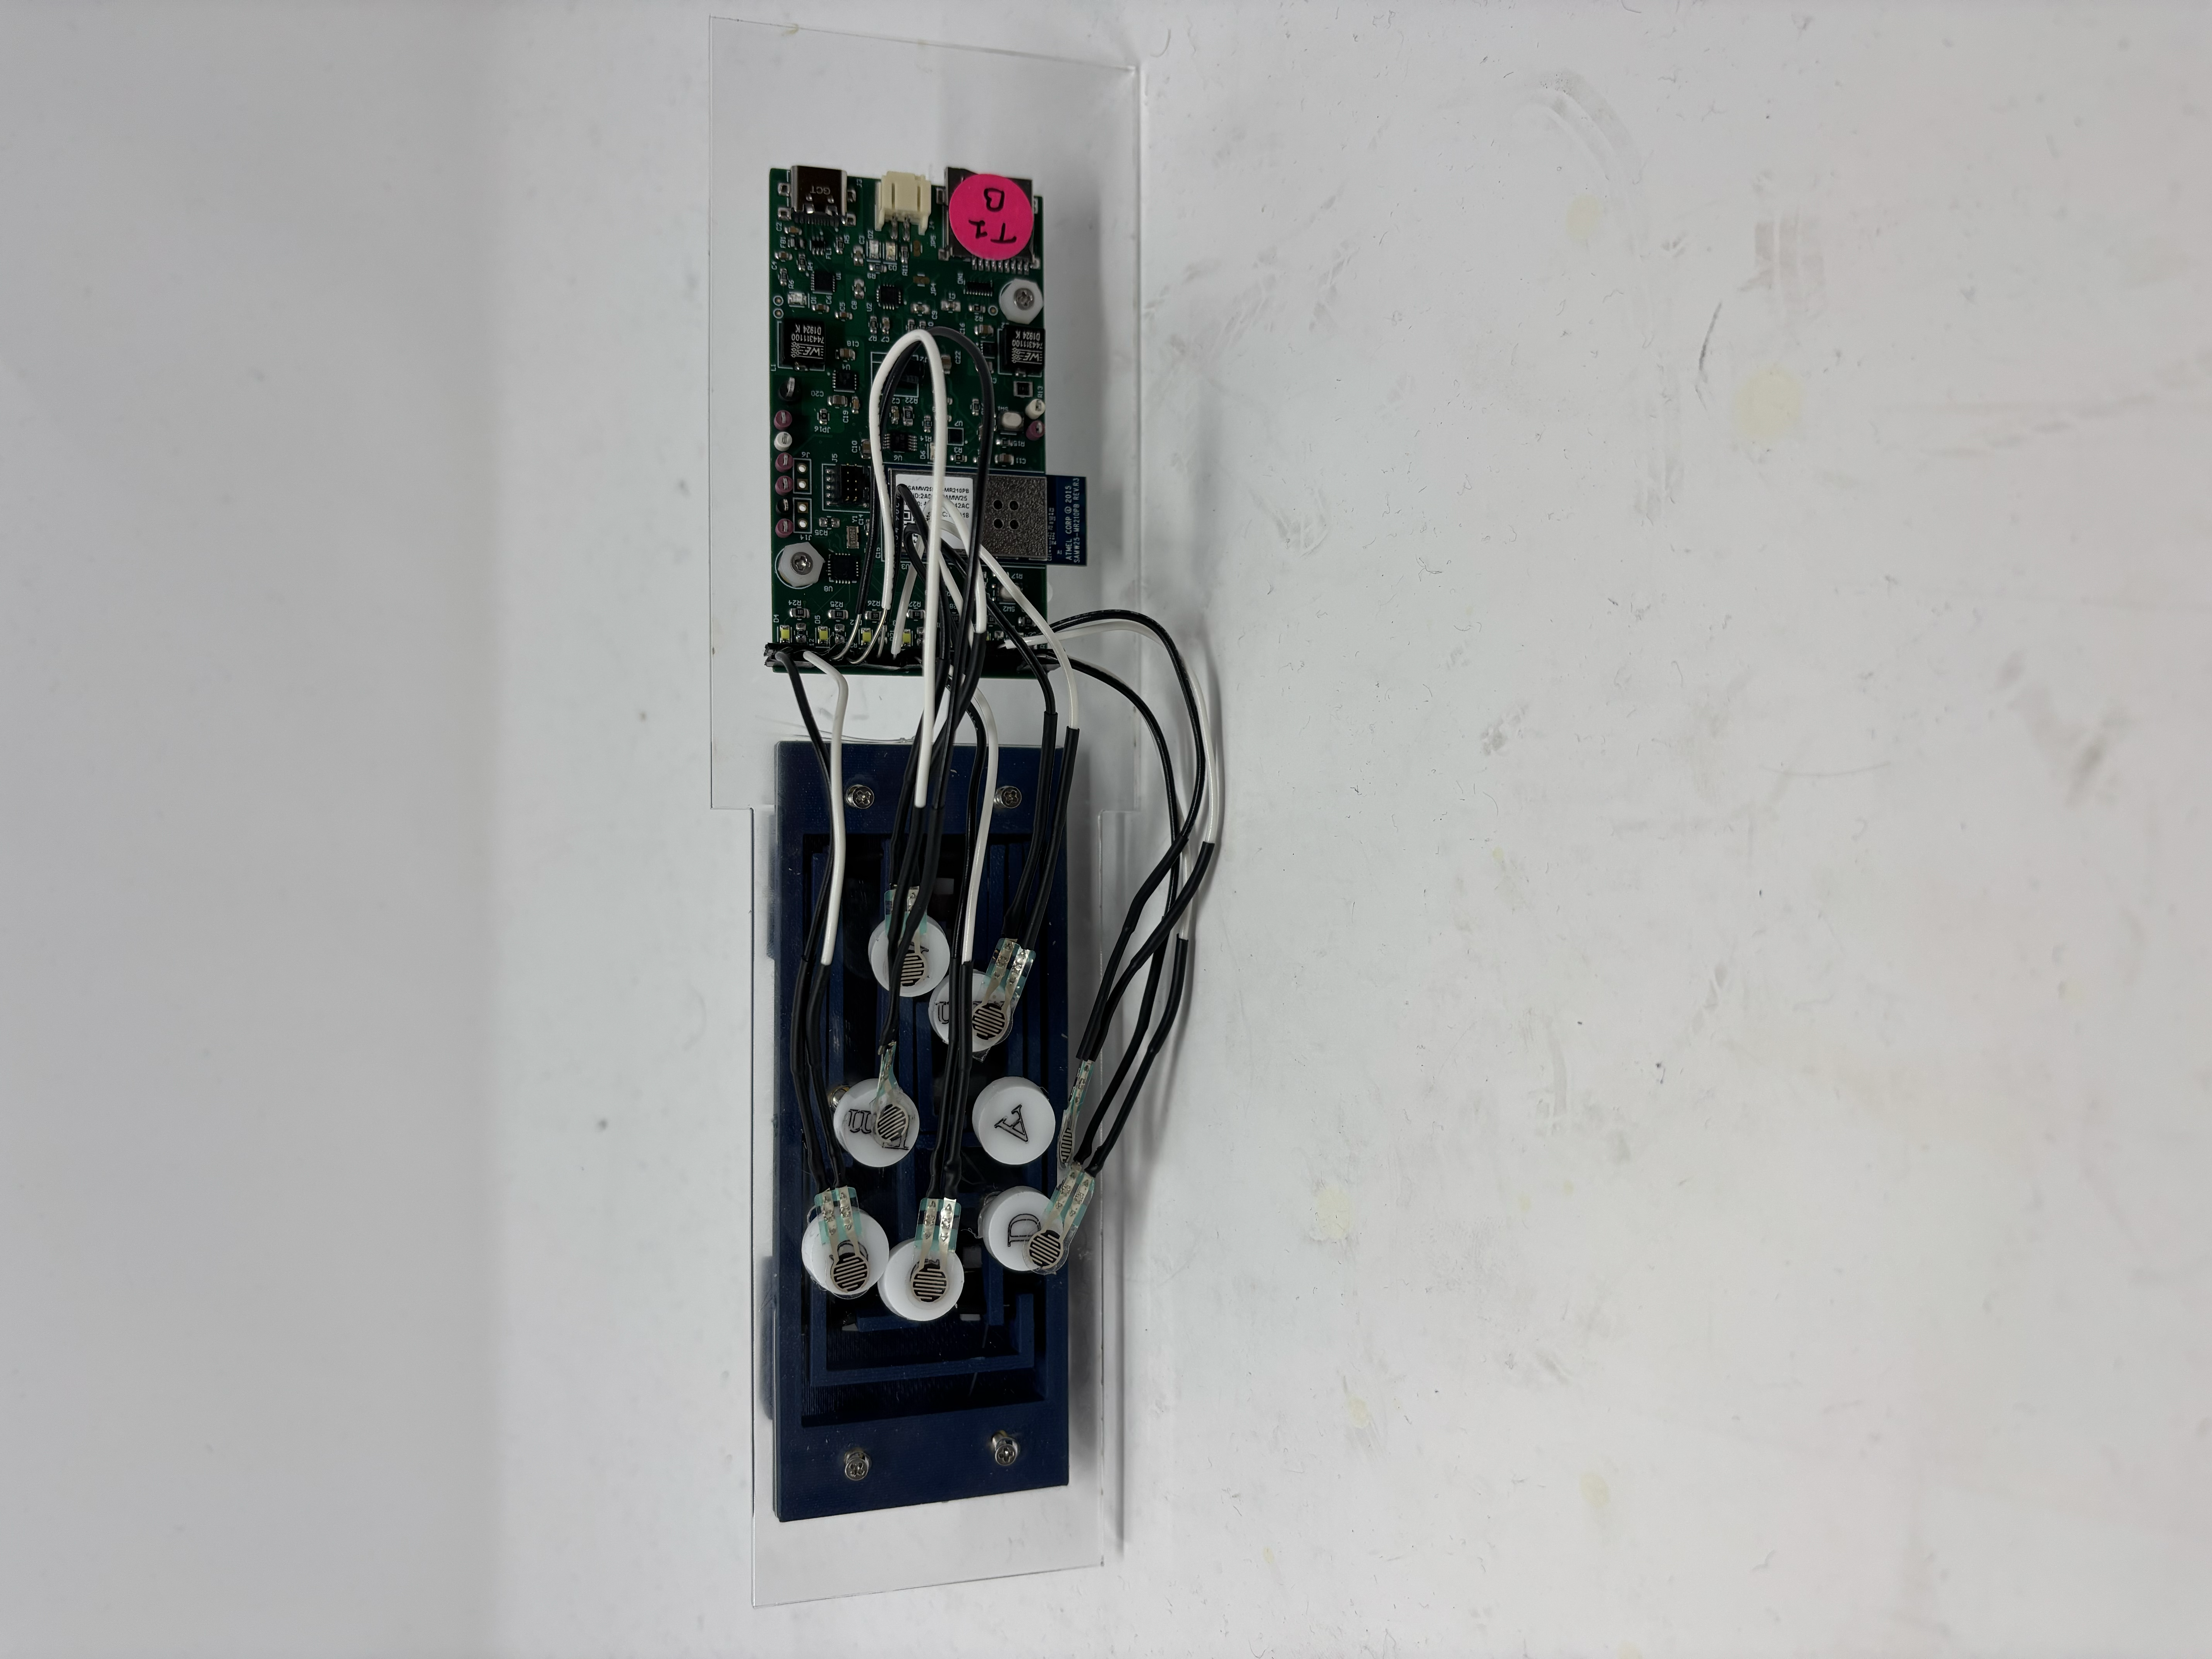
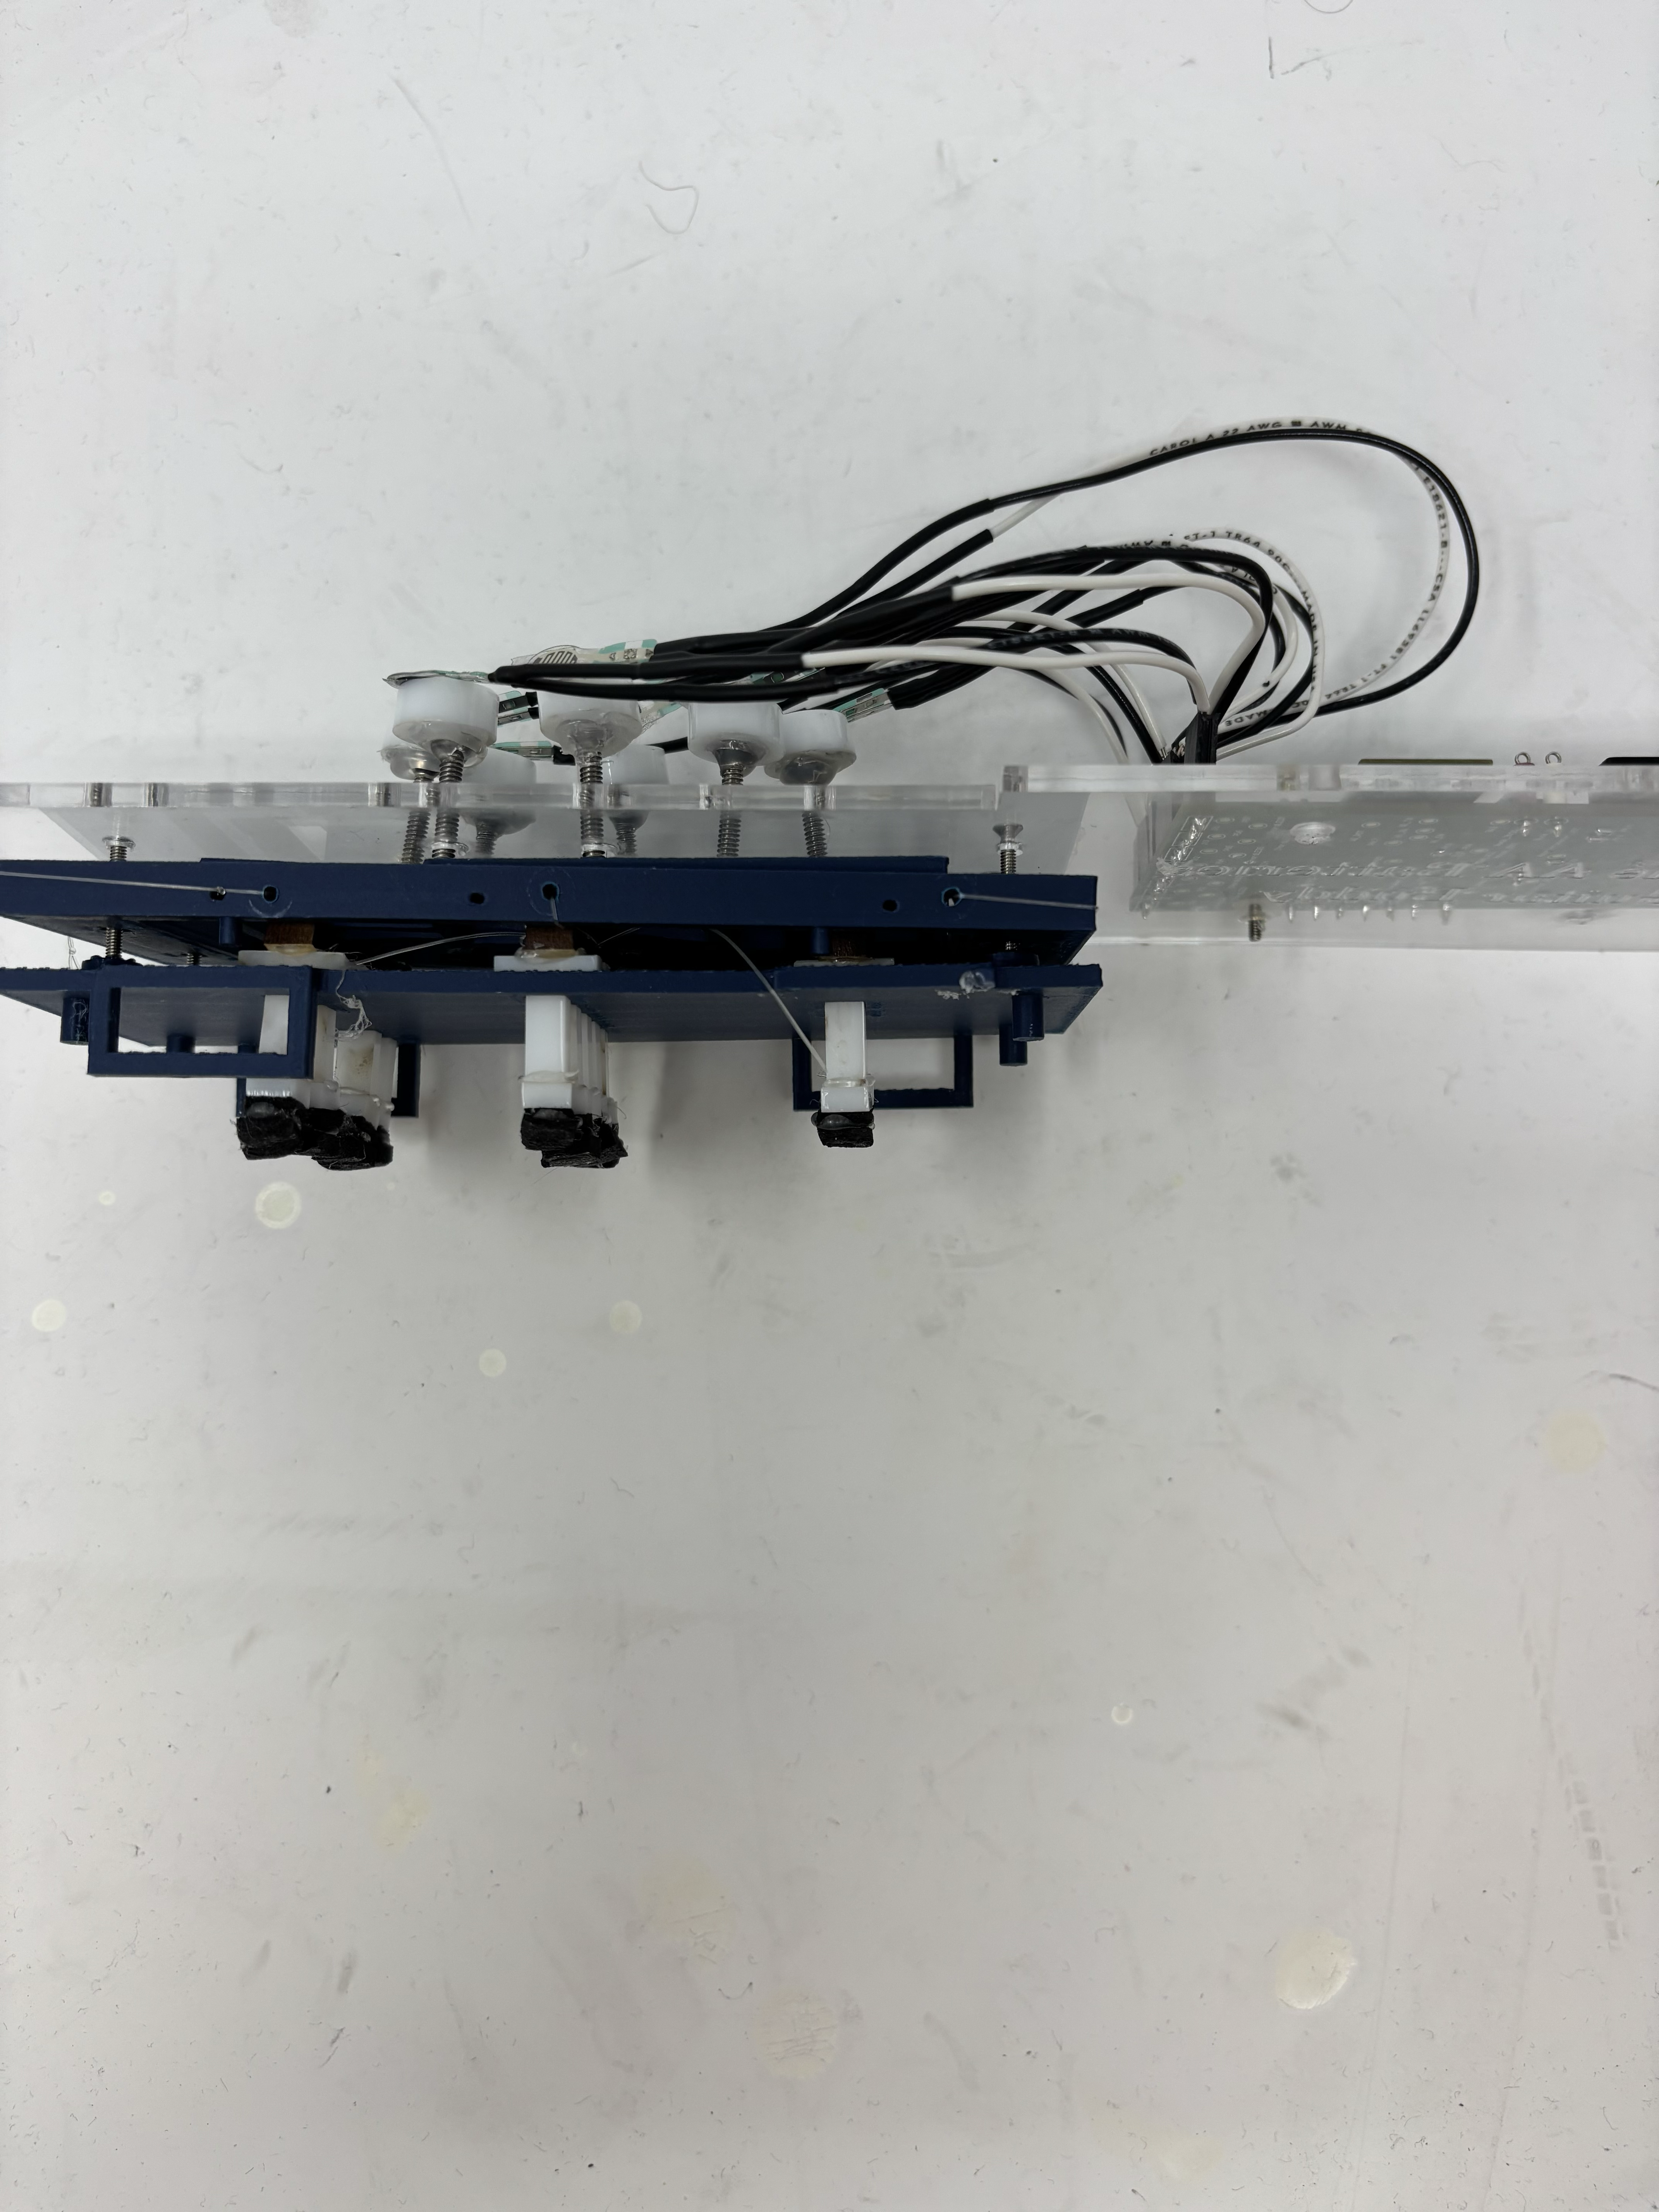
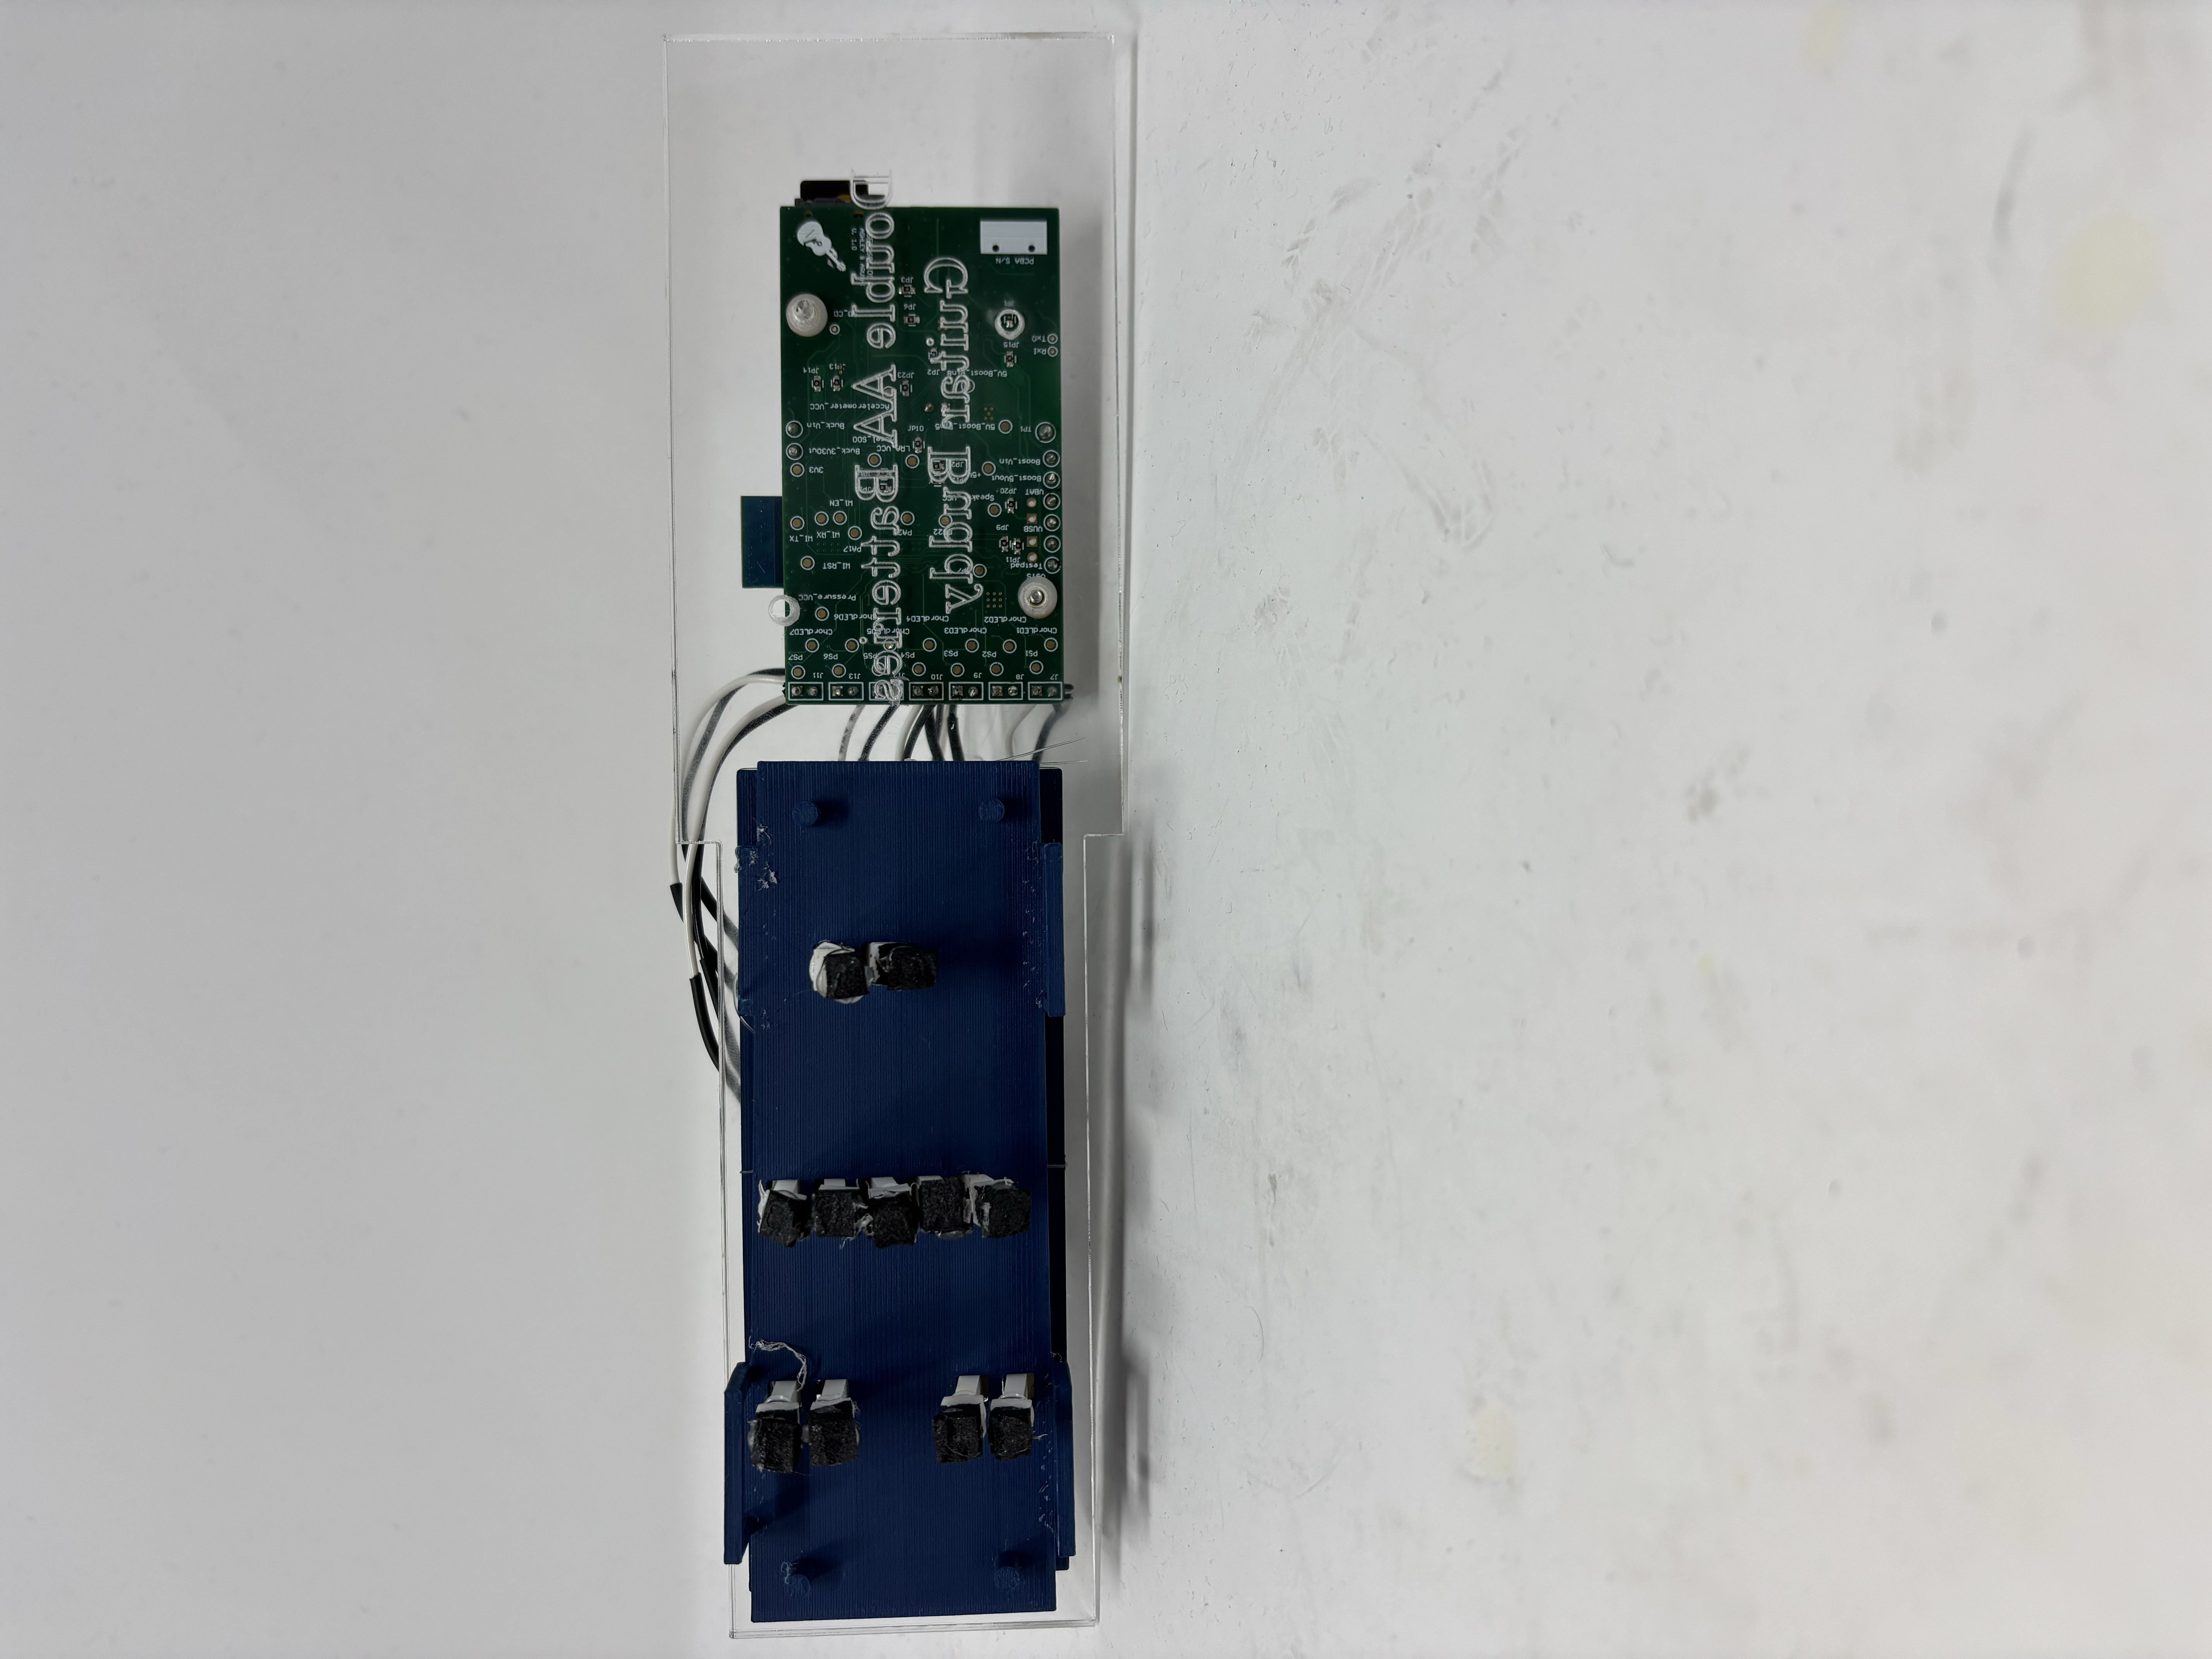
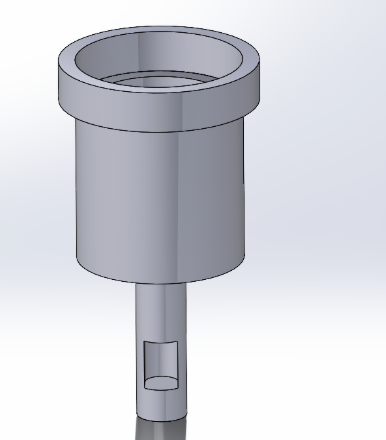
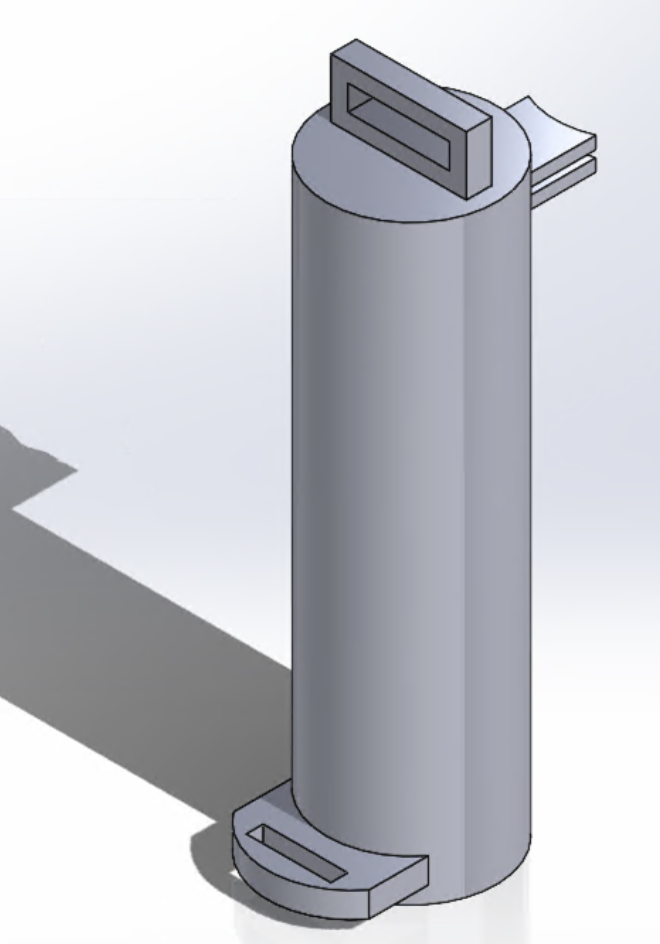
Physical Assmebly
Top:
Side:
Bottom:
Digital Assembly
Link to Github Page with MCAD Files
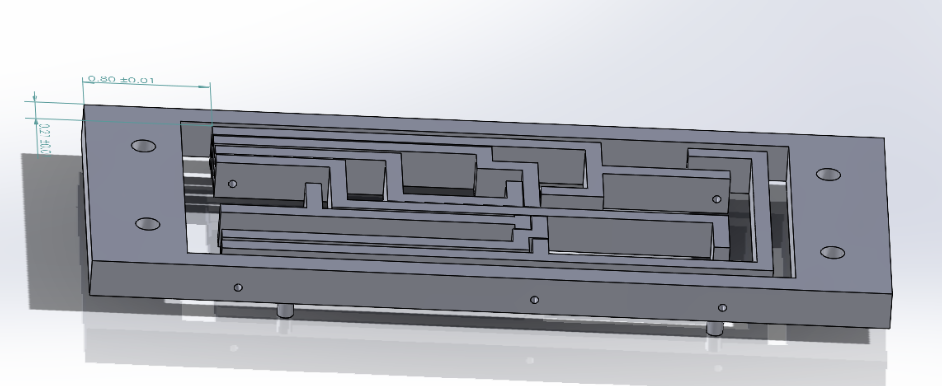
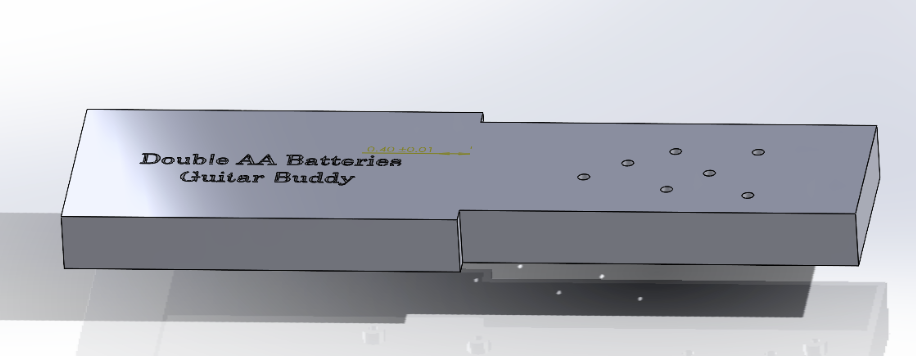
Exploded View
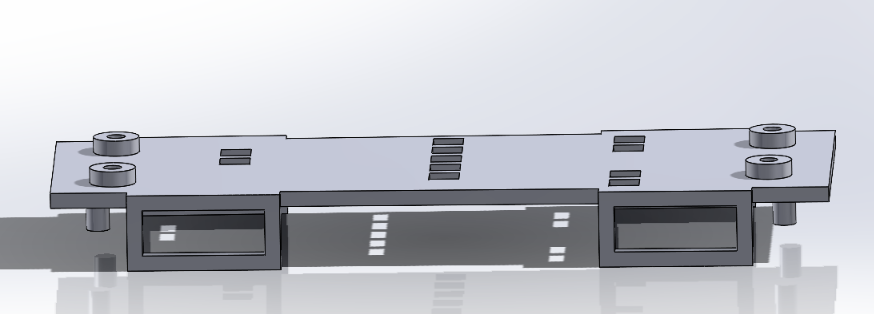
Assmebled View:

Bottom:
Middle:
Top:
Buttons:
Handle:
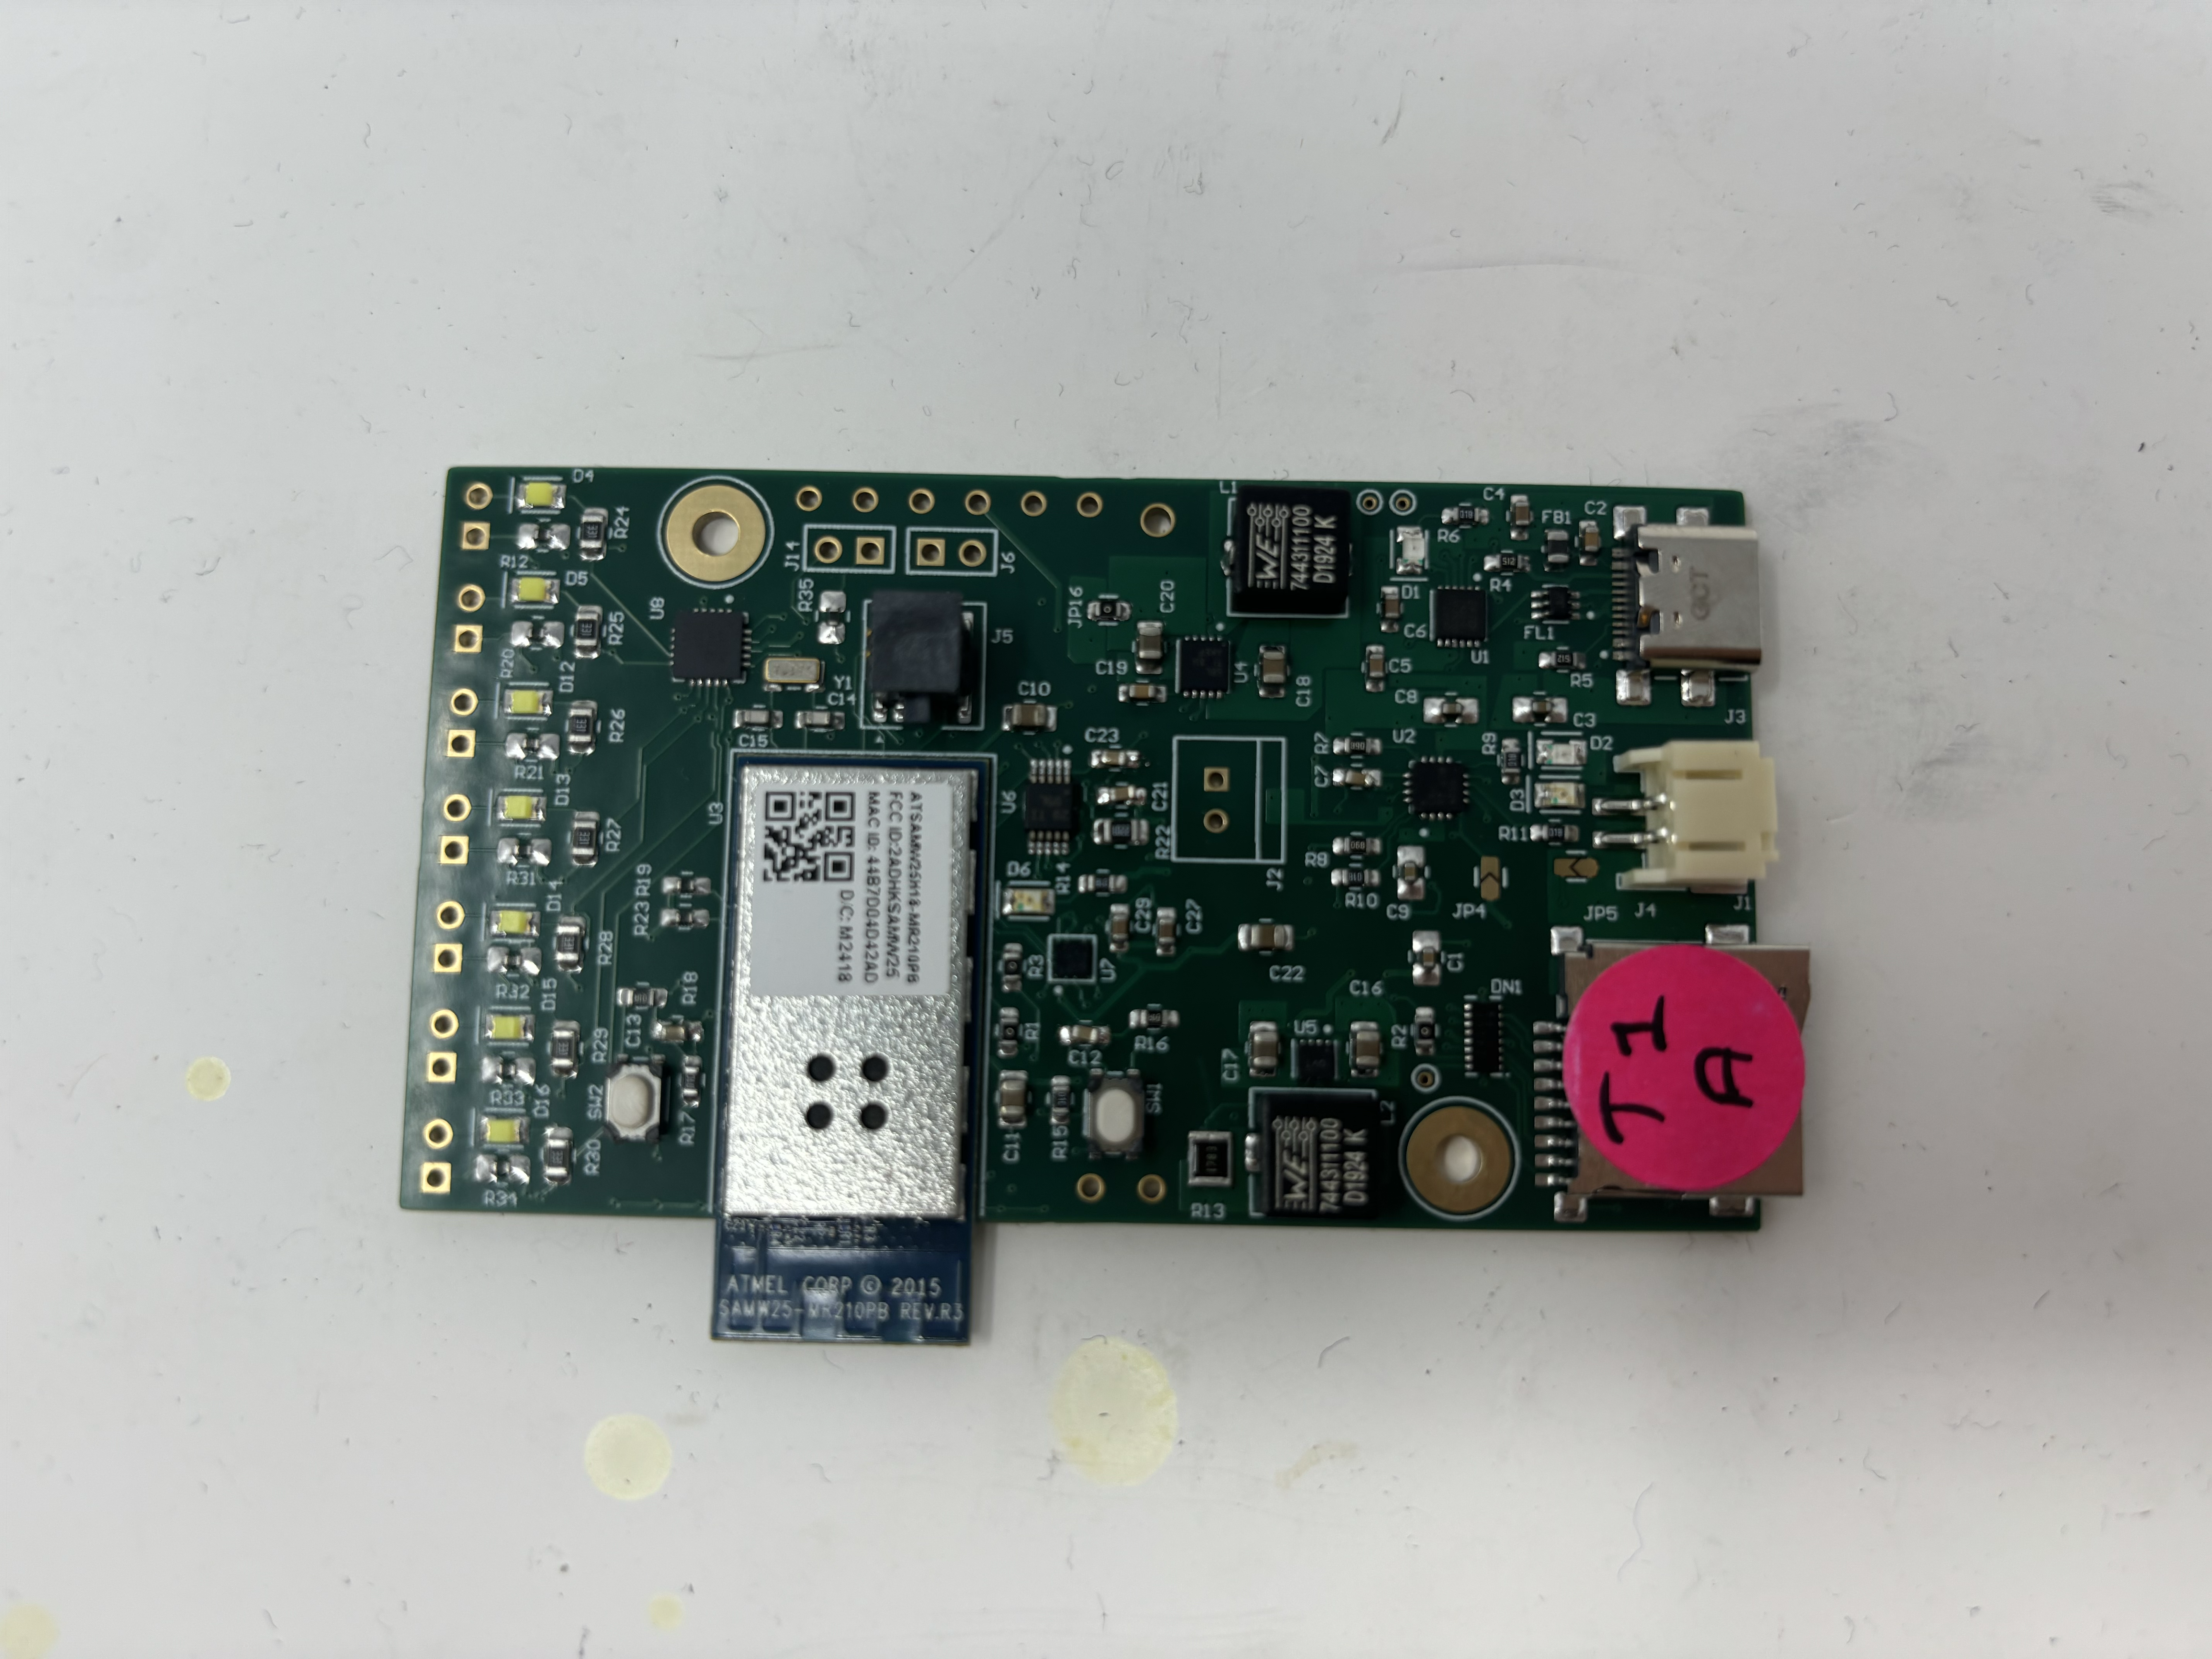
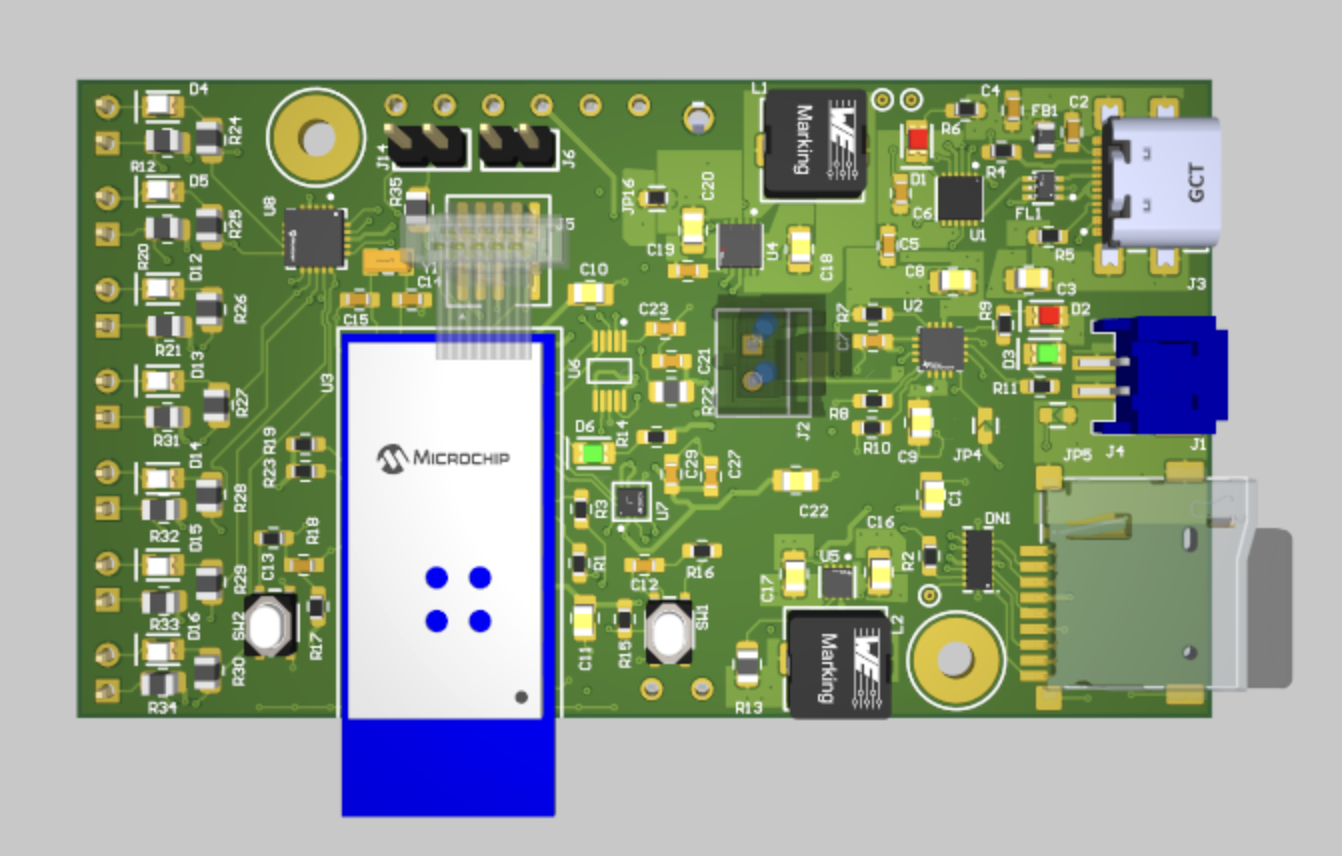
PCBA Top
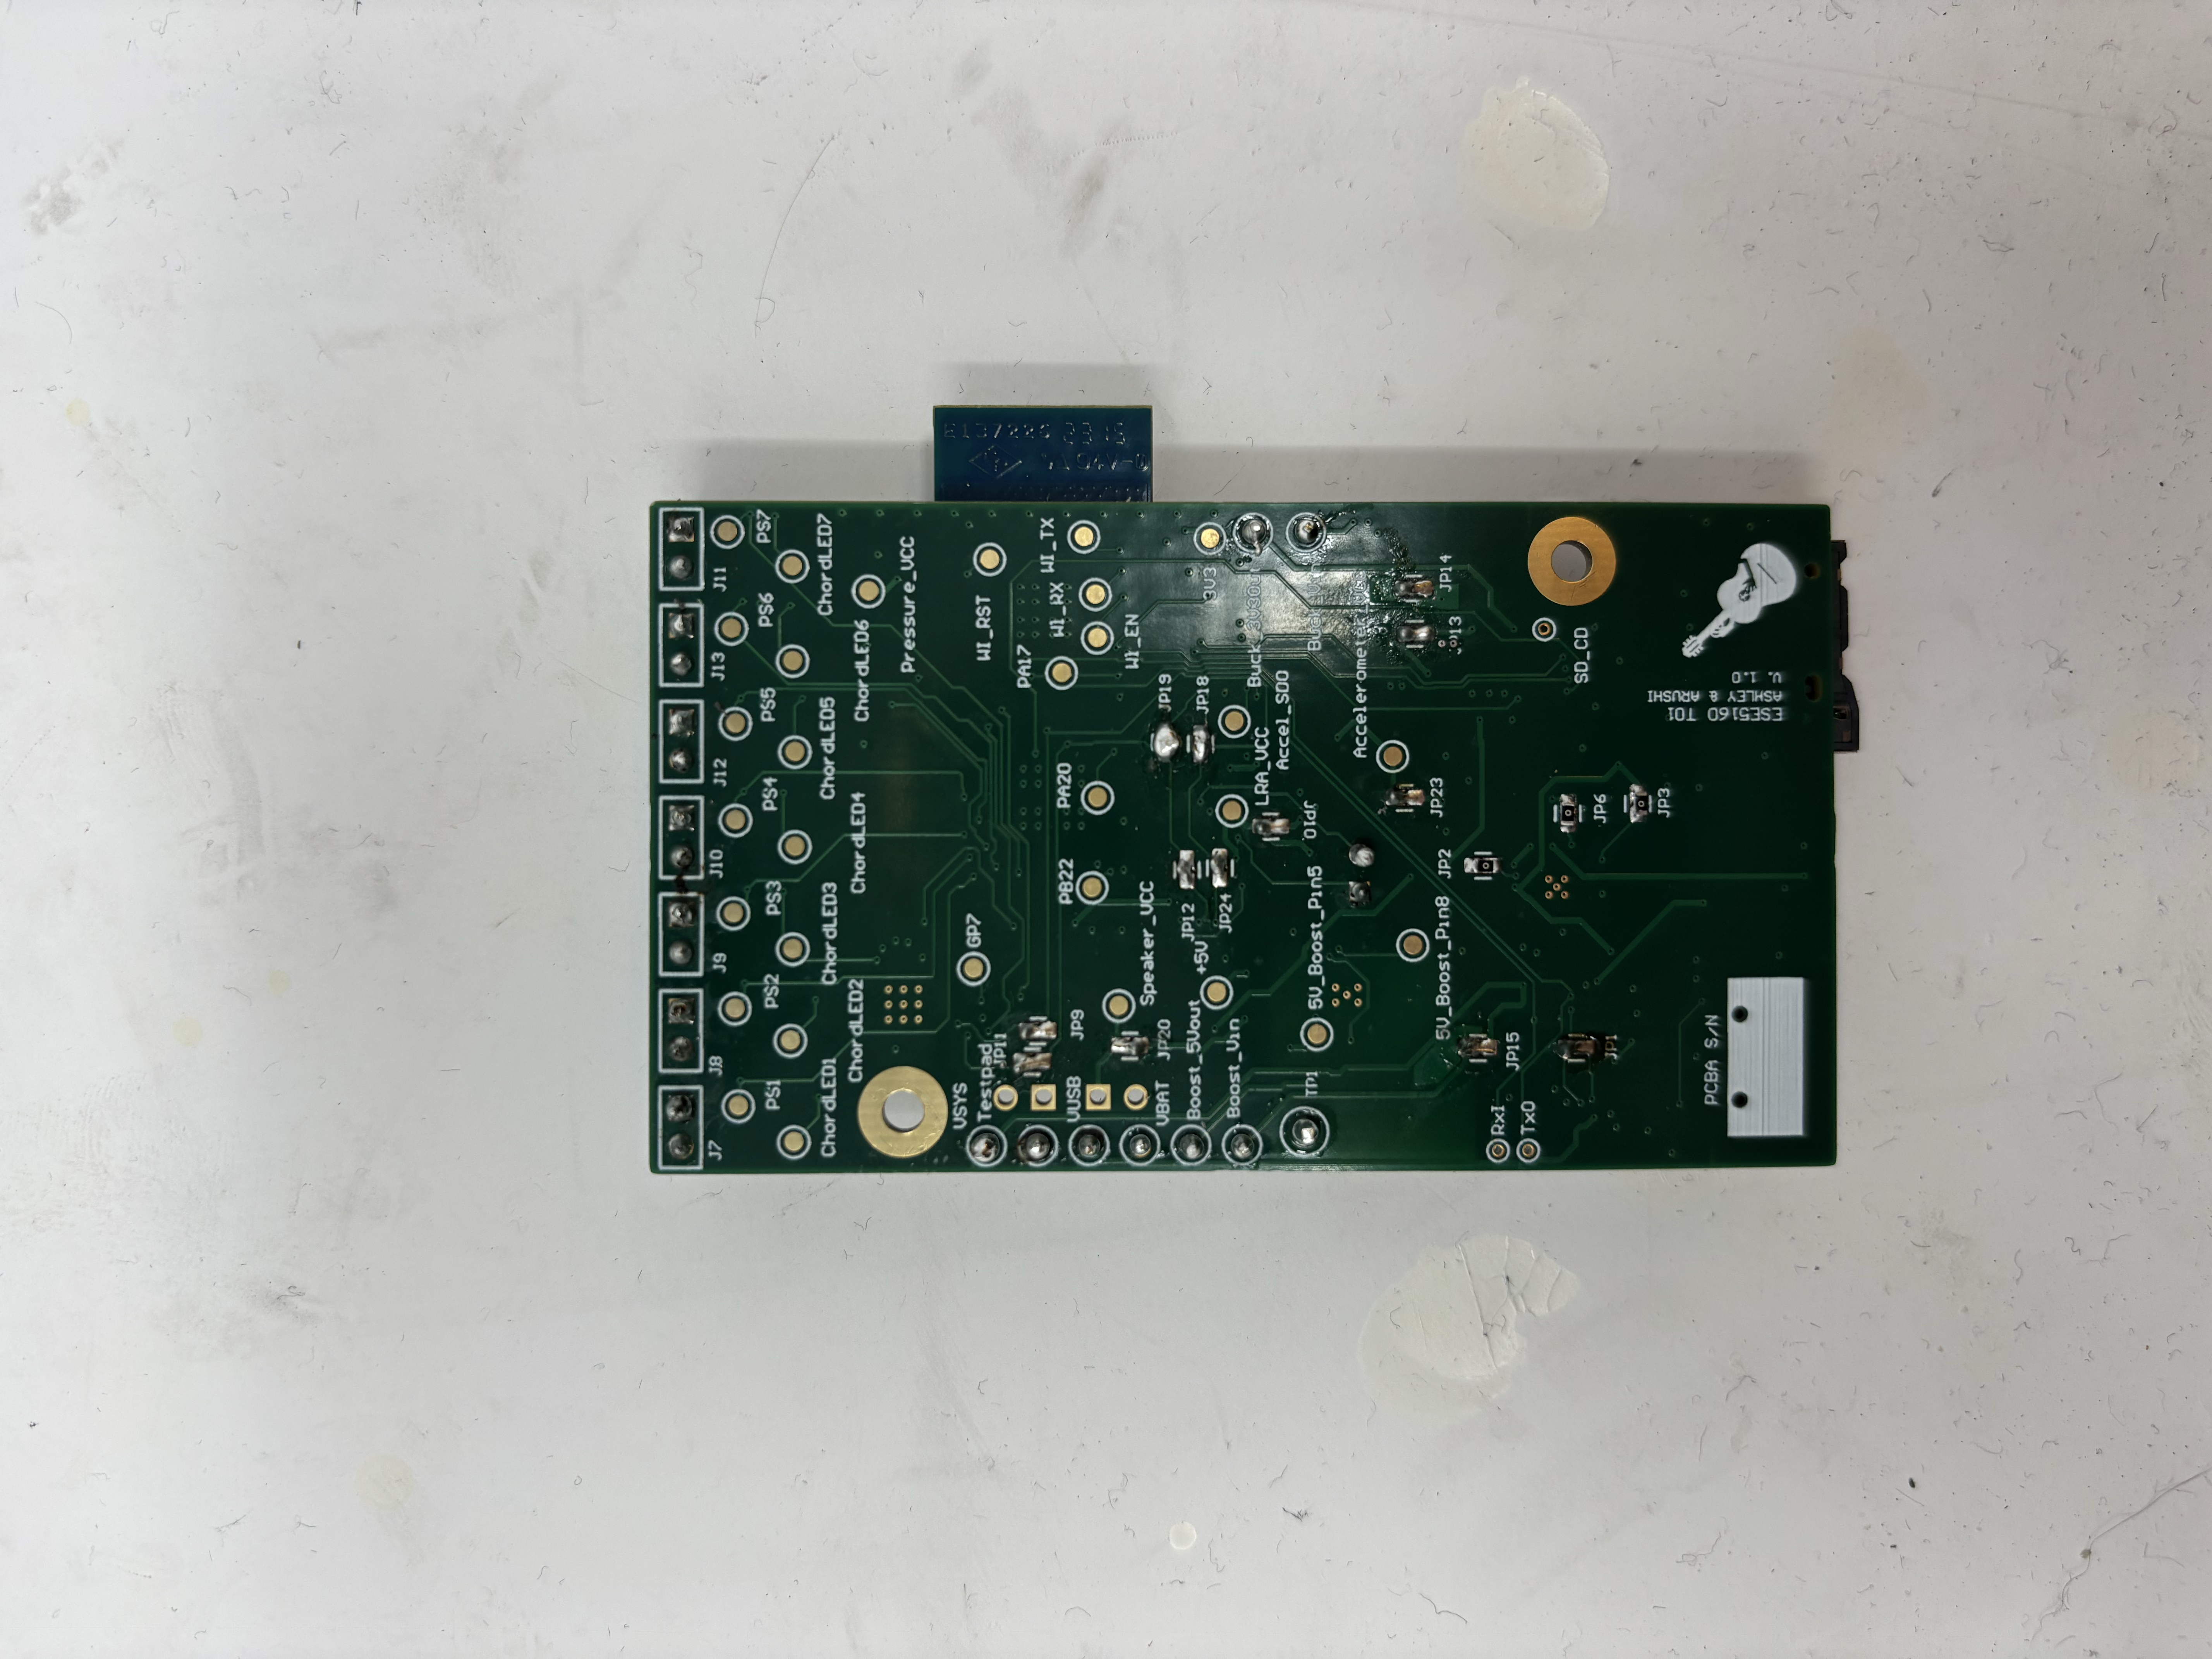
PCBA Bottom
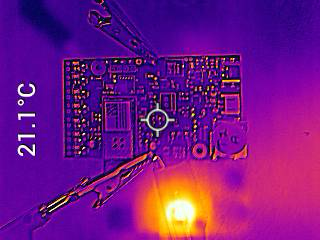
Thermal Camera Images under load
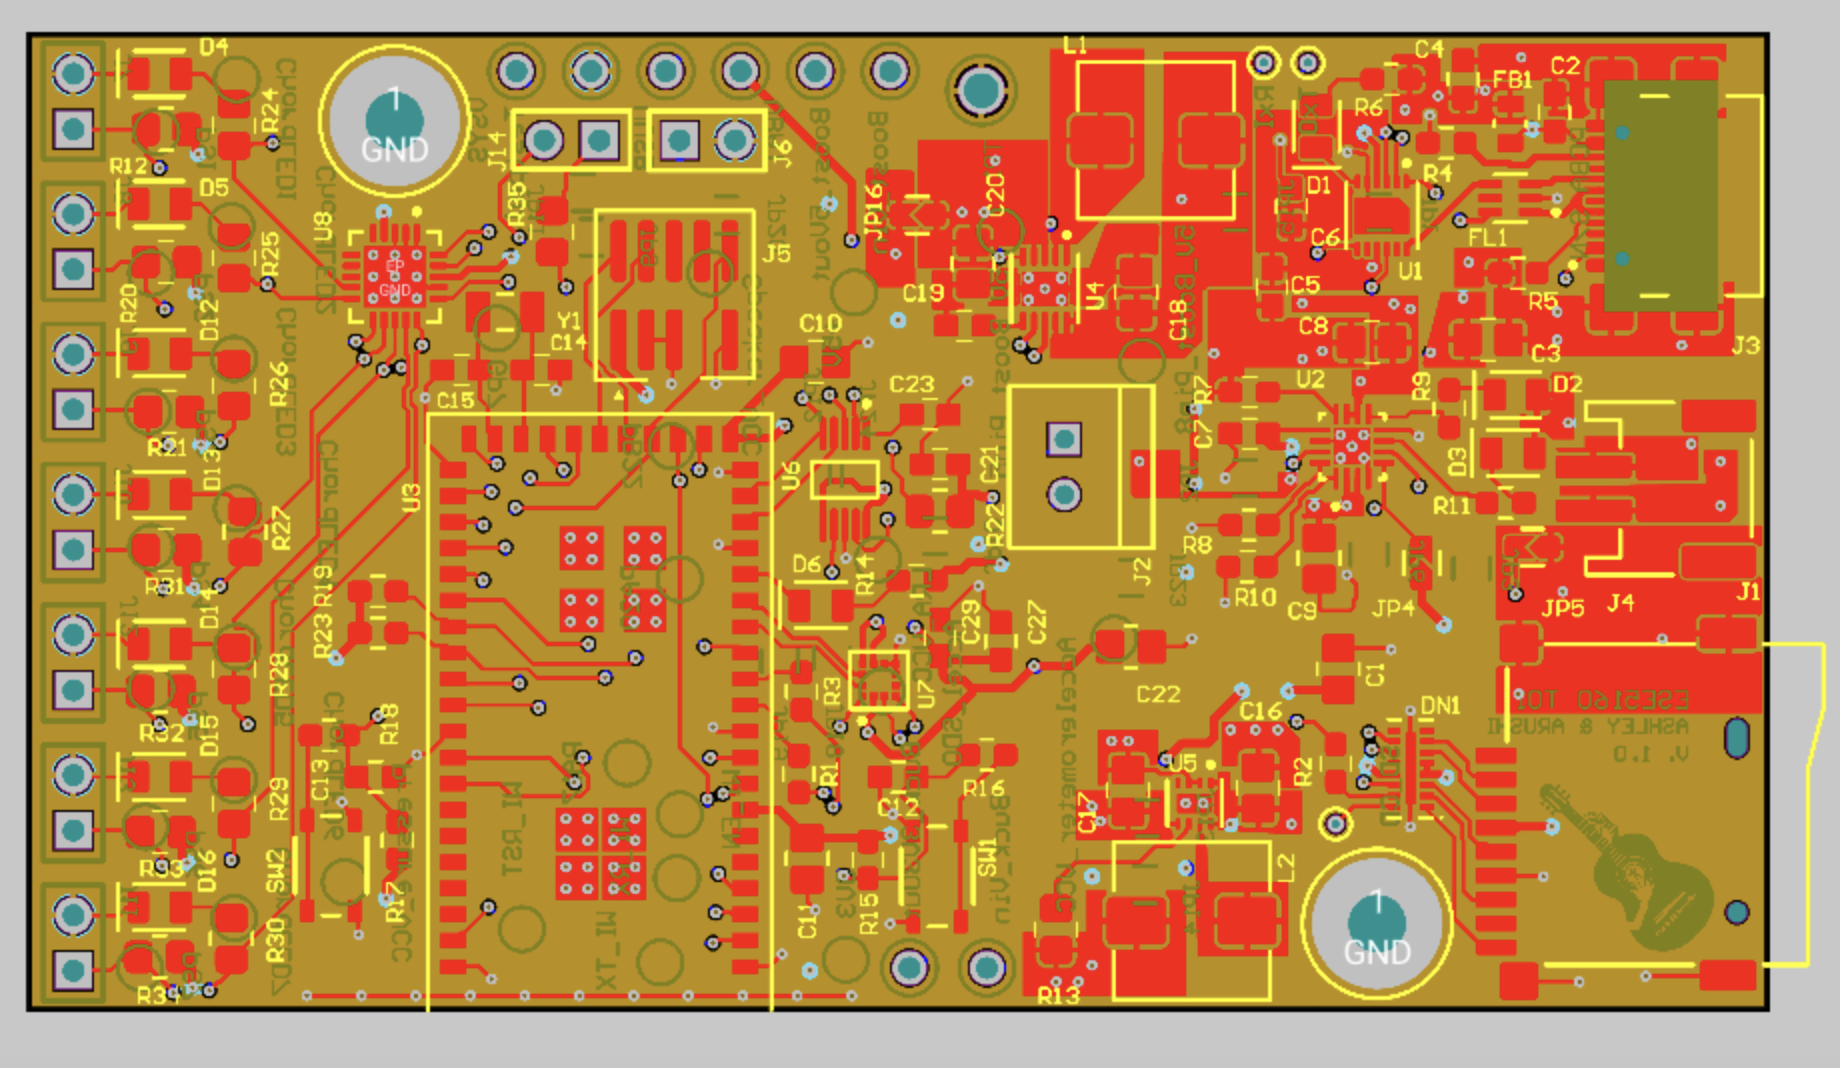
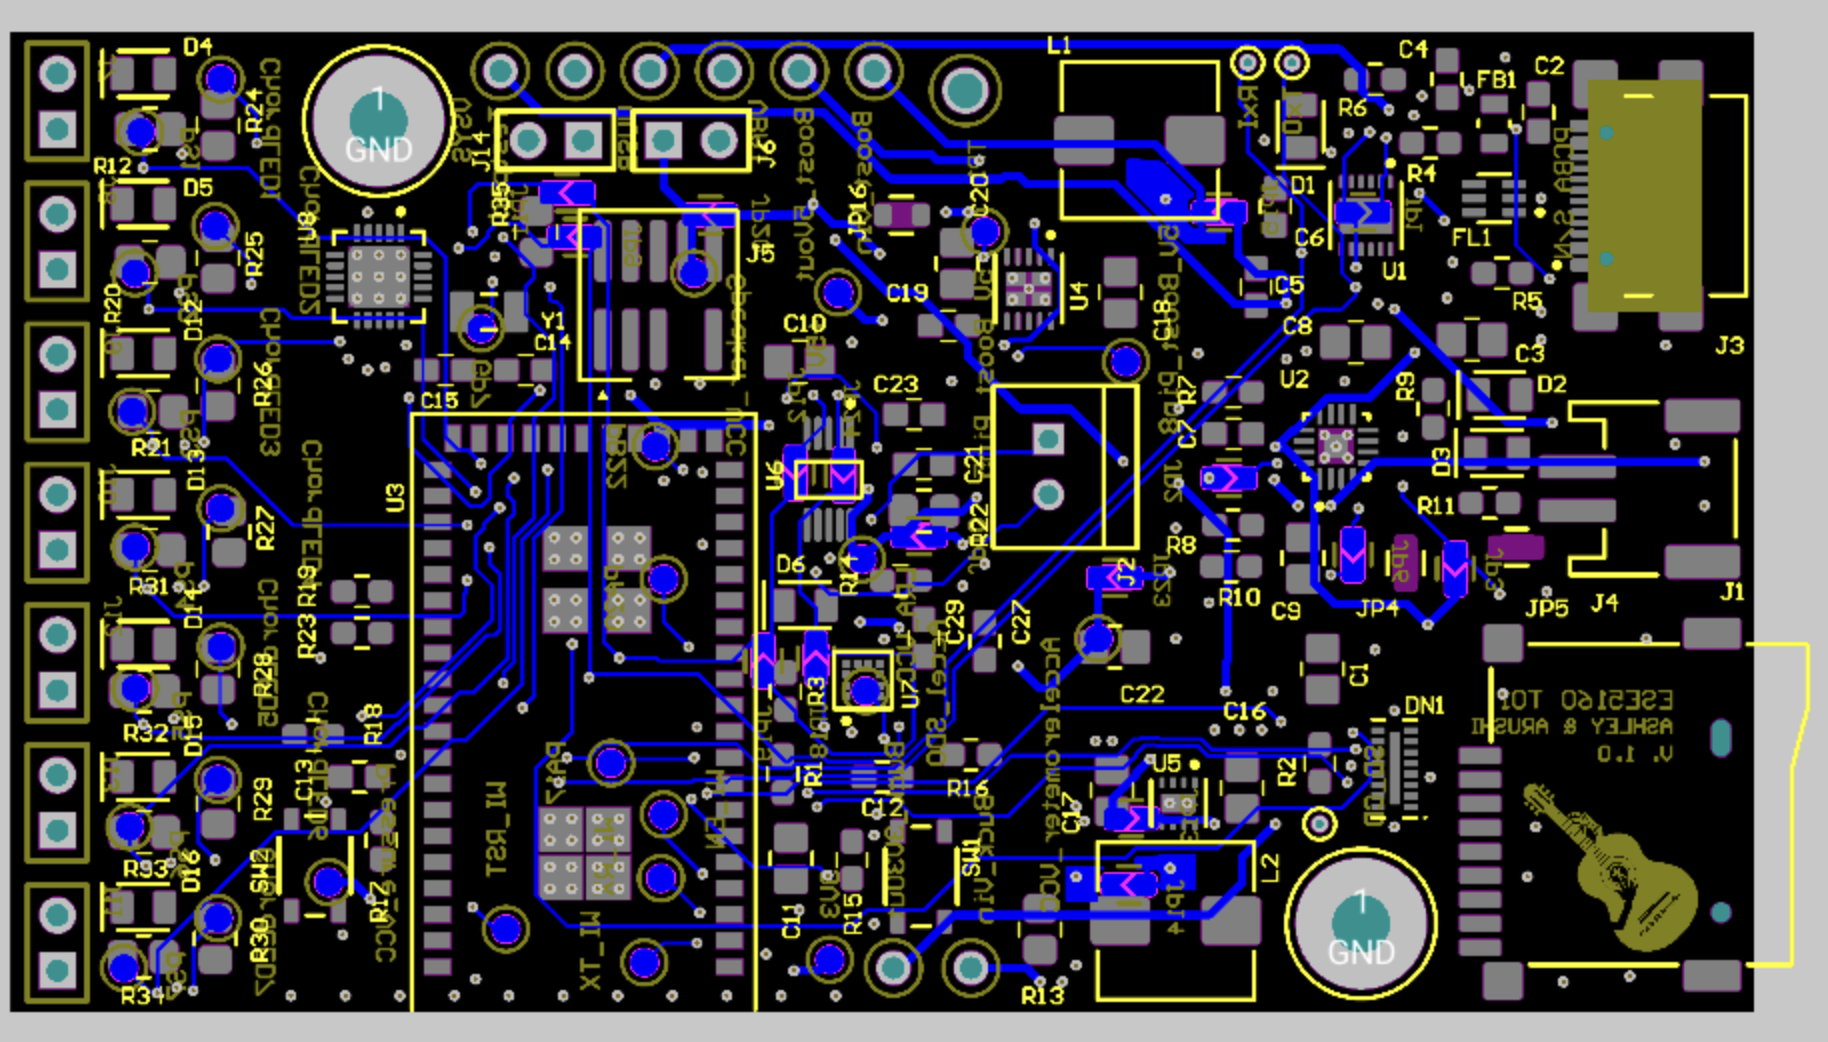
Altium Board Design in 2D
All Layers:
Top Layer:
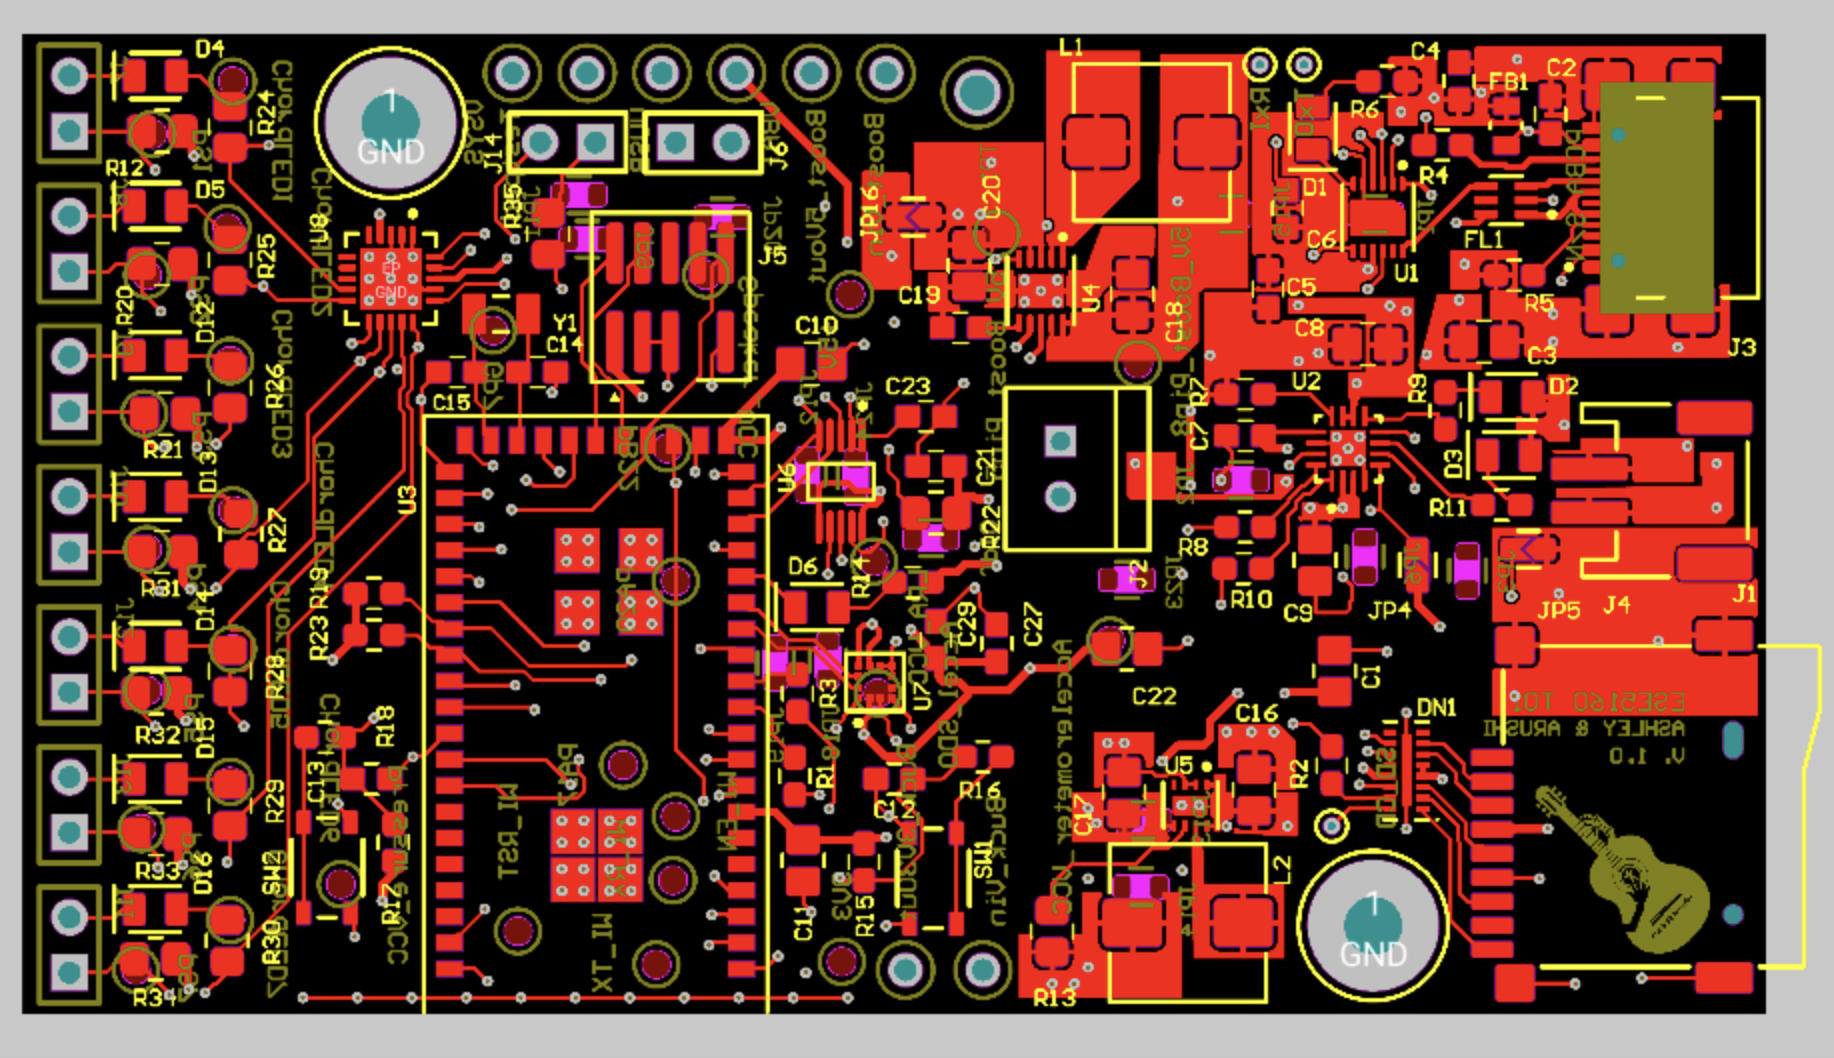
Middle two layers used for polygon pours – power and ground planes
Bottom Layer:
Altium Board Design in 3D
Top:
Bottom:

Node Red Dashboard
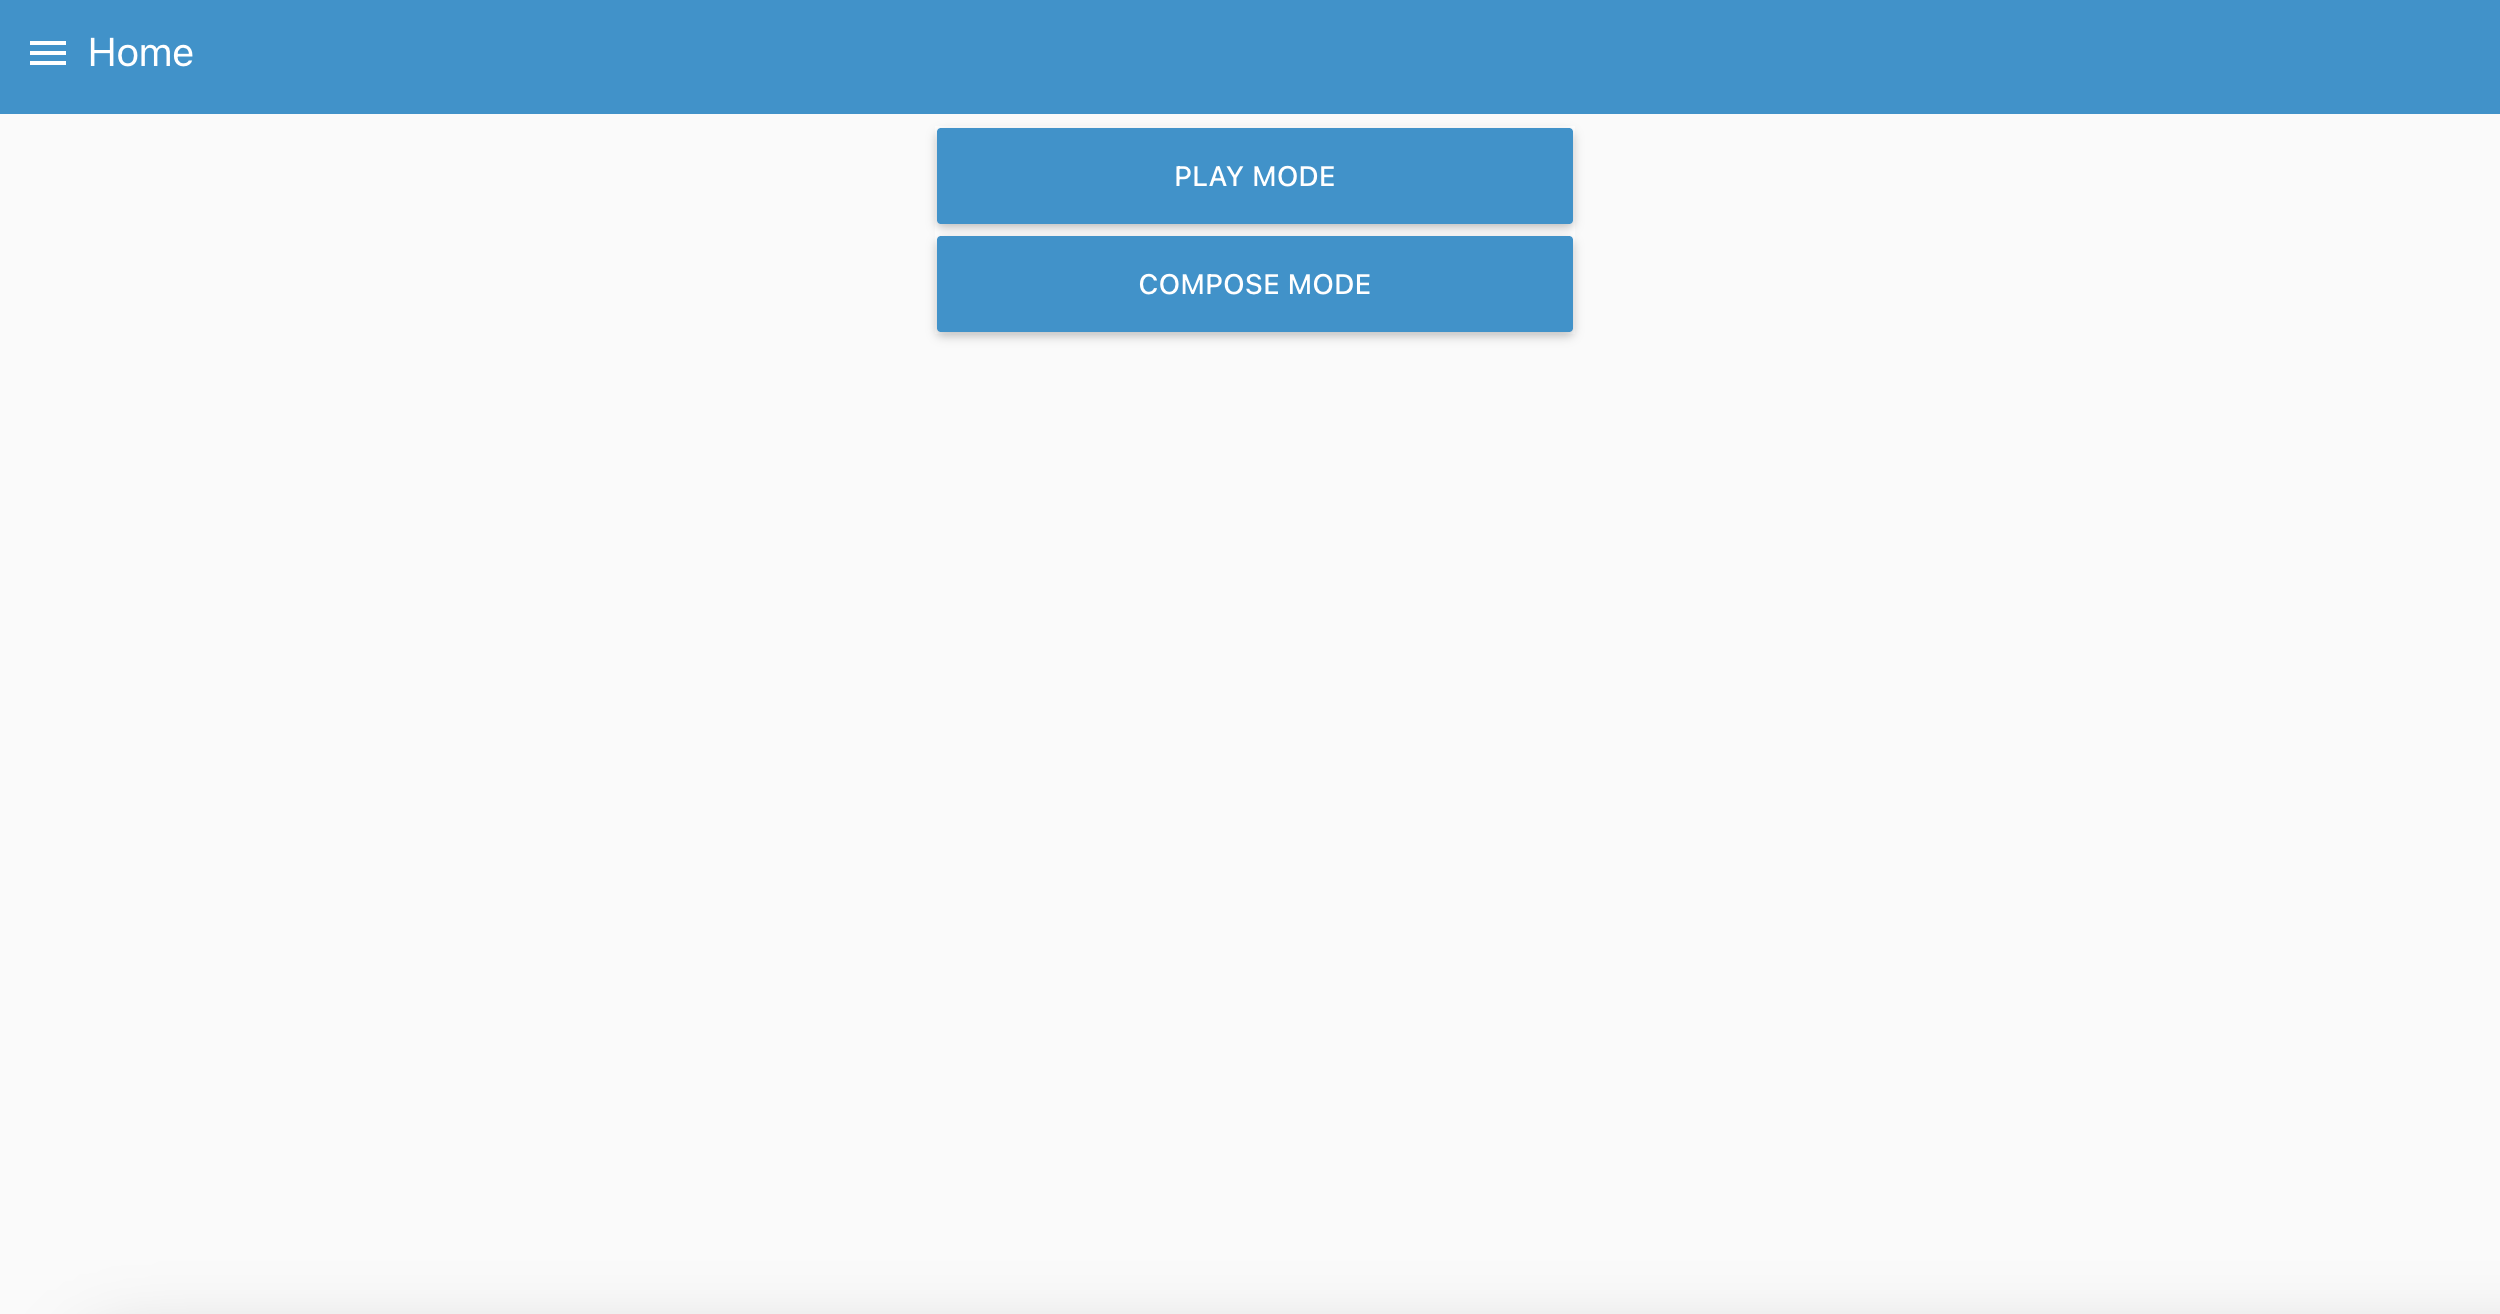
Home (Mode Selection)
Play Mode
Compose Mode
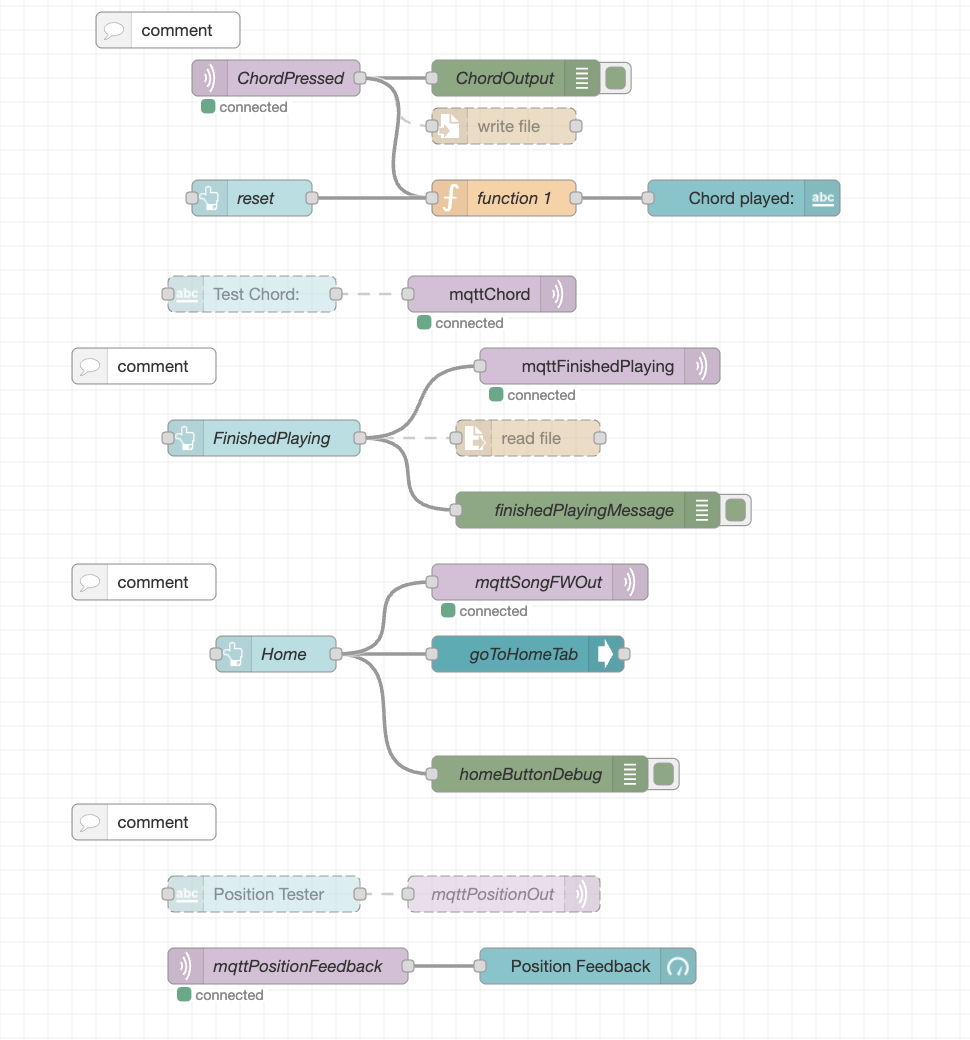
Node Red Backend
Home (Mode Selection)
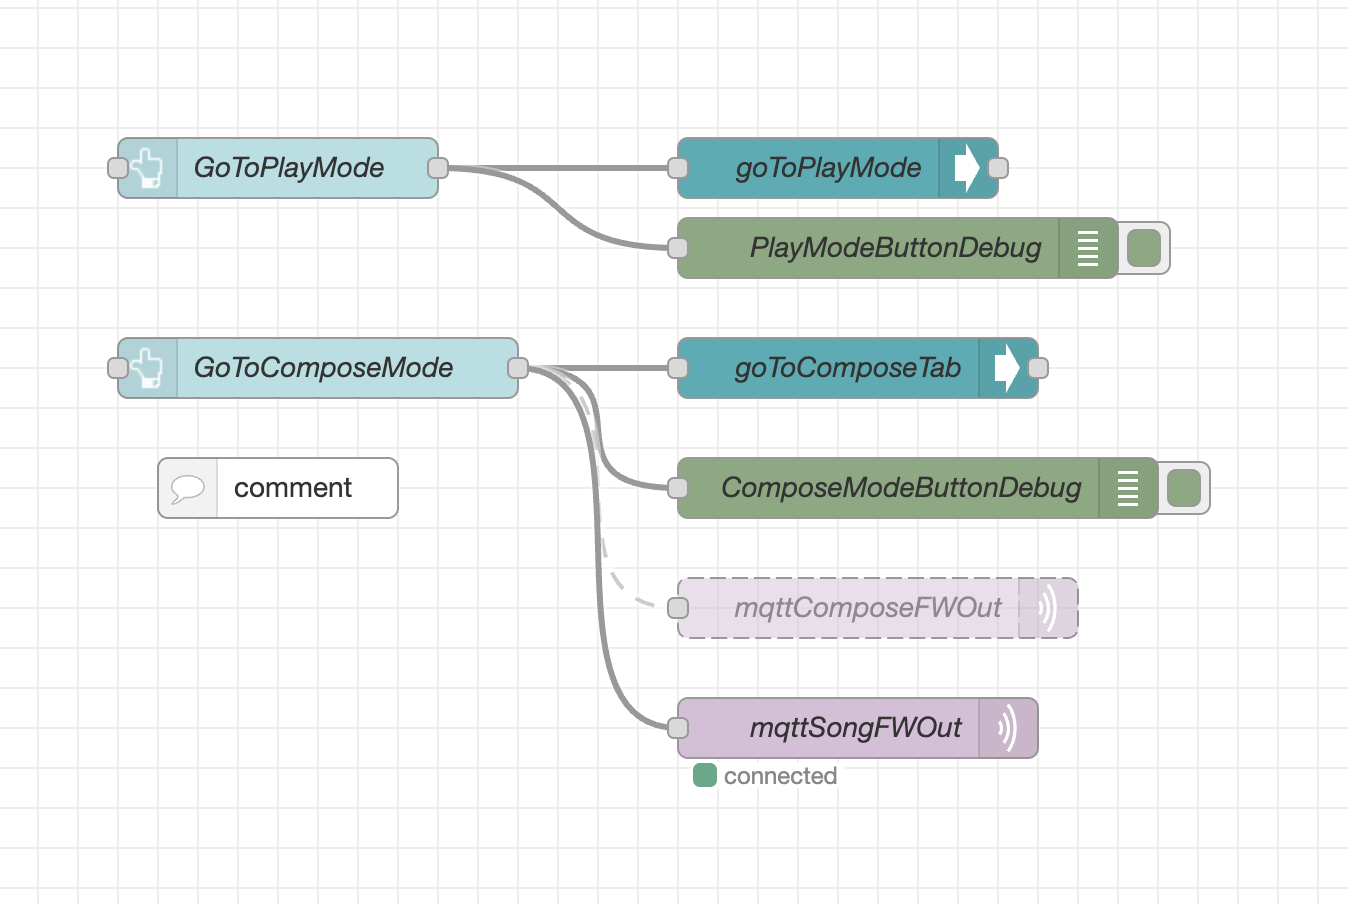
Play Mode
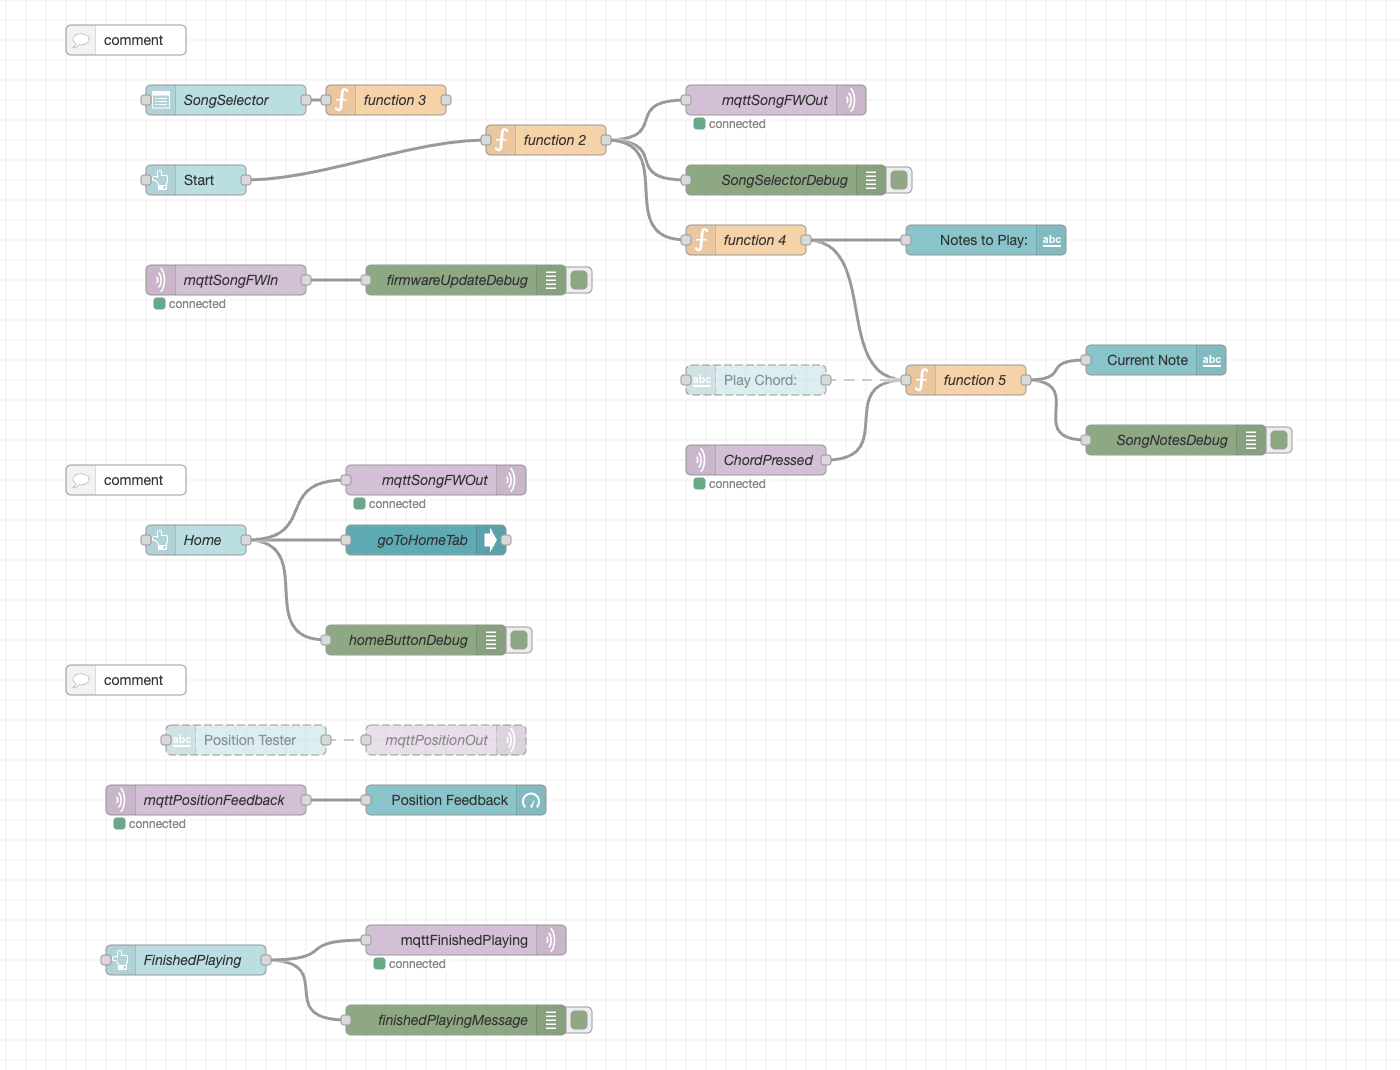
Compose Mode
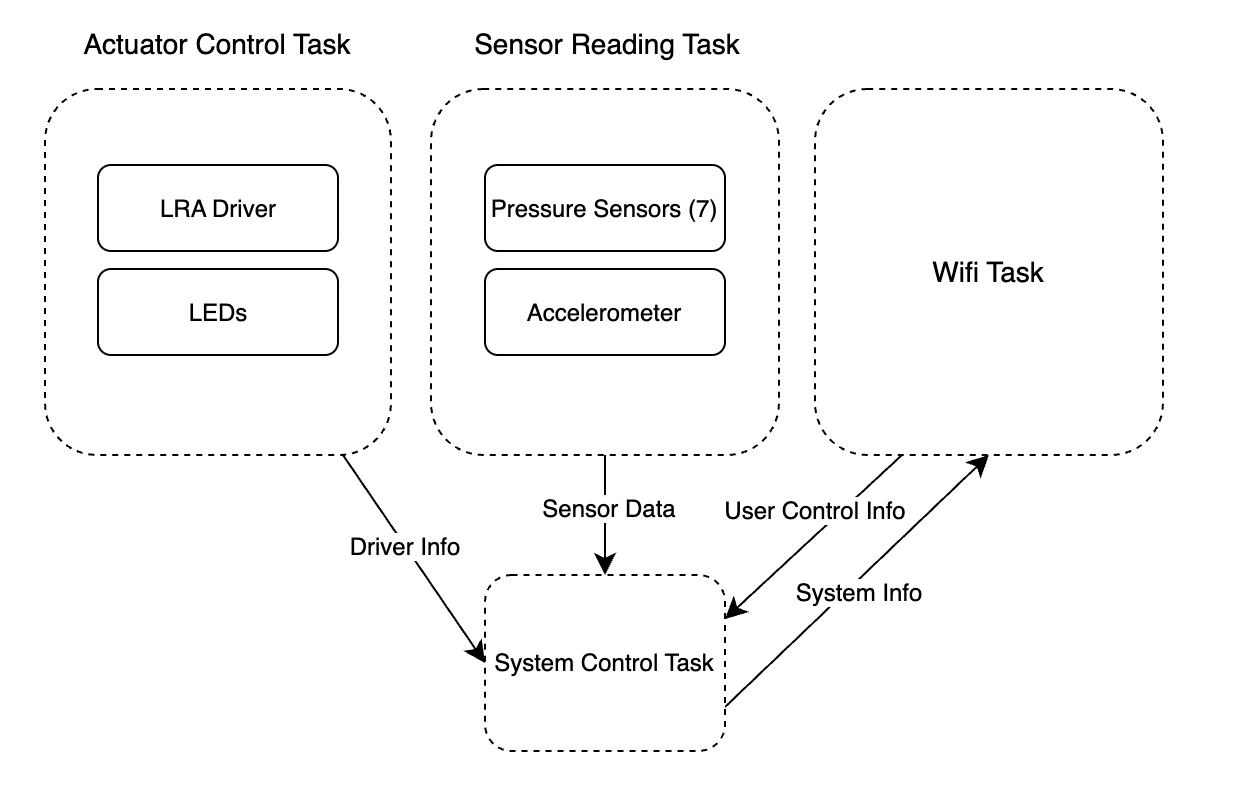
Block Diagram of System
State Machine Flow Chart
Codebase
-
A link to your final embedded C firmware codebases
-
A link to your Node-RED dashboard code